- Hire a Designer Deck Pro: Complete Guide to Services, Process & Project Planning
Are you planning to upgrade your outdoor space but unsure where to start? With so many products to choose from, finding the right solution can feel overwhelming. From deck tiles to rooftop terraces, every outdoor project needs careful planning. Many homeowners know the look they want. However, they often struggle with materials, measurements, drainage, installation, and permit requirements. Making the right decisions early helps you create a functional and long-lasting outdoor space. Hire a Designer Deck Pro gives you expert guidance at every stage. Our team helps you choose the right products, plan your project, and stay within your budget.
Why Do Outdoor Projects Need More Planning Than You Might Think?
At Designer Deck, many customers want to upgrade their outdoor spaces but soon realize the project involves more than choosing deck tiles or flooring. Before installation begins, you should assess the existing surface, check drainage, take accurate measurements, review building guidelines, and select the right products.
For example, rooftop terraces often need adjustable deck pedestals to create a level surface and improve water drainage. Some porcelain tile projects require Safety Support Grid Systems, while others work better with composite wood deck tiles or recycled plastic deck tiles. We also help customers choose the right Porsets 1 cm, 2 cm, or 3 cm porcelain tiles for their project.
Planning your project from the start helps you avoid costly mistakes and unexpected delays. It also makes it easier to choose products that match your space, lifestyle, and design goals.
Which Outdoor Space Are You Planning to Upgrade?
One of the first things we ask customers is what type of outdoor space they are working with. The answer helps us recommend products, installation systems, and accessories that make sense for the project. Over the years, we have helped homeowners, contractors, property managers, and developers improve a wide variety of outdoor environments, each with its own unique requirements.
1. Condo Balconies
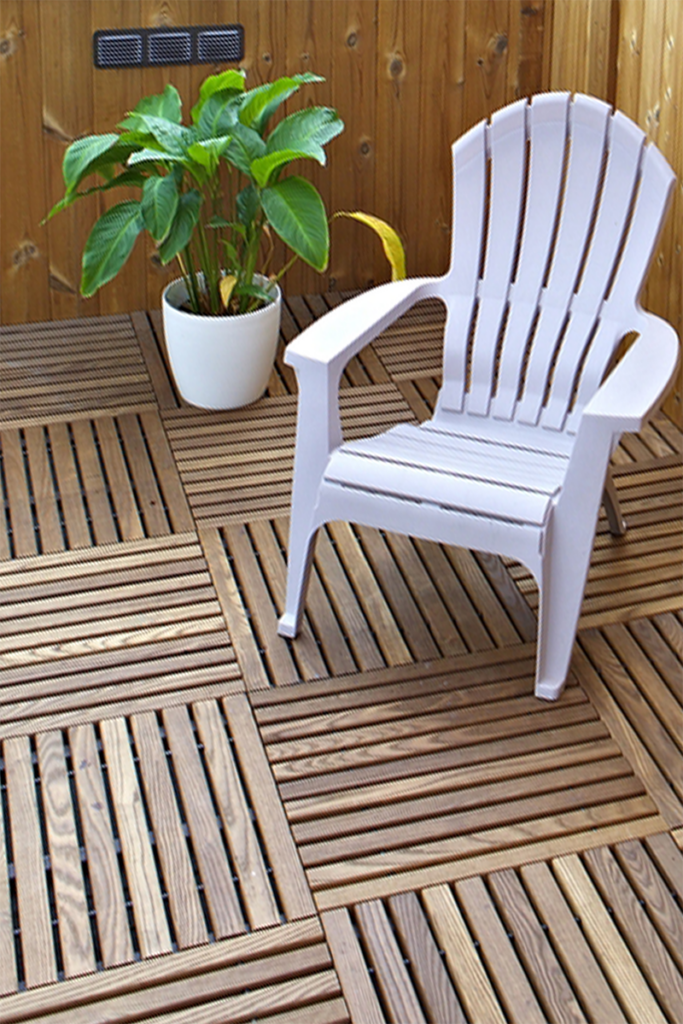
Condo balcony projects usually focus on turning a basic concrete surface into a more comfortable and finished outdoor area. This season, lighter tones and simple grid-style layouts are being used to make compact spaces feel more open. The aim is to improve everyday usability while keeping the design clean and low maintenance.
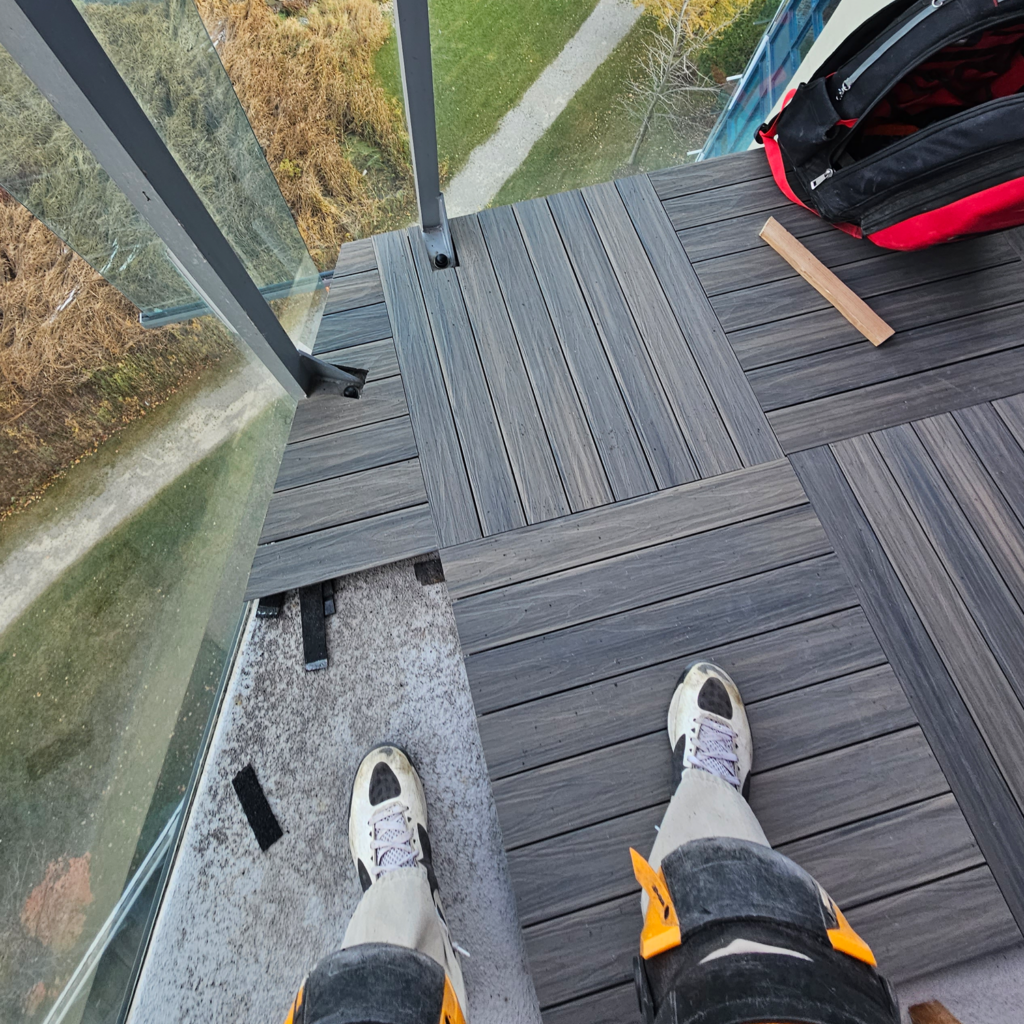
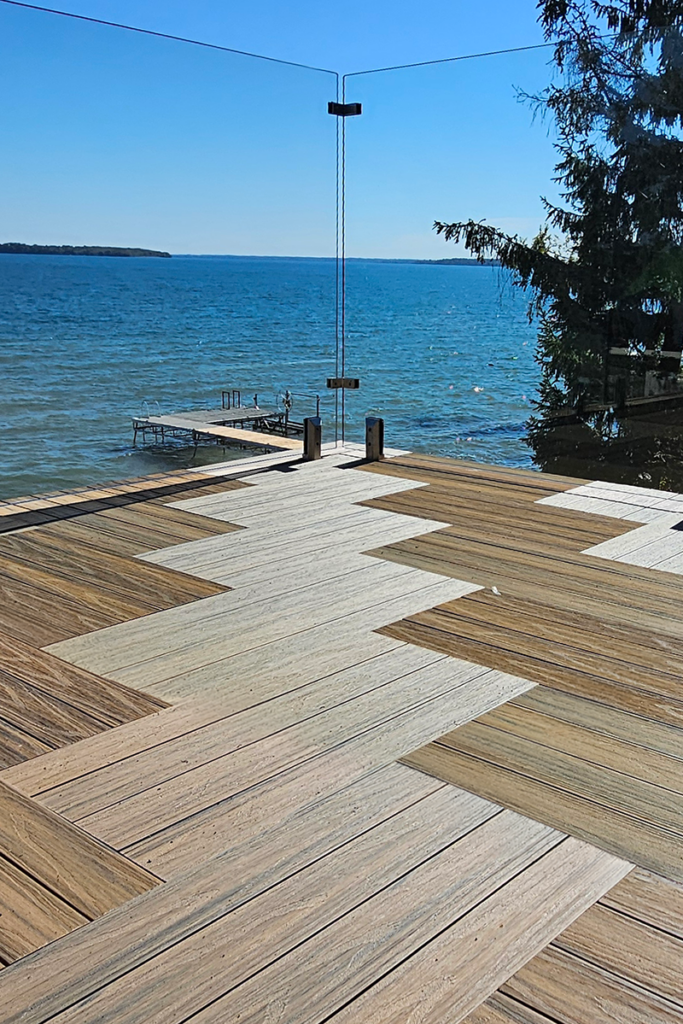
2. Rooftop Terraces
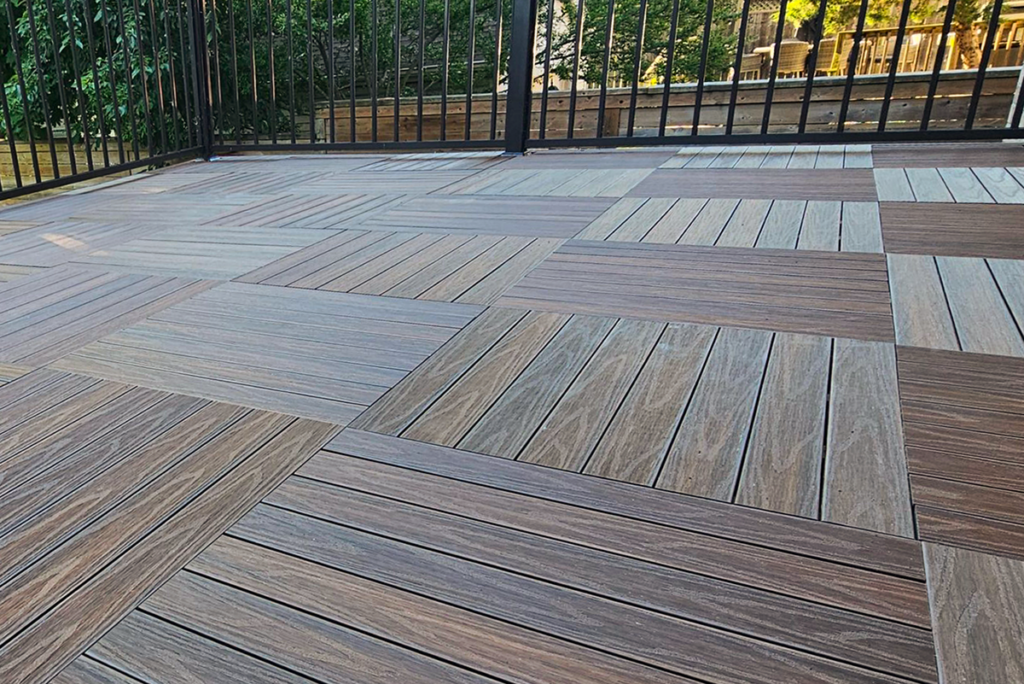
Rooftop terrace projects require attention to surface balance, drainage flow, and long-term stability. Modern designs are moving toward clean lines and structured finishes that work well with outdoor seating and open-air use. The focus is on creating a surface that feels stable, safe, and visually refined.
3. Floating Decks
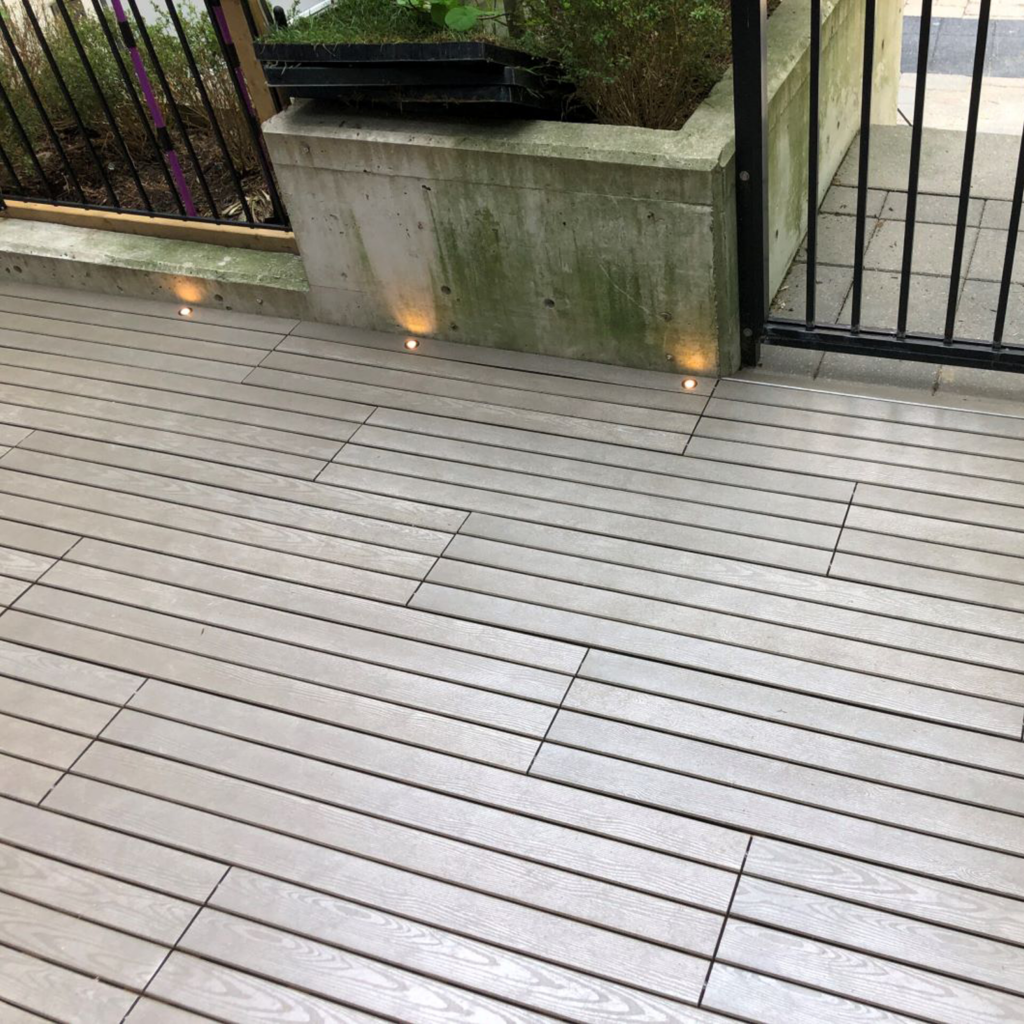
For floating deck related projects, the trend is shifting toward simple defined zones that organize outdoor space without heavy construction. Clear boundaries, neat alignment, and easy-to-maintain surfaces are preferred. The goal is to create a usable outdoor area that feels structured yet flexible.
4. Courtyards, Garden Areas and Outdoor Gathering Spaces
These spaces are shaped by their surroundings, so the design usually follows existing landscaping, walkways, and architectural elements. Instead of focusing only on the surface, attention is given to how everything connects visually. Mixed patterns and balanced layouts are commonly used to keep the space natural and easy on the eye.
5. Commercial Outdoor Spaces
Commercial outdoor projects are designed with heavy use in mind, so durability and long-term performance become the main priorities. Clean, professional finishes are preferred in spaces like hotels, restaurants and office complexes. The overall approach stays practical while still maintaining a modern appearance.
And of course, not every project involves creating a completely new outdoor area. Many customers already have an existing surface that simply needs a fresh new look, which is where deck resurfacing solutions can provide an excellent alternative to replacement.
Designer Deck Resurfacing Solutions for Existing Outdoor Spaces
Deck resurfacing renews your existing outdoor deck without replacing the entire structure. It upgrades the top surface, improves durability, restores the deck’s appearance and enhances everyday functionality. At Designer Deck, we offer professional deck resurfacing and patio resurfacing solutions for a wide range of outdoor spaces.
1. Deck Resurfacing
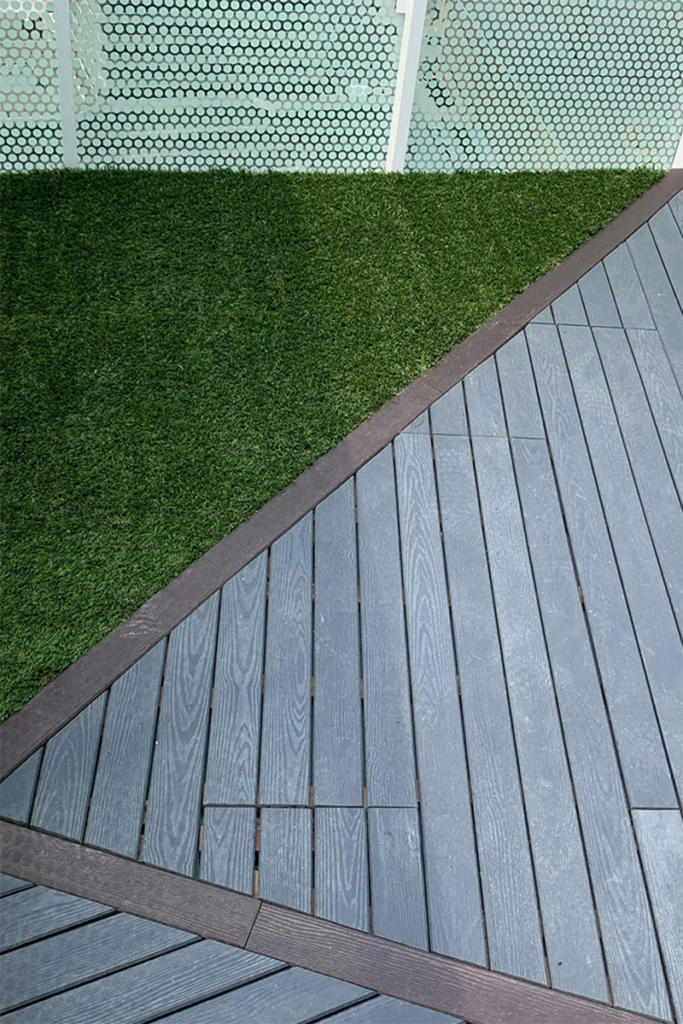
During deck resurfacing, the Designer Deck Pro team first inspects the existing structure to ensure it is stable. Next, we recommend the best surface system based on your project’s requirements. Choose porcelain tiles for a clean, modern finish, composite wood tiles for a warm, natural look, grass tile inserts to add greenery or natural stone tiles for a premium outdoor appearance. For high-traffic areas, we also recommend recycled rubber tiles to improve comfort and absorb impact. Our team installs every system to promote airflow beneath the surface and support proper drainage for long-lasting performance.
2. Patio Resurfacing
Patio resurfacing begins with a thorough inspection of the existing concrete base. Our team checks the slope, surface condition and drainage before recommending the best resurfacing solution. Natural stone pavers create a timeless outdoor look, while porcelain slabs deliver a clean, modern finish. Recycled composite tiles offer a durable, low-maintenance solution, grass grid tiles add natural greenery, and rubber outdoor tiles improve comfort and slip resistance in high-traffic areas. This approach transforms plain concrete into a functional, attractive and long-lasting outdoor space without removing the existing base.
Once you choose the right resurfacing solution, we create a detailed project plan. We review every measurement, material and installation requirement before work begins, ensuring a smooth installation and lasting results.
How Does Designer Deck’s Project Planning Process Works?
Planning a deck, balcony, rooftop or terrace starts with the right strategy. At Designer Deck, we support homeowners, builders, developers, and contractors through one streamlined planning process. Our team assesses your project requirements, recommends suitable products and develops a clear installation plan. This organized approach improves accuracy, reduces on-site challenges, and keeps every project on track from start to finish.
1. Understanding Project Requirements in Detail
Every project begins with a clear understanding of what needs to be achieved. This step focuses on the basic vision and purpose of the space. We gather details such as:
- Type of project: Whether it is a residential home, a commercial building, or a contractor-led execution project, as each category has different planning needs, material usage, and installation approach.
- Purpose of the space: Clear understanding of how the area will be used, such as a leisure sitting space, a high-traffic walking zone, or a functional flooring area designed for daily practical use.
- Design expectations: The preferred look and feel of the space, including modern style layouts, natural wood-like finishes, minimal clean designs, or a premium high-end appearance based on overall project vision.
- Specific requirements: Any special instructions shared by the client, builder, or site engineer regarding structure, layout adjustments, product selection, installation method, or site conditions.
This step ensures that the planning direction is correct from the beginning and matches the final expectation.
2. Detailed Site Information Collection
Accurate site data is one of the most important parts of the planning process. Without this, execution can face delays or errors. We collect:
- Exact surface measurements: Accurate length and width of the area along with total square footage or square meter calculation, which helps in planning material quantity and layout properly.
- Current site condition: Present surface status such as bare concrete base, existing old tiles, or any other installed finish, along with overall condition of the surface for installation readiness.
- Drainage flow and slope direction: Understanding how water naturally flows on the surface and identifying the slope direction to ensure proper drainage in outdoor spaces.
- Accessibility of the site: Ease of reaching the installation area for carrying materials, tools, and equipment, including stair access, lift availability, or direct entry points.
Along with this, clear site photographs are reviewed to understand real-time conditions before planning begins.
3. Product Selection and System Guidance
Once site details are clear, the next step is selecting the right decking system or surface solution. This includes:
- Recommended product type based on usage: Selection of decking system depending on load requirements such as light use areas like balconies, medium use spaces like residential terraces, or heavy load zones such as commercial outdoor areas.
- Material suitability for weather conditions and durability needs: Choosing materials that perform well under local weather exposure, including resistance to heat, rain, moisture, and long-term outdoor usage for better durability and stability.
- Surface finish options like texture, colour, and design pattern: Available finishing choices such as smooth or textured surfaces, wood-like or stone-inspired colours, and different layout patterns that match the overall design style of the space.
- Compatibility of system with the existing site base: Checking whether the selected decking system can be properly installed on the current surface such as concrete, tiles, or prepared sub-base without requiring major structural changes.
This step ensures that the selected solution is not only visually suitable but also long-lasting and practical for real use.
4. Technical Evaluation and Feasibility Check
Before moving into final planning, a technical review is carried out to ensure the project is safe and practical. This includes:
- Checking load-bearing capacity of the base surface: Assessing whether the existing surface can safely support the weight of deck tiles, furniture, and regular foot traffic without any risk to stability or structure.
- Identifying structural limitations, if any: Reviewing the site to understand any restrictions such as weak sections, cracks, or construction constraints that may affect installation or long-term performance.
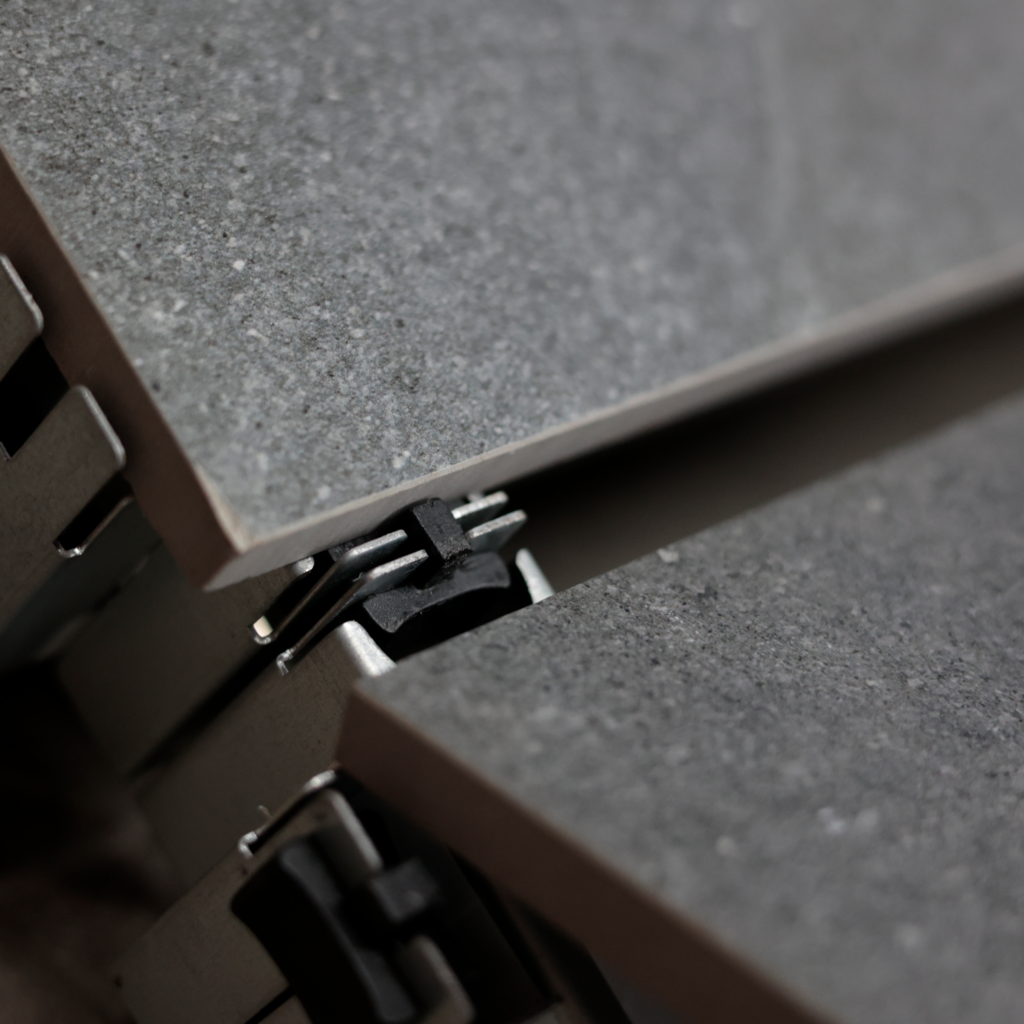
- Evaluating installation method suitability: Deciding the most appropriate installation approach based on site conditions, whether it requires pedestal systems, interlocking tiles, or direct laying methods.
- Reviewing leveling requirements and base preparation needs: Checking if the surface is even or if adjustments like leveling, smoothing, or minor preparation work are needed before installation begins.
- Ensuring material performance in expected environmental conditions: Making sure the selected decking materials can withstand local weather conditions such as heat, rain, and moisture for long-term durability and stable performance.
This step helps prevent future issues and ensures the installation process runs smoothly.
5. Layout Planning and Design Alignment
After technical clearance, the layout and visual planning stage begins. In this step:
- Basic layout or arrangement of tiles/decking is planned: The overall pattern and placement of deck tiles or decking boards is planned according to the shape and size of the space, ensuring a balanced and practical layout.
- Direction, alignment, and spacing are decided: The installation direction is fixed along with proper alignment and spacing so the surface looks clean, uniform, and well-structured after completion.
- Design flow is matched with architectural or user requirements: The layout is coordinated with the building style and user expectations so the outdoor space feels naturally connected to the surrounding structure.
- Sketches or drawings are created for better understanding: Simple visual sketches or basic drawings are prepared to clearly show how the final installation will look before execution begins.
- Final visual structure is aligned with the overall project goal: The complete layout is refined to ensure it matches the intended use, design vision, and practical requirements of the project.
This step turns raw site data into a clear visual plan for execution.
6. Timeline Planning and Execution Scheduling
Every project requires proper time planning to ensure smooth progress without delays. We define:
- Expected start date based on readiness: The project start date is decided once the site is ready for installation, meaning measurements are confirmed, design is approved, and materials are finalized for dispatch.
- Material preparation and delivery timeline: After final approval, materials are prepared, packed, and scheduled for delivery based on project size and location, ensuring everything reaches the site on time.
- Installation duration based on project size: The installation time is planned according to the area and complexity of work, with smaller projects taking less time and larger spaces requiring a structured execution schedule.
- Coordination schedule between teams (client, contractor, installer): A clear communication plan is set between all parties involved so that updates, approvals, and on-site activities stay aligned throughout the project.
- Any buffer time required for site adjustments: Extra time is kept in the schedule to manage minor changes, site preparation needs, or unexpected adjustments without affecting the overall project flow.
This helps ensure all stakeholders stay aligned throughout the project.
7. Delivery, Coordination, and Execution Support
The final step focuses on making sure everything is ready for on-site execution. This includes:
- Material delivery planning and logistics coordination: Materials are scheduled and delivered in a planned manner based on project timeline, site location, and installation sequence to ensure everything arrives at the right time.
- Site readiness confirmation before installation: Before starting work, the site is checked to ensure it is fully prepared, with correct measurements, cleared surface, and required conditions for installation.
- Support for installation guidelines and method execution: Clear instructions and practical guidance are provided so that the installation process follows the correct method and maintains quality standards.
- On-site coordination if required for large or complex projects: For bigger projects, coordination is provided during execution to ensure smooth teamwork between installers, contractors, and site teams.
- Final alignment between planning and actual execution: The planned design, layout, and technical details are matched with on-site work to ensure the final outcome reflects the approved plan accurately.
This ensures the transition from planning to installation is smooth and controlled.
Ready to Start Your Project?
A successful outdoor space always begins with proper planning and complete information. Once the right details are collected, execution becomes faster, smoother, and more efficient. Designer Deck supports all types of projects with a clear, practical, and well-organized planning process designed to deliver long-term results.
Frequently Asked Questions on Designer Deck Process Planning
Ques: What should I share first when I contact Designer Deck?
You can start by sharing your space type like balcony, rooftop, terrace or garden. Even a short description helps us understand your requirements clearly.
Ques: Do I need to know the exact deck tile type before starting?
No, you don’t need to decide in advance. We help you choose between options like porcelain deck tiles, composite wood tiles or recycled plastic tiles based on your space.
Ques: I only have rough measurements. Can planning still start?
Yes, rough measurements are enough to begin the discussion. Final accurate sizing is confirmed later during the planning stage.
Ques: What if I don’t have any design ideas for my outdoor space?
That is completely fine, many clients start without a fixed idea. We suggest layouts and deck tile patterns based on your space and usage.
Ques: Will you check if my surface is suitable for deck tiles?
Yes, we always review your existing surface condition before suggesting any system. This ensures the deck tiles or system selected will work properly and last longer.
Ques: Do I need to worry about drainage before installing deck tiles?
No, drainage is part of our planning check. We ensure water flow is not blocked and the deck tile system works safely on your surface.
Ques: Can I use different types of deck tiles in one project?
Yes, in many projects we combine different deck tile styles for better design and function. This depends on your space layout and requirements.
Ques: What if my project is still under construction?
That is also fine, we can plan in advance. We coordinate based on your construction stage so deck tile installation happens at the right time.
Ques: How do I know which deck tile option is best for heavy use areas?
We guide you based on usage level like residential, commercial, or high-traffic areas. Heavy-use spaces usually need stronger and more durable deck tile systems.
In Conclusion,
Every outdoor space has unique requirements. At Designer Deck , our experienced team helps you plan every detail with confidence. We start with accurate measurements, recommend the right materials, assess drainage, and understand how you will use the space. This approach makes product selection, layout planning, and installation much easier. It also helps you avoid costly mistakes and ensures a smooth project from start to finish.
Ready to transform your balcony, patio, rooftop or terrace? Hire a Designer Deck Pro today. Share your project details and let our experts help you create a durable, functional and beautifully designed outdoor space.
- Recycled Plastic Narrow Board vs Wide Board: What’s the Difference?
Can a simple deck tile pattern completely transform your outdoor space? The answer may surprise you. More homeowners across Canada now invest in stylish balconies, patios, rooftops, and terraces. Outdoor living has become an essential part of modern home design. As a result, recycled plastic outdoor tiles have become a popular flooring choice. They offer sustainable construction, realistic wood aesthetics, and easy maintenance. These qualities make them perfect for modern outdoor spaces.
At Designer Deck, Recycled Plastic Narrow Board and Recycled Plastic Wide Board tiles remain customer favorites. Both collections use durable recycled plastic for long-lasting outdoor performance. However, their board layout, texture and appearance create completely different looks. Choosing the right option depends on your design goals and outdoor space. First, let’s take a closer look at recycled plastic outdoor tiles and lumber.
What Are Recycled Plastic Outdoor Tiles and Lumber?
Recycled plastic deck tiles offer a versatile modular flooring solution for outdoor living spaces. Homeowners commonly install them on balconies, patios, rooftops, terraces, and garden areas. They improve both the appearance and functionality of outdoor spaces. Their realistic wood finish and simple installation system make them an excellent alternative to traditional outdoor flooring. These tiles use recycled plastic lumber as their core material.
The manufacturers produce this lumber from recycled plastic to withstand harsh outdoor conditions. It resists moisture, rot, insects, splintering, and weather damage. Unlike natural wood, it requires very little maintenance while delivering long-lasting performance. If you want outdoor flooring that combines durability, low maintenance, and a realistic wood appearance, recycled plastic deck tiles are an excellent choice.
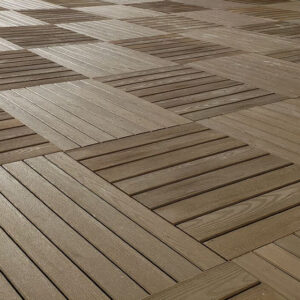
Recycled Plastic Narrow Board Tiles for Classic Outdoor Decking
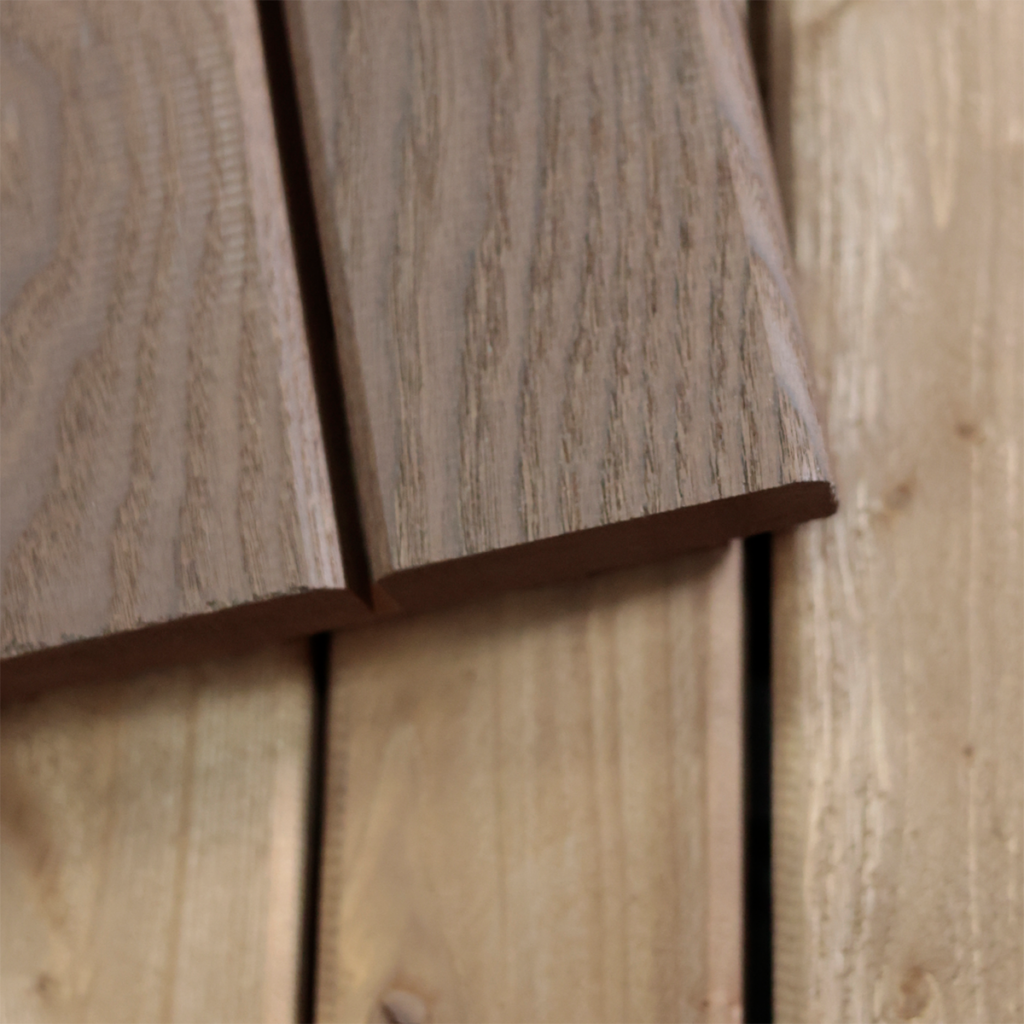
Recycled Plastic Narrow Board Tiles create a detailed, classic decking look with multiple closely spaced boards in every tile. This layout delivers a rich, textured finish that closely resembles traditional wood decking. Homeowners who prefer a structured and timeless outdoor design often choose this collection. Made from recycled HDPE plastic, these tiles resist moisture, sunlight, temperature changes, insects, and rot while requiring minimal maintenance. They work well on balconies, patios, rooftops, and terraces where durability and visual appeal matter equally. The latest Narrow Board designs feature realistic wood-grain textures and modern earthy colours, making them suitable for both traditional and contemporary outdoor spaces.
Here are the Latest Design Trends of Recycled Plastic Narrow Board Deck Tiles:
1. Sandstone
Sandstone is a soft, light earthy colour inspired by natural stone and light wood. It creates a bright and fresh look, making small outdoor spaces feel more open.
2. Deep Barrel
Deep Barrel is a deep brown shade that gives a strong and rich wood-like appearance. It is perfect for creating a bold and classic outdoor deck style.
3. Stormy Day
Stormy Day is a grey shade that fits well with modern outdoor designs. It gives a clean and simple look that matches most building styles.
4. Dusty
Dusty is a soft grey-brown colour that creates a calm and natural feel. It works well in relaxed outdoor spaces where a simple look is preferred.
The Narrow Board tiles come in a 2×2 square interlocking pattern, which allows easy installation and a uniform outdoor finish. This modular design helps the tiles connect seamlessly, creating a stable and even surface across balconies, patios, rooftops, and terraces.
Now, let’s move on to Recycled Plastic Wide Board Deck Tiles. The tile structure is similar to Narrow Board tiles, with the main difference lying in the wider board layout and surface texture, which gives a more modern and open appearance.
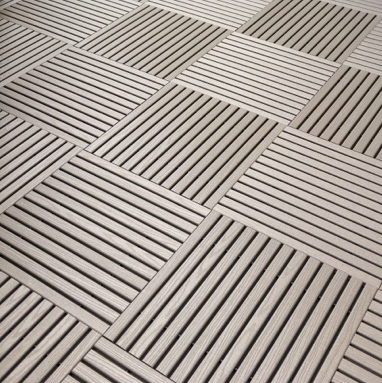
Recycled Plastic Wide Board Tiles for a Modern Deck Look
Recycled Plastic Wide Board Tiles feature wider board sections that create a clean, modern appearance. Their broad plank layout delivers a simple, open finish with less surface detailing than Narrow Board tiles. This makes them an excellent choice for contemporary outdoor spaces. Homeowners often install these tiles on patios, rooftops, terraces, poolside areas, and large garden spaces. Made from a blend of pre-consumer and post-consumer recycled HDPE plastic, they provide exceptional strength and long-lasting outdoor performance. The risers use PAD (Partly Air Dried) Grade 2 spruce and pine wood, ensuring a stable foundation and reliable installation. Their low-maintenance design, durable construction, and minimalist look make them ideal for modern outdoor living.
In terms of design, Wide Board tiles feature fewer but broader plank sections within each tile, creating a smooth and spacious visual effect. Thus, both Narrow Board and Wide Board tiles are available in the same colour range, including Sandstone, Deep Barrel, Stormy Day and Dusty Pebble. The main difference between the two lies in their board width, specifications, features and surface texture.
Recycled Plastic Narrow Board Vs. Wide Board: Highlighting Key Differences
Coming to the main point, both Narrow Board and Wide Board tiles use the same recycled HDPE material and feature a similar interlocking installation system for outdoor flooring. They also offer excellent weather resistance, durability, drainage and low-maintenance performance. However, their structural design, board layout, pattern options and overall appearance differ significantly, making each collection suitable for different outdoor spaces.
1. Board Structure and Surface Design
Narrow Board tiles feature 13 slim boards that create a detailed, textured, and traditional decking look. Wide Board tiles use 8 broader boards to deliver a cleaner, smoother, and more modern appearance. The board layout creates the biggest visual difference between the two collections.
2. Tile Pattern and Installation Layout
Narrow Board tiles are available in a 2×2 square interlocking format that ensures consistent alignment and easy installation across surfaces. Wide Board tiles offer greater flexibility as they come in both 2×2 square and 2×1 herringbone layouts. The additional herringbone option allows more creative design patterns for modern outdoor flooring arrangements.
3. Visual Appearance and Design Effect
Narrow Board tiles create a more detailed and structured appearance due to the 13 smaller boards within each tile, which adds depth and texture to the surface. Wide Board tiles, with only 8 broader boards, produce a cleaner and more open visual effect that suits modern minimalist design styles.
4. Size and Format Options
Narrow Board tiles are available in a standard square dimension of 23.75” × 23.75”. Wide Board tiles offer two format options, including a 24” × 24” square tile and a 12” × 24” rectangular (subway-style) tile, providing more layout flexibility for different design requirements.
5. Weight and Handling
Narrow Board tiles weigh 3.67–3.92 lbs per sq ft, giving them a sturdier and more solid feel. Wide Board tiles weigh about 2.81 lbs per sq ft, making them lighter and easier to handle during large installations.
6. Ideal Application Areas
Narrow Board tiles are best suited for smaller or defined outdoor areas such as balconies, compact patios and limited rooftop spaces where detailed texture enhances the design. Wide Board tiles are more suitable for larger open areas such as terraces, poolside decks and expansive outdoor zones where a clean and minimal appearance is preferred.
Quick Comparison at a Glance:
To make the differences easier to understand, here is a quick side-by-side comparison of Narrow Board and Wide Board tiles based on their key features and specifications:
Feature
Narrow Board Tiles
Wide Board Tiles
Surface Design 13 closely spaced boards for detailed texture 8 broader boards for a clean finish Visual Style Classic, textured wood-like appearance Modern, minimal, open look Installation Pattern 2×2 square interlocking system 2×2 square + 2×1 herringbone option Drainage System Horizontal and lateral drainage design Horizontal and lateral drainage design Surface Grip Embossed anti-slip wood grain finish Embossed anti-slip wood grain finish Maintenance Low maintenance, easy cleaning Low maintenance, easy cleaning Durability Resistant to rot, insects, and moisture Resistant to rot, insects, and moisture Color Options 4 earthy tones (shared range) 4 earthy tones (shared range) Ideal Usage Compact outdoor areas, balconies, rooftops Large open spaces, terraces, poolside decks Which Recycled Plastic Deck Tile You Should Choose?
If you want a more traditional and detailed deck appearance, Narrow Board tiles are a better choice. Their closely arranged board structure creates a textured surface that adds depth and works well in smaller or defined outdoor areas such as balconies, compact patios and limited rooftop spaces.
On the other hand, if you prefer a clean, modern, and more open look, Wide Board tiles are more suitable. Their broader board layout creates a minimal finish that works best in larger outdoor areas such as terraces, poolside decks, and open garden spaces where a spacious visual effect is preferred.
Both options offer strong durability, recycled material benefits, and long-lasting outdoor performance, so the final decision comes down to the type of design aesthetic you want to achieve. Furthermore, adding decorative elements enhances the final look of your outdoor space.
Enhancing Outdoor Spaces with Decorative Elements
Once the right deck tile style is selected, the overall outdoor look can be further improved by adding simple design elements that enhance depth, comfort and visual balance.
1. Decorative Rock Pebbles
Decorative rock pebbles placed along edges, planter zones or pathway borders create a natural contrast against the deck tile surface. They help define different sections of the outdoor space while adding a clean, balanced, and visually refined finish to the layout.
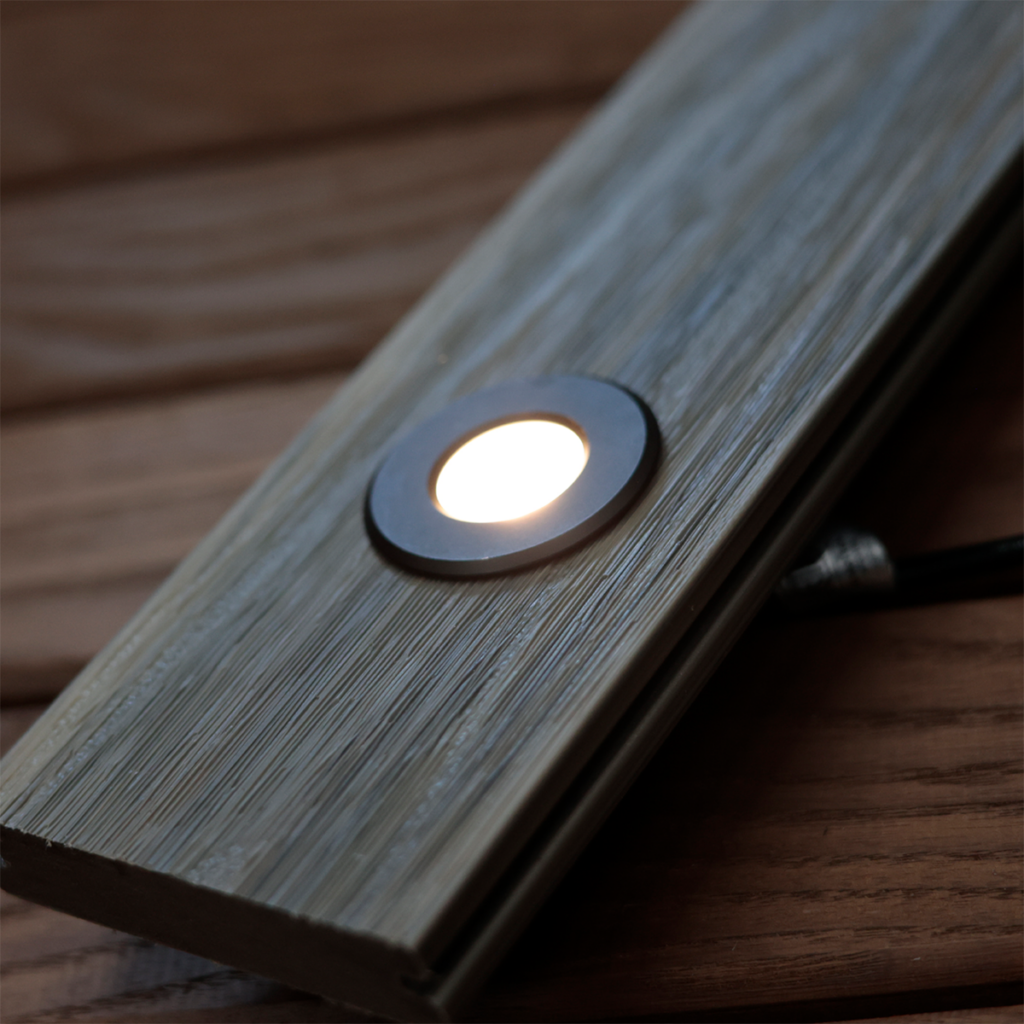
2. Ambient Outdoor Lighting
Ambient outdoor lighting adds warmth and visibility during evening hours. Soft lighting placed near seating areas, corners, or walkways highlights the texture of the deck surface and creates a welcoming, elegant, and visually rich outdoor atmosphere.
The right deck tiles can completely transform your outdoor space. Designer Deck’s Narrow Board and Wide Board collections combine durability with distinctive design. Whether you prefer a classic or modern look, both collections help you create a stylish, functional, and low-maintenance outdoor living area that matches your vision.
Frequently Asked Questions on Recycled Plastic Decking
Ques: What are recycled plastic deck tiles used for?
Ans: Recycled plastic deck tiles are used for outdoor flooring in spaces such as balconies, patios, rooftops, and terraces. They provide a durable and low-maintenance surface with a wood-like appearance.
Ques: Where can recycled plastic decking be installed?
Ans: It can be installed in residential and commercial outdoor areas including garden spaces, poolside decks, rooftop terraces and balcony flooring systems.
Ques: What makes Narrow Board tiles different from Wide Board tiles?
Ans: Narrow Board tiles feature a more detailed surface with closely arranged boards, while Wide Board tiles offer a cleaner and more modern look with broader board sections.
Ques: Are recycled plastic deck tiles weather resistant?
Ans: Yes, they are designed to withstand rain, sunlight, and temperature changes while resisting moisture, rot and insect damage over time.
Ques: Do these tiles require regular maintenance?
Ans: No heavy maintenance is required. Occasional cleaning with water is enough to maintain their appearance and performance.
Ques: Where can I buy recycled plastic decking in Canada?
Ans: You can explore high-quality options at Designer Deck, which offers both Narrow Board and Wide Board recycled plastic deck tile collections in Canada.
Ques: What is recycled plastic lumber made of?
Ans: It is made from a blend of recycled pre-consumer and post-consumer high-density polyethylene (HDPE), designed for strength and outdoor durability.
Ques: Are recycled plastic boards better than wood?
Ans: Recycled plastic boards last longer outdoors as they do not rot, splinter or absorb moisture like natural wood, making them more stable over time.
Ques: What outdoor spaces are best for deck tiles?
Ans: Deck tiles work best in compact balconies, open terraces, patios, rooftops and poolside areas depending on the design style chosen.
In Conclusion,
Designer Deck offers a variety of deck tiles for different outdoor spaces and design preferences. Narrow Board tiles create a detailed, classic wood look, while Wide Board tiles deliver a clean, modern finish. Both collections offer durable, sustainable and low-maintenance flooring for balconies, patios, rooftops and terraces. Choose Narrow Board tiles for smaller, defined spaces or select Wide Board tiles to create an open, contemporary look. Both options withstand harsh outdoor conditions and maintain their appearance for years.
Need help choosing the right deck tiles? Contact Designer Deck for expert advice, product recommendations and premium outdoor flooring solutions tailored to your project.
- Top Porsets 2 Elevated Porcelain Tile Flooring Designs for Every Home
When architects and developers plan modern residential and commercial spaces, flooring becomes an important part of the design process. Tile Flooring choice affects how interior and exterior spaces look and match with the overall infrastructure of the home. From living rooms and kitchens to patios and rooftop spaces, every surface contributes to the final look of the property. Among various tile flooring options available today, porcelain tile flooring has become a preferred choice for creating a luxurious and modern lifestyle. Its elegant appearance, durability, and ability to complement contemporary spaces make it suitable for both indoor and outdoor spaces.
At Designer Deck, we have a collection of porcelain tiles available in different thickness options such as 1 cm, 2 cm, and 3 cm, allowing homeowners and designers to choose a solution based on project requirements and load capacity. In this blog, we will discuss Porsets 2 cm elevated porcelain tile flooring and explore the various stylish tile designs available that can enhance the appearance of every home.
Why Porsets 2 Are a Trending Luxury Choice for Indoor and Outdoor Spaces?
In recent times, tile flooring trends have been evolving quickly as people want designs that look beautiful and also stay strong for years. This is where advanced systems like Porsets 2 come in and are becoming one of the preferred choices in modern construction. Porsets 2 is a 2 cm thick elevated porcelain flooring system built to combine modern style with reliable strength. It is installed on pedestal supports that lift the tiles slightly above the base surface, creating a level and well-aligned finish. This structure also supports long-term stability and smooth surface performance.
It is commonly used in homes and commercial projects because it adapts easily to different spaces. Areas like living rooms, kitchens, balconies, terraces, and rooftops gain a refined and premium appearance with this system. In outdoor applications, it performs effectively when paired with adjustable deck pedestals. These supports create space beneath the tiles, allowing water to flow through easily and air to circulate. This helps keep the surface dry, reduces water accumulation, and maintains structural balance over time. Next, let’s explore the top porsets 2 designs for interior as well as exterior spaces.
Top Porsets 2 Elevated Porcelain Flooring Designs for Residential and Commercial Spaces
As you know, Porsets 2 offers excellent design flexibility and can be used across a wide range of indoor and outdoor areas. Its modern appearance and elevated flooring structure allow homeowners and designers to create visually appealing spaces while maintaining functionality. With different textures, patterns, and finishes available, it becomes easier to match the flooring with various architectural styles and design preferences. Below are the top Porsets 2 designs for modern indoor and outdoor spaces.
Interior Spaces: Best Porsets 2 Tile Designs for Every Room
Every room inside a home creates a different experience and mood. Some spaces are designed for relaxation, some for gatherings, and others for daily activities. Choosing the right Porsets 2 elevated porcelain flooring design can help create a balanced interior while improving the overall appearance of the home. Different shades, textures, and finishes can complement furniture, wall colours, lighting, and decorative elements while creating a smooth visual connection between rooms.

1. Living Room
The living room becomes one of the most noticeable spaces in a home because it is where families spend time together and guests are welcomed. Flooring in this area should create a bright, comfortable, and inviting atmosphere. Shades such as Almond, Amalfi, Seashell, Silver Valley, and Greige can help create a spacious appearance while blending naturally with modern furniture and decorative styles. Lighter tones can also reflect more natural light, making the room feel larger and more open.
2. Drawing Room
Drawing rooms usually create the first impression of a home and are commonly designed with a more elegant appearance. Flooring designs with a refined and premium character can improve the overall atmosphere of this space. Imperial, Eramosa, Silver, and Greige can complement luxury furniture, statement lighting fixtures, and contemporary design themes while creating a polished look.
3. Kitchen
Modern kitchens require flooring that supports style while complementing cabinets, countertops, and appliances. Clean and stone-inspired finishes can create a timeless appearance while helping the space feel organized and visually balanced. Kitchen porcelain tile designs Canada such as Ice Grey, Gris, Crema Antico, and Indus White can fit beautifully into both modern and contemporary kitchen layouts.
4. Dining Room
Dining spaces bring family members together, making the environment warm and welcoming. Flooring with soft and balanced tones can improve the dining experience while matching tables, chairs, and decorative accents. Crema Antico, Almond, Silver Valley, and Amalfi can create an elegant dining atmosphere.
5. Bedroom
Bedrooms are designed for comfort and relaxation, which makes warm and natural flooring designs a suitable choice. Wood-inspired porcelain designs such as Ash Timber, Birch Timber, and Light Timber can bring the appearance of natural wood while maintaining the strength of porcelain flooring. Shades like Moongrey can also create a peaceful atmosphere suitable for modern bedroom interiors.
6. Children’s Room
Children’s rooms usually look attractive with flooring that creates a bright and cheerful environment. Seashell, Silver Valley, and Almond can create a soft appearance that blends well with playful interior themes and colourful decorative elements.
7. Home Office and Study Room
Study rooms and home office spaces require an environment that supports focus and productivity. Flooring with balanced and neutral tones can help create a clean and organized appearance. Greige, Light Timber, and Ash Timber can complement modern workspaces and minimalist interiors.
8. Bathroom
Bathrooms generally look attractive with lighter shades that create a fresh and clean appearance. Silver, Tundra, Ice Grey, and Indus White can complement modern fixtures, glass shower panels, and contemporary layouts while helping the space feel bright.
9. Hallways and Entrance Areas
Hallways connect different spaces throughout the home, so flooring should create a smooth transition between rooms. Imperial, Eramosa, Gris, and Greige can create a connected and sophisticated appearance throughout the interior.
10. Indoor Lounge and Reading Areas
Relaxation corners and indoor seating areas can become more comfortable with flooring designs that create a calm atmosphere. Moongrey, Light Timber, Coast, and Silver Valley can complement indoor plants, cozy seating arrangements, and modern decor styles.
In case of exterior spaces, Porsets 2 are installed by using adjustable deck pedestals. With such a support system, you can place porcelain tiles on uneven surfaces and adjust the height of the pedestals as per your requirement.
Exterior Spaces: Porsets 2 Tile Designs for Outdoor Living
The right tile flooring can define outdoor spaces by adding structure, surface continuity, and a more refined architectural finish. Factors such as tile texture, dimensions, shade selection, and layout pattern play an important role in shaping the overall renovation of the exterior residential areas.
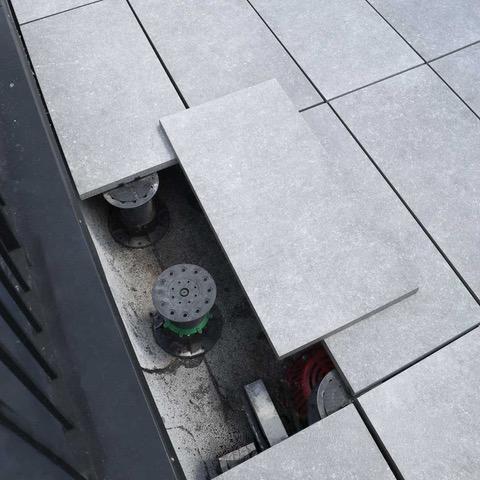
Adjustable Deck Pedestals for Outdoor Tiles
1. Patio Spaces
Patios usually require flooring that creates a strong visual foundation while supporting seating and dining arrangements. Slate Grey, Thundercloud, Rio Black, and Black Opal can introduce deeper tones and modern surface patterns that work well with pergolas, outdoor furniture, and open-air gathering spaces.
2. Terrace Areas
Terraces usually benefit from tile designs that add texture and create a balanced architectural appearance. Algonquin, Eramosa, and Indus can provide natural stone-inspired finishes that help create depth and dimension across larger surfaces.
3. Balcony Spaces
Balconies generally work best with tile designs that help smaller areas feel more open and organized. Coast, Moongrey, Seashell, and Silver Valley can create a lighter surface appearance while complementing railing systems, planters, and compact seating arrangements.
4. Rooftop Spaces
Rooftop areas usually require flooring that creates a defined and contemporary setting. Black Opal, Thundercloud, Rio Black, and Indus can contribute stronger visual contrast and a modern surface profile suitable for outdoor lounges and elevated deck areas.
5. Porch Areas
Porches create the transition between exterior and interior sections of the property. Almond, Tundra, Coast, and Crema Antico can introduce balanced tones and surface textures that support different architectural styles.
6. Garden Walkways and Surrounding Areas
Walkways and surrounding landscape sections benefit from tile designs that integrate smoothly with natural elements. Algonquin, Slate Grey, Eramosa, and Tundra can create a structured pathway appearance while complementing greenery and outdoor materials.
7. Poolside Areas
Poolside spaces generally require tile designs that create a clean and modern surface finish. Silver, Coast, Indus White, and Greige can contribute lighter tones that pair well with water features, outdoor seating layouts, and surrounding landscape elements.
As Porsets 2 creates well-defined flooring layouts across residential spaces, its durability and surface performance also make it a practical solution for commercial environments where flooring experiences continuous daily movement.
Commercial Spaces: Porsets 2 for High Traffic Areas
Commercial spaces require flooring systems that support regular movement while maintaining a clean and professional appearance. Areas such as offices, retail stores, restaurants, hotels, rooftop lounges, and commercial outdoor seating zones experience continuous foot traffic throughout the day. Flooring selection in these environments influences the overall experience of the space and contributes to its long-term performance.
1. Office Spaces
Office environments usually require flooring that creates a structured and professional atmosphere. Greige, Silver Valley, Imperial, and Gris can complement modern office interiors, meeting rooms, reception areas, and collaborative workspaces.
2. Restaurants and Cafes
Dining environments benefit from flooring designs that contribute to the overall theme of the space. Crema Antico, Almond, Slate Grey, and Eramosa can work well with contemporary dining layouts and seating arrangements.
3. Retail Stores and Shopping Areas
Retail spaces generally require flooring that supports movement while maintaining a polished appearance. Silver, Ice Grey, Thundercloud, and Black Opal can create a modern surface profile suitable for commercial display areas.
4. Hotels and Hospitality Spaces
Hotels and hospitality environments usually focus on creating a refined atmosphere throughout lobbies, waiting areas, and outdoor seating sections. Imperial, Silver Valley, Rio Black, and Indus can contribute to a premium architectural appearance.
Apart from this, Porsets 2 can be installed in Rooftop Commercial Lounges and Outdoor Seating Areas. Tile designs such as Thundercloud, Black Opal, Rio Black, and Slate Grey can complement modern outdoor furniture and contemporary exterior layouts.
Frequently Asked Questions on Porsets 2 Tile Flooring
Ques: Why are porcelain tile designs becoming more popular in modern homes?
Ans: Porcelain tile flooring combines surface durability with a wide range of textures, shades, and dimensions. It can complement both contemporary and traditional layouts across indoor and outdoor spaces.
Ques: Which tile colors are currently trending for residential spaces?
Ans: Modern porcelain tile designs Canada collections commonly include Greige, Ice Grey, Silver Valley, Thundercloud, and natural stone-inspired shades that work well with changing design trends.
Ques: Can 2cm porcelain outdoor flooring be installed on uneven surfaces?
Ans: Yes, 2cm porcelain outdoor flooring can be installed with adjustable deck pedestals that help create a level flooring surface while supporting height adjustments as required.
Ques: Does tile thickness make a difference in flooring performance?
Ans: Tile thickness can influence strength and application areas. Porsets 2 elevated porcelain flooring uses a 2 cm profile that can support indoor areas as well as elevated outdoor installations.
Ques: Where can porcelain deck tiles be used around a property?
Ans: Porcelain deck tiles Canada solutions can be installed in patios, terraces, balconies, rooftop areas, garden spaces, and outdoor seating sections.
Ques: Are elevated porcelain tile systems suitable for outdoor projects?
Ans: Elevated porcelain tile systems for outdoors can help create structured flooring layouts while allowing space beneath the tiles for water movement and airflow.
Ques: Is porcelain tile a suitable choice for bathroom flooring?
Ans: Porcelain tile designs Canada bathroom collections usually include lighter and stone-inspired shades that can complement modern fixtures and create a clean appearance.
Ques: How do larger tile dimensions affect the overall flooring layout?
Ans: Larger tile dimensions can create a more continuous surface appearance with fewer visible joints, helping spaces feel more open and organized.
Ques: Should neutral tile shades be selected for long-term design flexibility?
Ans: Neutral shades such as beige, grey, white, and Greige continue to remain relevant because they pair easily with changing furniture styles and interior themes.
Winding Up,
Designer Deck is a trusted supplier of premium outdoor and elevated flooring solutions across Canada. We offer Porsets systems, adjustable deck pedestals, and modern porcelain tile flooring designed for residential and commercial spaces. The right flooring can improve the overall look and feel of a space while helping create a clean and well-planned design. If you are planning to upgrade your indoor or outdoor area with Porsets 2 elevated porcelain tile flooring, connect with our team and begin your next project today.
- Deck Tile Warranty Explained — What is Covered and What is Not
Every deck tile product comes with a warranty. Most buyers never read it. That is usually fine — until something goes wrong and the claim falls into the fine print.
Here is a straight look at what deck tile warranties typically cover, what they typically do not, and how to evaluate whether a warranty is actually worth the paper it is printed on.
What a Deck Tile Warranty Should Cover?
1. Manufacturing defects: Cracks, warping, or failures in the material itself that are not caused by misuse or improper installation. This is the core of every legitimate warranty.
2. Colour fastness (UV fading): Quality tiles should resist fading in sun exposure for many years. Warranty terms vary by material — porcelain typically has the longest colour warranty, followed by recycled plastic (UV inhibitor-protected), WPC, and natural wood (shortest, because wood naturally weathers).
3. Structural failure from normal use: If the tile breaks under normal foot traffic, normal furniture, or normal weather, that is a warranty claim.
4. Material quality issues: Surface delamination, interlock failure, riser breakage — problems that trace back to the manufacture of the product.
What a Deck Tile Warranty Typically Does NOT Cover?
1. Improper installation: If the installation was botched, the warranty on the product itself usually does not apply. This is why professional installation carries its own warranty alongside the product warranty.
2. Damage from misuse:
- Dropping heavy objects on the tiles
- Dragging furniture that damages the surface
- Using metal tools that scratch or chip
- Using harsh chemicals that degrade the finish
3. Damage from extraordinary weather: Tornadoes, direct lightning strikes, and other extreme weather events are typically excluded. Normal Canadian winter is fully covered by products designed for Canadian conditions.
4. Damage from the slab underneath: If the concrete slab fails, shifts, or develops structural issues, damage to the tiles on top is usually not a tile warranty claim. This is why we recommend inspecting the slab before installation.
5. Cosmetic changes from normal use: Foot-traffic patina, natural wood greying, minor scuffs — these are normal wear, not warranty events.
How Designer Deck Warranties Work?
Designer Deck backs every product line with a written warranty. Terms vary by product — porcelain carries the longest warranty, followed by WPC and recycled plastic, with natural wood having shorter coverage because wood naturally weathers over time.
Professional installation carries a separate installation warranty, which covers labour-related issues.
Red Flags in Warranty Terms (When Shopping Other Brands)
1. Very short warranty periods: A one-year warranty on outdoor flooring is a signal that the manufacturer does not expect the product to last much longer than that. Quality deck tiles warrant for years, not months.
2. “Pro-rated” warranty after year one: Some warranties only cover the full replacement cost in year one, then diminish each year. Read the terms — a 10-year pro-rated warranty might only cover 10% in year 10.
3. Warranty only transferable with major documentation: If you are selling the property, a non-transferable warranty loses value. Designer Deck warranties are transferable with purchase documentation.
4. Installation-only warranties with no product coverage: Some contractors warrant installation but not the tiles themselves. You want both — product from the manufacturer, labour from the installer.
5. Vague or undefined terms: “Defective materials” should be specifically defined. Otherwise it becomes whatever the manufacturer says it means when you file a claim.
How to File a Warranty Claim (the Typical Process)?
- Document the issue with photos and a description
- Locate your original purchase or installation documentation
- Contact the manufacturer or installer
- Allow for an inspection if required
- Receive resolution — replacement tiles, repair, or refund as specified in the warranty terms
Keep your purchase documentation. This is the most common reason warranty claims fail — the homeowner cannot prove when and where they bought the product.
Why Installation Warranty Matters?
A beautiful product installed badly is still a bad outcome. Product warranty covers the tile; installation warranty covers the labour. Both matter.
Designer Deck professional installation includes an installation warranty alongside the product warranty. DIY installation is supported with guidance, but the installation warranty does not apply to self-installed projects.
Transferring Warranty if You Sell the Property
For condo owners who may sell in the future, a transferable warranty adds value to the listing. Designer Deck warranties transfer to the new owner with documentation, which helps on resale.
What to Keep for Your Records
- Original invoice and receipt
- Warranty documentation
- Installation photos (before and after)
- Contact information for the installer and manufacturer
- Any maintenance records
A simple folder or digital backup is enough. The goal is being able to produce documentation if needed years later.
The Honest Truth About Warranties
Most warranty claims never happen. Quality tiles from quality manufacturers simply do not fail at meaningful rates. The warranty exists as a backstop for the small minority of claims, and as a signal from the manufacturer about how confident they are in the product.
A manufacturer who stands behind long warranty terms is telling you they expect the product to last. That is the single best indicator of actual product quality.
Frequently Asked Questions
Ques: How long is the Designer Deck warranty?
Ans: Warranty terms vary by product line. Porcelain carries the longest coverage; natural wood the shortest (due to the natural weathering of wood). See our warranty page for specific terms by product.
Ques: What if my tiles were installed by my builder and I am the second owner?
Ans: Designer Deck warranties are transferable with documentation from the original installation. Ask the builder or previous owner for records.
Ques: Does the warranty cover labour to replace a defective tile?
Ans: This depends on the specific warranty and installation agreement. Professional installations typically include labour coverage for warranty-related work; DIY installations generally do not.
Ques: What if my condo corporation installed the tiles as part of a building-wide project?
Ans: Building-wide warranty coverage is typically negotiated between Designer Deck and the corporation at project start. Individual unit owners should check with their property manager for specifics.
- Rental Property Balcony Upgrades That Do Not Damage the Surface
Renting a condo in Toronto often comes with a concrete balcony that nobody wants to touch because nobody wants to lose their damage deposit. Landlords similarly worry about tenants damaging the slab with permanent installations. The result is that a lot of potentially great outdoor spaces sit unused because neither side knows what is actually safe.
Here is the guide for both renters and landlords on finishing a rental balcony without damage, without permanent modification, and without losing a deposit.
For Renters — What You Can and Cannot Do?
Generally safe (no permission needed for most leases):
- Furniture
- Planters
- Removable outdoor décor
- Freestanding screens or umbrellas
- Solar or battery-operated lights
Gray area (usually permitted but check first):
- Interlocking deck tiles (removable, no adhesive, no penetration)
- Outdoor rugs (some leases prohibit due to moisture issues)
- Freestanding privacy screens with weighted bases
Usually prohibited:
- Anything that screws, glues, or anchors to the slab
- Painted or coated surfaces
- Framed decks of any kind
- Plumbed-in fixtures
Why Interlocking Deck Tiles Are Renter-friendly?
Interlocking tiles lift out as easily as they go in. No glue, no adhesive, no fasteners. When you move out, the tiles lift out in the same afternoon they took to install. The slab underneath is in the exact same condition as before — often cleaner because the tiles protected it from direct sun and weather.
For renters, this means:
- A finished balcony for the whole time you live there
- No damage to the slab (protects your deposit)
- Tiles come with you to your next place
- The value lives on rather than being left behind
What to Communicate With Your Landlord?
Even though non-permanent installations usually do not require landlord approval, a quick email protects you:
“I am planning to install removable interlocking deck tiles on the balcony. They do not penetrate the slab, do not use adhesive, and lift out when I move out. Happy to share product specs if helpful. Let me know if you have any concerns.”
Most landlords respond positively because the tiles protect their slab from weather and wear.
For Landlords — Why Allowing Deck Tiles is in Your Interest?
1. Tenant retention: A finished balcony is a real amenity. Tenants are more likely to renew leases on units that feel like real living spaces rather than storage pods with railings.
2. Slab protection: Deck tiles protect the concrete from direct UV exposure, rain, and freeze-thaw — the main causes of slab deterioration. Units with tiles over time have less concrete damage than units with bare slabs.
3. Zero long-term commitment: If the tiles are the tenant’s, they leave with the tenant. If they are yours (see below), they are a one-time investment that upgrades the unit for multiple tenants.
4. Higher rentability: A listing photo with a finished balcony generates significantly more interest than one with a bare slab.
For Landlords — Should You Install Tiles Yourself?
Many landlords of condo rental units are finding that installing quality deck tiles themselves pays back quickly:
- Unit shows better in listings, rents faster
- Commands slightly higher rent
- Protects slab from weathering between tenants
- One-time cost, amortized across many tenancies
Quality tiles like Designer Deck WPC or recycled plastic survive multiple tenancies and still look good years later. The incremental rent and improved tenant retention usually cover the installation within 18–24 months.
For Airbnb and Short-term Rental Hosts
Airbnb and Vrbo hosts with balconies have an even stronger case. A finished, photogenic balcony:
- Photographs beautifully (drives bookings)
- Increases nightly rates
- Generates better reviews
- Differentiates the listing from competitors
The investment pays back faster with short-term rental economics than with long-term leases.
What Renters Should Look for in Their Choice of Tile?
- Truly removable (no adhesive, no fasteners)
- Weight within typical balcony load limits
- UV-protected for long tile life
- Quality documentation (for condo board approval if required)
- Canadian-made for freeze-thaw durability
These specs describe Designer Deck tiles — which is why the product has been chosen by thousands of renters, landlords, and short-term rental hosts in Toronto.
Moving Out — the Process
When you move, the process is:
- Lift tiles off the slab (10–30 minutes for a typical balcony)
- Stack them for transport (they are light and stackable)
- Sweep or hose off the slab underneath
- Take tiles with you to the next place
The slab underneath is typically cleaner than it would have been without the tiles, because the tiles protected it from weather and sun.
Frequently Asked Questions
Ques: Do I need written permission from my landlord to install removable deck tiles?
Ans: Check your lease for specific provisions about balcony modifications. For most standard leases, non-penetrating and non-permanent changes are permitted, but a brief email to your landlord protects you and builds goodwill.
Ques: Will deck tiles stain the concrete underneath?
Ans: No. Quality interlocking tiles with riser systems allow water and air to flow underneath, preventing the moisture trap that causes staining. The slab is often cleaner when the tiles come up than when they went down.
Ques: Can I sell the tiles to the next tenant?
Ans: Yes, and many renters do exactly this. It can offset the moving-out cost.
Ques: How long does it take to remove the tiles at move-out?
Ans: A typical condo balcony can be cleared in under 30 minutes. Tiles stack easily for transport.
- Eco-Friendly Deck Tiles — Sustainable Outdoor Flooring Options
Sustainable outdoor flooring is a category where marketing has outrun reality. Every product claims to be “green.” Few actually are. If you care about what you are putting on your balcony or rooftop, here is the honest look at which eco-friendly deck tiles options are genuine, what “sustainable” actually means in this category, and how to cut through the greenwashing.
What Sustainability Actually Means for Outdoor Flooring?
Four real factors determine whether an outdoor product is genuinely sustainable:
- Input material (recycled content vs. virgin material)
- Manufacturing footprint (where and how it is made)
- Durability (how long before it needs replacement)
- End-of-life options (can it be recycled or does it end up in landfill)
A product is not sustainable just because it contains “recycled content.” It needs to do reasonably well on all four factors.
Recycled Plastic Deck Tiles — the Genuinely Eco-friendly Deck Tiles Option
1. Input material: Recycled plastic is one of the eco-friendly deck tiles and is 100% recycled plastic. Material that would otherwise have gone to landfill, diverted and given a long second life as a deck tile. Designer Deck’s recycled plastic lines (Vivid and Contour Collections) are made from recycled material sourced in Canada.
2. Manufacturing footprint: Canadian-manufactured in Ontario. Reduces transportation emissions compared to imported alternatives.
3. Durability: Decades of outdoor life. UV-protected. Mold-proof. Freeze-thaw stable. The longer a product lasts, the better its per-year environmental footprint.
4. End-of-life options: Recyclable back into the plastic stream at the end of useful life.
5. Net verdict: Genuinely the most eco-friendly outdoor flooring option in the Designer Deck range. If sustainability is your top priority, this is the pick.
Wood-plastic Composite (WPC) — Partial Sustainability
1. Input material: Combines recycled plastic with wood fibres. Recycled content varies by product line. Designer Deck’s WPC (Opulent Collection) uses recycled plastic bonded with wood.
2. Manufacturing footprint: Canadian-manufactured. Moderate processing energy.
3. Durability: Very good long-term durability, reducing replacement cycles.
4. End-of-life options: More complex than pure plastic because of the composite nature. Harder to recycle than single-material products.
5. Net verdict: Genuinely sustainable on balance, but not as clean a sustainability story as pure recycled plastic.
Responsibly Sourced Wood Eco-Friendly Deck Tiles — a Real Alternative
1. Input material: Pressure-treated pine, Western red cedar, or Tantimber hardwood. Naturally renewable material, with cedar offering particularly strong sustainability credentials when sourced from certified forests.
2. Manufacturing footprint: Depends heavily on source. Canadian-harvested cedar carries a small footprint. Tropical hardwoods have a larger footprint unless certified.
3. Durability: Decades of life with minimal care. Patinates gracefully. Natural wood is the only material that actually becomes more beautiful as it ages.
4. End-of-life options: Biodegradable. At end of life, the material returns to the natural carbon cycle. The best end-of-life story of any deck tile material.
5. Net verdict: Strong sustainability case when responsibly sourced. Cedar in particular is one of the cleanest material choices available.
Porcelain — a Different Sustainability Story
1. Input material: Clay and minerals, fired at high temperature. Renewable in the sense that clay is abundant; high-energy in manufacturing.
2. Manufacturing footprint: Higher than plastic or wood due to kiln-firing energy. Typically imported from Italy or Spain.
3. Durability: The longest effective lifespan of any option. Porcelain installations often outlast the buildings they are installed on. High durability compensates significantly for higher manufacturing footprint.
4. End-of-life options: Can be crushed and used as aggregate. Not biodegradable.
5. Net verdict: Sustainability through longevity rather than low footprint. Valid but different story than the other options.
Greenwashing to Watch Out for
1. “Made from plants” claims on plastic products: Small bio-content in a mostly plastic product does not make it sustainable. Check actual percentages.
2. “Eco-friendly deck tiles” with no documentation: Real sustainability claims come with documentation — material composition, manufacturer certifications, source information.
3. Tropical hardwoods without FSC certification: Some exotic hardwoods come from forests that are not managed sustainably. Ask for Forest Stewardship Council (FSC) certification on tropical species.
4. Products with very short life claims: A product marketed as “compostable” or “biodegradable” that only lasts one season is not sustainable — it is disposable.
Certifications and Standards to Look for
- Forest Stewardship Council (FSC) for wood products
- Canadian Standards Association (CSA) for material testing
- Recycled content documentation from manufacturer
- Canadian-manufactured designation for transportation footprint
How Designer Deck Approaches Sustainability?
Our whole eco-friendly deck tiles product line is Canadian-manufactured, which reduces transportation emissions compared to imported decking products. Our recycled plastic lines use post-consumer material. Our wood products are sourced from Canadian mills. Our WPC combines recycled content with wood. And all our products are engineered to last decades — which matters more than any single sustainability claim.
Frequently Asked Questions
Ques: What is the greenest outdoor flooring option for a condo balcony?
Ans: Recycled plastic deck tiles have the cleanest sustainability story for most Toronto condo applications — high recycled content, Canadian-made, long life, and recyclable at end of life.
Ques: Is composite decking actually sustainable?
Ans: Partially. Recycled content varies widely by manufacturer. Read product documentation and favor brands that publish actual composition details.
Ques: Can I compost old wood deck tiles?
Ans: Untreated cedar or hardwood yes. Pressure-treated wood no — chemical treatment disqualifies it from composting. Pressure-treated wood should go through regular waste channels.
Ques: What happens to deck tiles when I am done with them?
Ans: Quality tiles have enough life left that they rarely hit end-of-life during a normal owner’s timeline. Designer Deck tiles can often be lifted, cleaned, and reinstalled at a new property or sold to another owner.
- Townhome Rooftop Decks — Complete Design & Installation Guide
Stacked townhomes across the GTA increasingly come with rooftop decks — private terraces accessed from the top floor through a small bulkhead. On paper, this is one of the best features of modern townhouse living. In practice, a huge number of these rooftops sit as bare pea gravel or rough concrete for years because owners do not know where to start or assume finishing it will require a major renovation.
It does not. Here is the full guide to turning a bare townhome rooftop into a usable outdoor living space. Designer Deck has worked with many of the GTA’s most established townhome builders — including Mattamy Homes, Menkes, Great Gulf, Tribute Communities, and Aspen Ridge — to finish thousands of these exact spaces.
Why Townhome Rooftops Sit Unused?
- The bulkhead access feels inconvenient
- The surface is rough concrete or pea gravel and not inviting
- Owners assume big renovation costs
- Uncertainty about weight limits and structural load
- No shade or protection from elements
- Privacy concerns with neighboring units
Every one of these is addressable — usually in a single weekend.
The Most Important First Step — Replace the Pea Gravel or Cover the Concrete
Townhome rooftops almost always come in one of two finishes from the builder:
- Pea gravel or ballast stone laid loose over the waterproof membrane
- Bare concrete with minimal finish
Both feel terrible to walk on, look unfinished, and make every other design decision harder. Covering the surface with interlocking deck tiles is transformational — often more so than on condo balconies, because the contrast with pea gravel is starker than the contrast with a smooth concrete slab.
Design Templates by Townhome Rooftop Size
1. Small (150–250 sq ft): A lounging and coffee space. Full WPC or recycled plastic tile coverage, one outdoor sofa, one coffee table, two side planters, string lights. Add a small bistro set if there is room.
2. Medium (250–500 sq ft): Enough room for defined dining and lounging zones. Full tile coverage. A six-person dining table in one zone. An outdoor sofa with coffee table in another. Privacy screens on sightlines to neighboring townhomes. Integrated lighting. Possibly a pergola for shade.
3. Large (500+ sq ft): Genuine outdoor-room territory. Can include a dining zone, a lounge zone, and a third zone (bar area, BBQ area, or garden area). Porcelain becomes a realistic option at this size given the higher budget.
Weight and Structural Considerations
Townhome rooftops are engineered for rooftop use, so they can handle typical residential loads — furniture, planters, BBQ, and people. Things to check with your builder documentation:
- Maximum distributed load per square foot
- Maximum point load (for heavy items like hot tubs — generally not recommended on most townhome rooftops)
- Any specific restrictions from the builder
Designer Deck tiles are well within typical townhome rooftop load limits.
Privacy on Townhome Rooftops
The honest challenge of townhome rooftops is that your neighbours have the same view of your rooftop that you have of theirs. A few practical solutions:
- Tall planters with grasses or bamboo along sightlines
- Lattice privacy screens (freestanding, no fasteners into the slab)
- Outdoor curtain panels on a freestanding frame
- A pergola with side panels
- Furniture orientation that faces away from shared sightlines
Any solution should be non-permanent and not penetrate the slab.
The Bulkhead Problem (and Opportunity)
The bulkhead — the small structure housing the stairs up — is the ugliest feature on most townhome rooftops. Two approaches:
- Hide it — plant climbing vines up a lattice, or add an outdoor-rated cover panel
- Use it — a large bulkhead wall is the perfect backdrop for a mounted TV, an outdoor artwork, or string-light anchor points
Shade, Wind, and Toronto Weather
Townhome rooftops sit high enough to catch real wind and full sun. Plan accordingly:
- South- and west-facing rooftops need shade for summer afternoons (pergola, large umbrella)
- High rooftops dry out plants quickly — choose drought-tolerant species
- Furniture should be weighted or anchored (not to the slab) to resist wind
- Cushions and accent pieces should be brought inside when not in use
Installation on a Townhome Rooftop
Installation takes about a day for most townhome rooftops. Key logistics:
- Material must be carried up through the bulkhead stairs (no elevator access typically)
- The pea gravel or ballast is either left in place (tiles sit on top) or removed (cleaner finish)
- Drains and rooftop hatches must remain accessible
- Cuts around the bulkhead and any vents are typical
Designer Deck handles all of this as part of professional installation.
Common Mistakes on Townhome Rooftops
1. Trying to build a framed deck: Overkill, expensive, and almost always prohibited by the builder warranty or corporation rules.
2. Leaving the pea gravel: The space will never feel finished if you cannot walk on it comfortably. Cover the gravel first.
3. Ignoring the bulkhead: The bulkhead is visible from everywhere on the rooftop. Plan for it or hide it, but do not pretend it is not there.
4. Buying too much furniture: Same rule as condo balconies — fewer, better pieces always look better than a cluttered rooftop.
When to Install
Spring and fall are the most popular installation seasons. Summer works but installer schedules fill quickly. Winter installation is possible for most products but less common. Book 2–4 weeks ahead in peak season.
Frequently Asked Questions
Ques: Do I need my builder’s approval to finish the rooftop?
Ans: Usually not for non-permanent installations like deck tiles. Check your builder documentation and any condo corporation rules if the townhome is part of a common-element community.
Ques: Can I put a hot tub on my townhome rooftop?
Ans: Usually no — hot tubs create point loads that exceed most townhome rooftop ratings. Always verify with an engineer before any heavy installation.
Ques: What about a BBQ?
Ans: Most townhome rooftops support residential BBQs. Propane units are common; natural gas requires a gas line run from the unit below, which is a larger project.
Ques: Can I install a permanent pergola?
Ans: Permanent pergolas generally require fasteners into the structure and are often prohibited. Freestanding pergolas with weighted bases are the common alternative.
- The Homeowner’s Guide to Cost-Effective Balcony Finishing
Finishing a concrete balcony or small deck is one of the highest-return home improvements you can make, because raw concrete reads as unfinished and a finished deck reads as a real outdoor room. But costs vary wildly depending on the approach, and a lot of money gets wasted on the wrong choices.
Here is the honest homeowner’s guide to getting a balcony or deck finished at the lowest defensible cost without ending up with something that looks cheap or fails in a year.
The Three Real Options, by Budget
Budget-friendly — interlocking deck tiles in recycled plastic or pressure-treated wood: This is the best dollar-per-outcome option for most small to medium balconies. Recycled plastic (Vivid or Contour Collection) or pressure-treated pine tiles cover the slab completely, install in a day, require no permits, and look finished.
Mid-range — interlocking deck tiles in WPC or cedar: Same installation approach but with premium wood-tone finishes. WPC in particular delivers a high-end real-wood aesthetic at a mid-range price. This is where most Toronto condo owners land.
Premium — porcelain or Tantimber hardwood: For showpiece spaces. Premium porcelain still costs significantly less than pedestal paver systems while delivering a comparable look.
Where People Waste Money?
1. Building a framed wood deck on a small balcony: Framed decks are great for backyard patios and larger decks. On a small condo balcony, they are expensive overkill — and usually prohibited by the condo board anyway.
2. Pedestal paver systems on small residential spaces: Pedestal systems shine on large commercial rooftops. On a 150 sq ft residential balcony, you are paying a premium for benefits you will never use.
3. Epoxy coatings that fail in one winter: Cheap upfront. Fail in freeze-thaw. Net cost after replacement is much higher than going with tiles in the first place.
4. Lower-end plastic tiles from big-box stores: Often a false economy. Virgin plastic without UV protection cracks, fades, and shows significant wear quickly. Savings at purchase often disappear over the product’s shorter useful life.
5. Outdoor rugs: Seasonal at best. Trap moisture. Stain the slab. Usually replaced every year or two.
Where the Real Savings Are Hiding?
1. Choose the right material for your use case. If a balcony is mostly seen from inside the unit through glass doors, you do not need premium porcelain — a quality recycled plastic in a nice colour looks excellent and costs a fraction. Save the premium materials for spaces where you will actually stand on them and look closely.
2. Do simple shapes yourself (and hire for complex ones). A simple square balcony with no obstacles is genuinely DIY-friendly. Complex shapes with railings, drains, and angles benefit from professional installation. Matching the job to the skill level saves money either way.
3. Skip the accessories you will not use. LED integrated lighting, grass inserts, custom patterns — these are great if you will use and enjoy them. If you are just trying to finish the space, the base tile installation delivers 80%+ of the visual improvement.
4. Buy tiles that can come with you. Interlocking tiles lift out as easily as they go in. If you sell the condo, the tiles can come to the next place. A framed deck cannot. Factor this into long-term value.
5. Look at promotional pricing. Designer Deck periodically runs promotional pricing on professional installation. Ask during your consultation whether any promotions apply.
Total Project Budget Planning
For a typical Toronto condo balcony project, plan for:
- Deck tile installation (the biggest line item — budget-friendly to mid-range depending on product)
- Outdoor furniture (separate from the tile budget, highly variable)
- Planters and plants (add as you go)
- Lighting (can be added later)
The tile installation is a one-time investment that lasts decades. The rest can be added, changed, or upgraded over time without touching the floor again.
What to Ask During a Quote?
- Is this price installed or supply-only?
- How many days will installation take?
- Are cuts and trim pieces included?
- What warranty comes with the product and the installation?
- Are there any additional costs (riser upgrades, custom cuts, permit fees)?
- How is waste and old material disposed of?
- What payment terms and timeline?
Frequently Asked Questions
Ques: What is the single cheapest way to finish an ugly concrete balcony?
Ans: Quality recycled plastic deck tiles deliver the best dollar-per-result ratio. They are also mold-proof, UV-protected, and Canadian-made — unlike most bargain alternatives.
Ques: Can I finish part of the balcony now and the rest later?
Ans: Yes. Interlocking tiles can be installed in stages. Many homeowners finish the main living area first and add seating-area tiles or grass inserts later.
Ques: Do deck tiles increase my condo resale value?
Ans: Real estate agents consistently report finished outdoor spaces help condo units show better and sell faster. Because the tiles are removable, you can also take them with you if you prefer.
Ques: Are there ongoing costs?
Ans: Minimal. Basic cleaning is free. Professional spring/fall cleaning is optional. Replacement of individual tiles (if ever needed) is inexpensive.
- How to Level an Uneven Rooftop Terrace Without Major Construction
Almost every flat rooftop terrace in Toronto is not actually flat. By design, rooftops slope to drain — usually 2% or more — and over decades most slabs develop additional unevenness from settling. Stand on most condo terraces with a marble and it will roll.
If you want a usable, comfortable rooftop, you need a level walking surface without destroying the drainage the roof was designed for. Here is how to do that without pouring new concrete, building a deck frame, or spending pedestal-system money.
Why Rooftop Terrace Are Uneven in the First Place?
1. Intentional slope for drainage: Flat roofs have a built-in slope of 2% minimum (1 inch of drop per 4 feet of length). This is how water gets to drains. Perfectly flat roofs would pond and fail.
2. Settled unevenness over time: Buildings settle. Concrete cures and shifts. Twenty years after construction, most slabs have additional dips and high spots that were not there originally.
3. Drain locations that are not lowest points: Sometimes drains were placed where building design required, not where slope naturally takes water. This creates low spots that hold water.
4. Damage and repair: Past membrane repairs or patched spalling can leave the surface noticeably uneven.
What Does NOT Work for Leveling?
1. Re-pouring the slab: Extremely expensive, requires engineering, breaks the waterproof membrane, and is almost never approved in condo buildings. Avoid.
2. Self-leveling concrete over the slab: Adds weight to the roof, cracks in freeze-thaw, and often voids the waterproof membrane warranty. Not recommended for rooftop terraces in Canadian conditions.
3. Building a framed wood deck: Works, but requires structural fasteners (usually prohibited), adds significant weight, and is overkill for most rooftops.
4. Outdoor rugs: Do nothing for leveling and trap moisture that makes the unevenness worse over time.
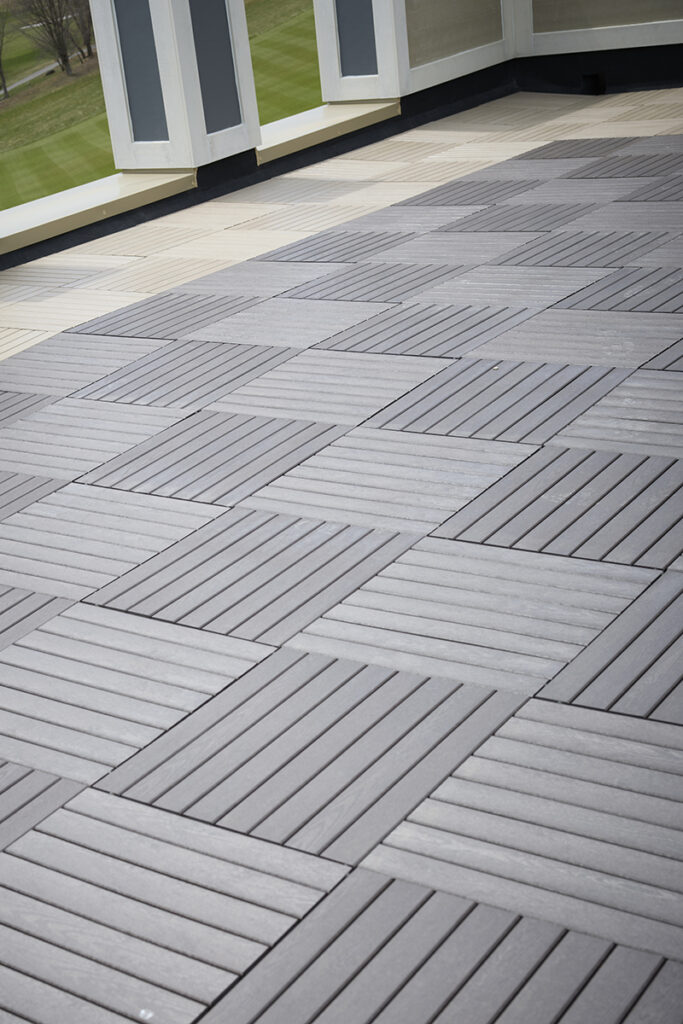
What Works — the Two Real Options?
Option 1: Adjustable pedestal paver systems. Each paver sits on an adjustable pedestal. Installers turn the pedestal to compensate for low spots, creating a perfectly flat walking surface several inches above the roof. This is the traditional solution for severely uneven commercial rooftops and high-end residential projects.
Downsides: expensive (premium price point), slow installation, heavy, and difficult to maintain.
Option 2: Contoured tile installation with integrated risers. Designer Deck tiles sit on integrated risers and are professionally contoured to the surface. Rather than fighting the slope, the tile installation follows it — delivering a stable, finished walking surface while preserving the original drainage direction.
Downsides: does not produce a perfectly flat surface (but delivers a comfortable one for foot traffic). Not suitable for extremely severe slope conditions.
For 90%+ of residential rooftops, this is the right answer. It is faster, cheaper, and more drainage-friendly than pedestal systems.
When Pedestals Are the Right Call?
- Slope exceeds 4% (very uncommon in residential rooftop terrace)
- Large ponding areas that persist more than 48 hours (fix these first, then install)
- Design requires significant elevation above the existing roof
- Commercial applications with specific engineering requirements
When Contoured Tile Installation is the Right Call?
- Residential condo terraces, penthouses, and townhome rooftops
- Any rooftop under approximately 1000 sq ft
- Any rooftop with normal residential slope
- Projects where budget and installation speed matter
- Projects where maintenance access to the membrane matters
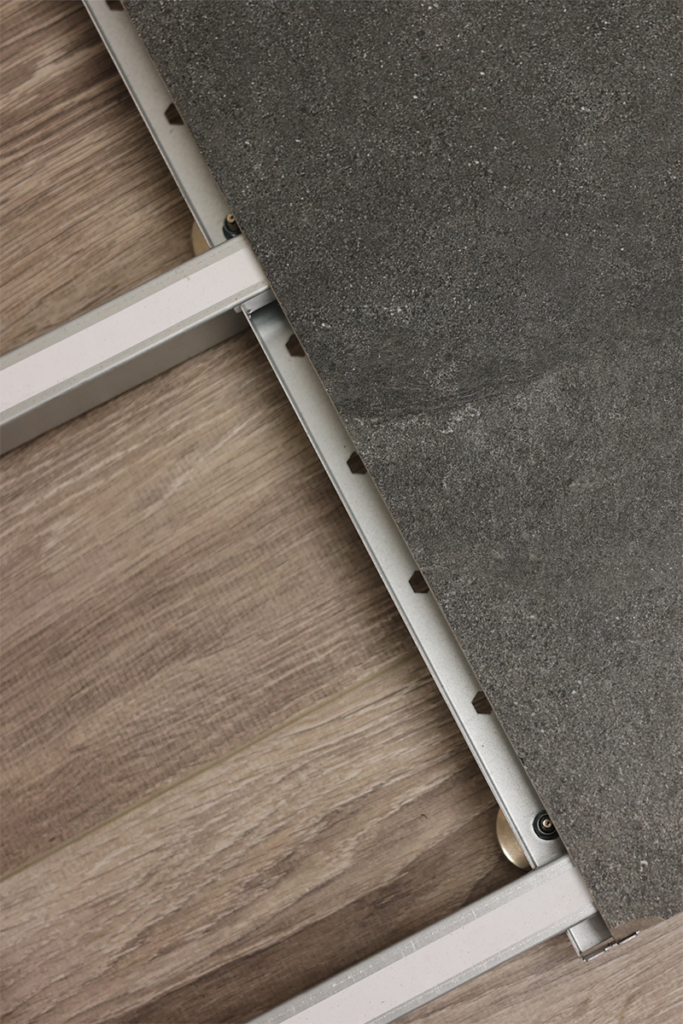
The Installation Process on an Uneven Rooftop Terrace
A quality installer walks the rooftop terrace first and identifies:
- The overall slope direction
- Any specific low spots or high spots
- Drain locations and active drainage paths
- Areas where additional support might help
Tiles are then laid following the natural slope, with supports or spacers added where needed to keep the walking surface feeling solid underfoot. The result is not a flat floor — it is a comfortable floor that drains correctly.
What You Get vs. What You Do Not Get
What you get:
- A stable, comfortable walking surface
- No more puddles on the surface
- Proper drainage to existing drains
- A finished, attractive rooftop
- Easy maintenance access
What you do not get (without pedestals):
- A perfectly flat, laser-level floor
- Significant elevation above the roof surface
For most owners, this trade-off is absolutely worth it. A comfortable, good-looking, well-draining rooftop that cost a fraction of what a pedestal system would have cost is usually the right answer.
Frequently Asked Questions
Ques: How much slope is too much for contoured tile installation?
Ans: Most residential rooftops (slope under 4%) work well with contoured installation. Severely sloped rooftops may need pedestals. We assess during the free consultation.
Ques: Can I make the surface more level with shims or spacers?
Ans: Professional installation includes targeted support where needed to keep the walking surface feeling solid. This is different from pedestal leveling — we are improving comfort, not creating a perfectly flat plane.
Ques: What if my rooftop terrace has a significant low spot that ponds?
Ans: Standing water underneath the tiles is a drainage problem, not a tile problem. Fix drainage first — usually a roofer’s work — then install tiles over the corrected surface.
Ques: Does contoured installation affect durability?
Ans: No. Tiles are designed to flex slightly with minor surface variation. Durability comes from material quality, not from being installed on a perfectly flat surface.
- Deck Tile Maintenance — A Year-Round Care Guide for Canadian Climates
Quality deck tiles are a relatively low-maintenance outdoor surface — but they are not no-maintenance. A little care at the right time of year keeps them looking new for decades and avoids the minor issues that become bigger over time.
Here is a season-by-season guide to caring for Designer Deck tiles in Canadian conditions, whether you have porcelain, WPC, recycled plastic, or natural wood.
Spring — the Most Important Cleaning of the Year
Winter leaves debris, road salt residue, and general grime on every outdoor surface. Spring is when you reset the tiles for the active months ahead.
What to do:
- Sweep thoroughly to remove debris, leaves, and dirt
- Wash with mild soap and water (dish soap in a bucket works)
- Rinse thoroughly with a hose or gentle pressure wash
- Check that all drainage paths are clear — leaves love to pile up at drains
- Inspect tiles for any winter damage
- Tighten or level any tile that has shifted
What to avoid:
- High-pressure washers on maximum setting (can damage finishes)
- Bleach or harsh solvents (not needed and can discolor)
- Wire brushes on porcelain or WPC (can scratch)
Designer Deck also offers professional annual cleaning and maintenance for clients who prefer to hand it off.
Summer — Keep It Simple
During the active summer use, maintenance is minimal. Sweep occasionally, hose off pollen and dust, wipe up spills promptly, and enjoy the space.
What to watch for:
- Bird droppings (rinse off quickly — the acid can etch some finishes if left for weeks)
- Planter drainage stains (put saucers under planters)
- BBQ grease splatter (wipe immediately)
- Wine or food stains on light-coloured porcelain (rinse promptly)
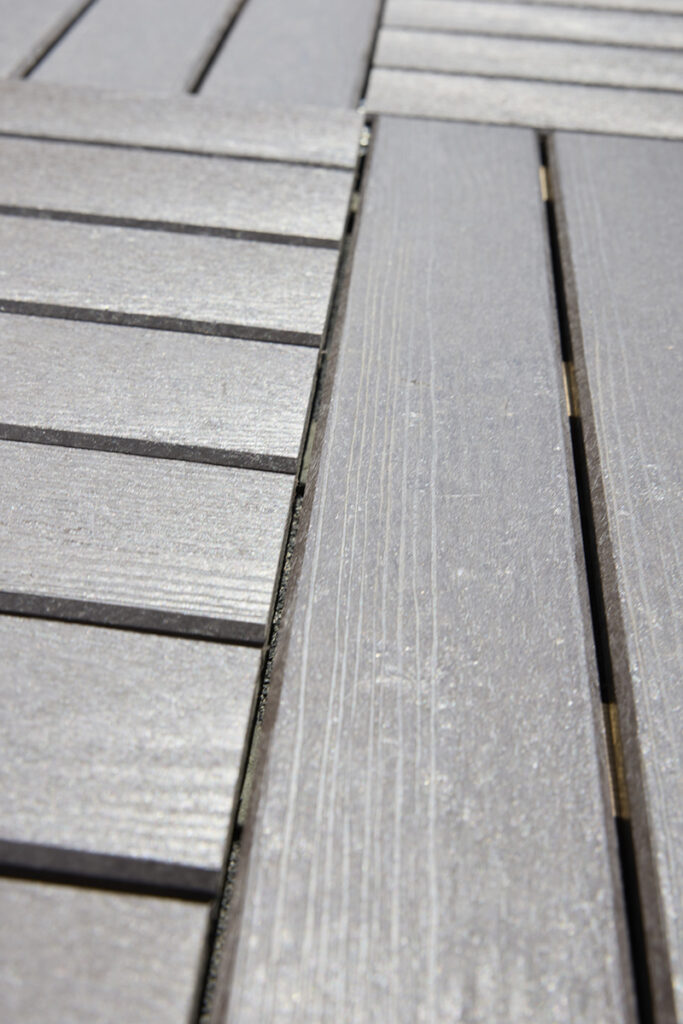
Fall — Prep for Winter
Fall is when you prep the space for the cold months. The goal is starting winter with clean tiles and clear drainage.
What to do:
- Sweep fallen leaves frequently — they stain light-coloured tiles and block drains
- Do a full wash before the first freeze
- Clear drainage channels completely
- Store or cover outdoor furniture cushions
- Move planters that cannot handle freezing
- Check for any tiles that need replacement — easier to address now than mid-winter
Winter — Less Than You Think
Winter care is minimal. Designer Deck tiles are engineered for Canadian conditions and can stay in place year-round.
Safe in winter:
- Let snow sit on the tiles if you do not need the space
- Use a plastic or rubber-edged shovel for heavy accumulation
- Pet-safe ice melt or standard calcium chloride is fine
Avoid in winter:
- Metal shovels (can scratch porcelain especially)
- Chipping at ice with sharp tools
- Large quantities of rock salt on natural wood tiles
- Gas-powered snow throwers (designed for driveways, not balconies)
Material-specific Care Notes
1. Porcelain: The lowest-maintenance of any deck tile. Sweep, rinse, done. Non-absorbent surface resists almost all stains. Only caution is impact from sharp or heavy dropped objects.
2. WPC: Low maintenance. Sweep and rinse. Mild soap for occasional deep cleaning. No staining, sealing, or oiling required — this is the main reason people choose WPC over real wood.
3. Recycled plastic: Lowest maintenance alongside porcelain. Mold-proof because there are no wood fibres. Rinses clean easily.
4. Natural wood (pressure-treated, cedar, Tantimber): Slightly more attention than the synthetics. Natural wood benefits from an annual wash and a wood protector every few years depending on exposure. Color will mellow over time (many owners love the silvery patina cedar develops). For restored colour, apply a cedar-specific sealer.
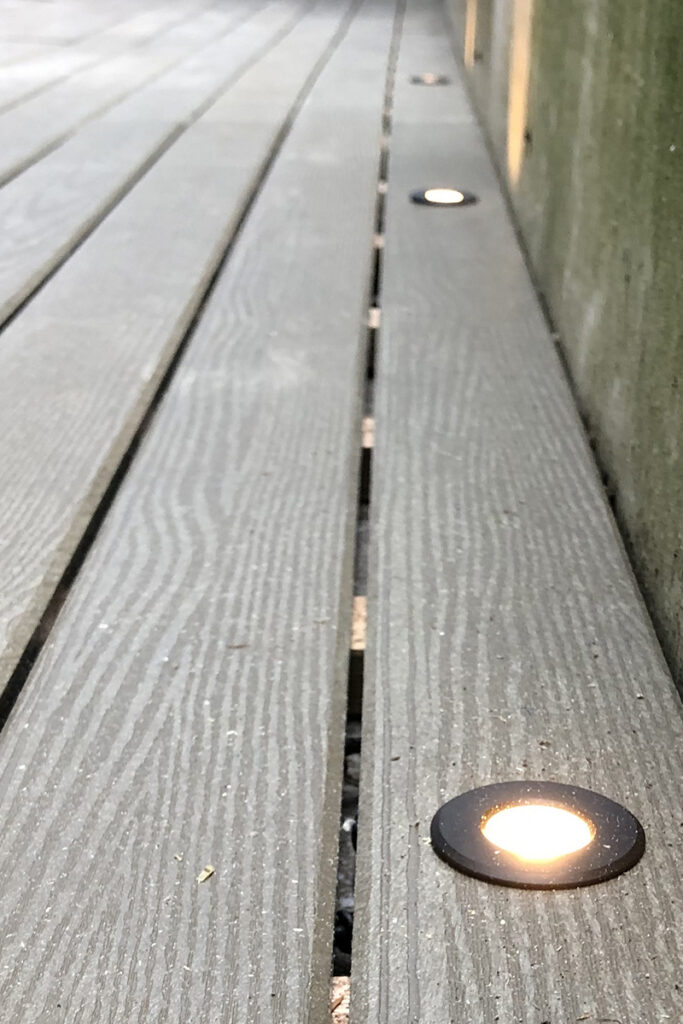
Common Maintenance Mistakes
1. Using pressure washers on maximum setting: Modern pressure washers can damage tile finishes if used too aggressively. Use a wide fan tip and moderate pressure, and keep the nozzle at least 12 inches from the surface.
2. Using bleach as a general cleaner: Bleach is rarely needed and can discolor some finishes over time. Dish soap and water handles almost everything.
3. Ignoring drainage: Clogged drains cause ponding above the tile surface, not underneath. Keep drains clear — especially in fall.
4. Dragging furniture across tiles: Lift furniture rather than dragging. This applies to any outdoor surface and is especially important for porcelain.
When to Call Professional Maintenance?
Designer Deck offers professional cleaning, maintenance, and winter storage services. Consider the professional option when:
- The rooftop is large and cleaning is a full-day job
- You have moved and need tiles lifted, stored, and reinstalled elsewhere
- Membrane work is needed underneath
- You want a professional inspection as part of the service
Frequently Asked Questions
Ques: How often should I deep-clean my deck tiles?
Ans: Once in spring and once in fall is enough for most installations. High-traffic or south-facing rooftops may benefit from an extra mid-summer cleaning.
Ques: Can I use a pressure washer on deck tiles?
Ans: Yes, with moderate pressure (around 1500 PSI) and a wide fan tip. Avoid maximum pressure and pinpoint nozzles.
Ques: Do deck tiles need sealing?
Ans: Porcelain, WPC, and recycled plastic do not need sealing. Natural wood tiles benefit from periodic sealing depending on the desired finish.
Ques: What do I do if a tile gets damaged?
Ans: Pop out the damaged tile and snap in a replacement. Designer Deck can supply matching replacement tiles for all active product lines.
-
 24Jul
24Jul
Hire a Designer Deck Pro: Complete Guide to Services, Process & Project Planning
Are you planning to upgrade your outdoor space but unsure where to start? With so many products to choose from, finding the right solution can… Read More →
-
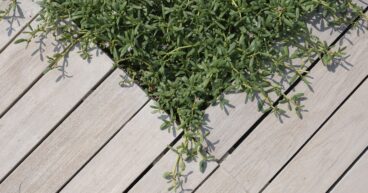 21Jul
21Jul
Recycled Plastic Narrow Board vs Wide Board: What’s the Difference?
Can a simple deck tile pattern completely transform your outdoor space? The answer may surprise you. More homeowners across Canada now invest in stylish balconies,… Read More →
-
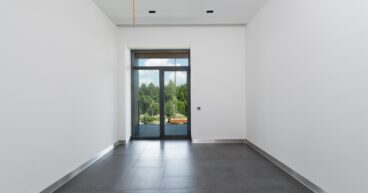 17Jul
17Jul
Top Porsets 2 Elevated Porcelain Tile Flooring Designs for Every Home
When architects and developers plan modern residential and commercial spaces, flooring becomes an important part of the design process. Tile Flooring choice affects how interior… Read More →
-
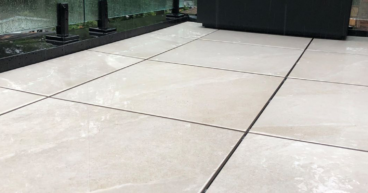 15Jul
15Jul
Deck Tile Warranty Explained — What is Covered and What is Not
Every deck tile product comes with a warranty. Most buyers never read it. That is usually fine — until something goes wrong and the claim… Read More →
-
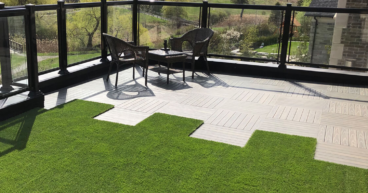 13Jul
13Jul
Rental Property Balcony Upgrades That Do Not Damage the Surface
Renting a condo in Toronto often comes with a concrete balcony that nobody wants to touch because nobody wants to lose their damage deposit. Landlords… Read More →
-
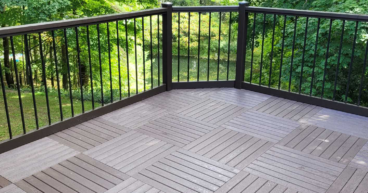 10Jul
10Jul
Eco-Friendly Deck Tiles — Sustainable Outdoor Flooring Options
Sustainable outdoor flooring is a category where marketing has outrun reality. Every product claims to be "green." Few actually are. If you care about what… Read More →
-
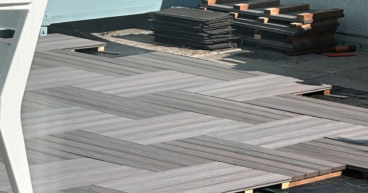 08Jul
08Jul
Townhome Rooftop Decks — Complete Design & Installation Guide
Stacked townhomes across the GTA increasingly come with rooftop decks — private terraces accessed from the top floor through a small bulkhead. On paper, this… Read More →
-
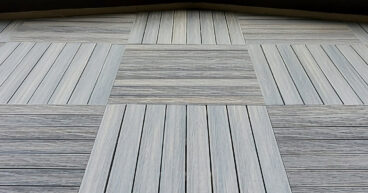 06Jul
06Jul
The Homeowner’s Guide to Cost-Effective Balcony Finishing
Finishing a concrete balcony or small deck is one of the highest-return home improvements you can make, because raw concrete reads as unfinished and a… Read More →
-
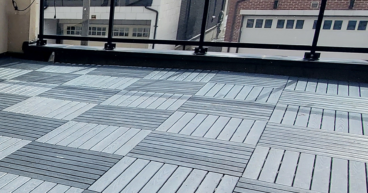 03Jul
03Jul
How to Level an Uneven Rooftop Terrace Without Major Construction
Almost every flat rooftop terrace in Toronto is not actually flat. By design, rooftops slope to drain — usually 2% or more — and over… Read More →
-
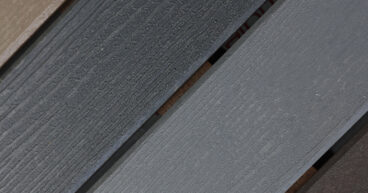 01Jul
01Jul
Deck Tile Maintenance — A Year-Round Care Guide for Canadian Climates
Quality deck tiles are a relatively low-maintenance outdoor surface — but they are not no-maintenance. A little care at the right time of year keeps… Read More →
-
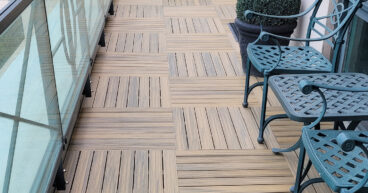 29Jun
29Jun
Pedestal-Free Rooftop Systems — Why Designer Deck Does Not Need Them
The rooftop paver industry has spent decades convincing consumers that you need adjustable plastic pedestals to finish a rooftop properly. For high-end large-format stone installations,… Read More →
-
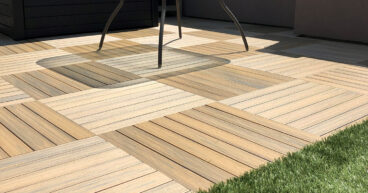 26Jun
26Jun
Rooftop Patio Ideas for Toronto Condos (With Real Projects)
Toronto condo rooftops are some of the most underused spaces in the city. Hundreds of buildings have private terraces, shared rooftops, and penthouse decks that… Read More →


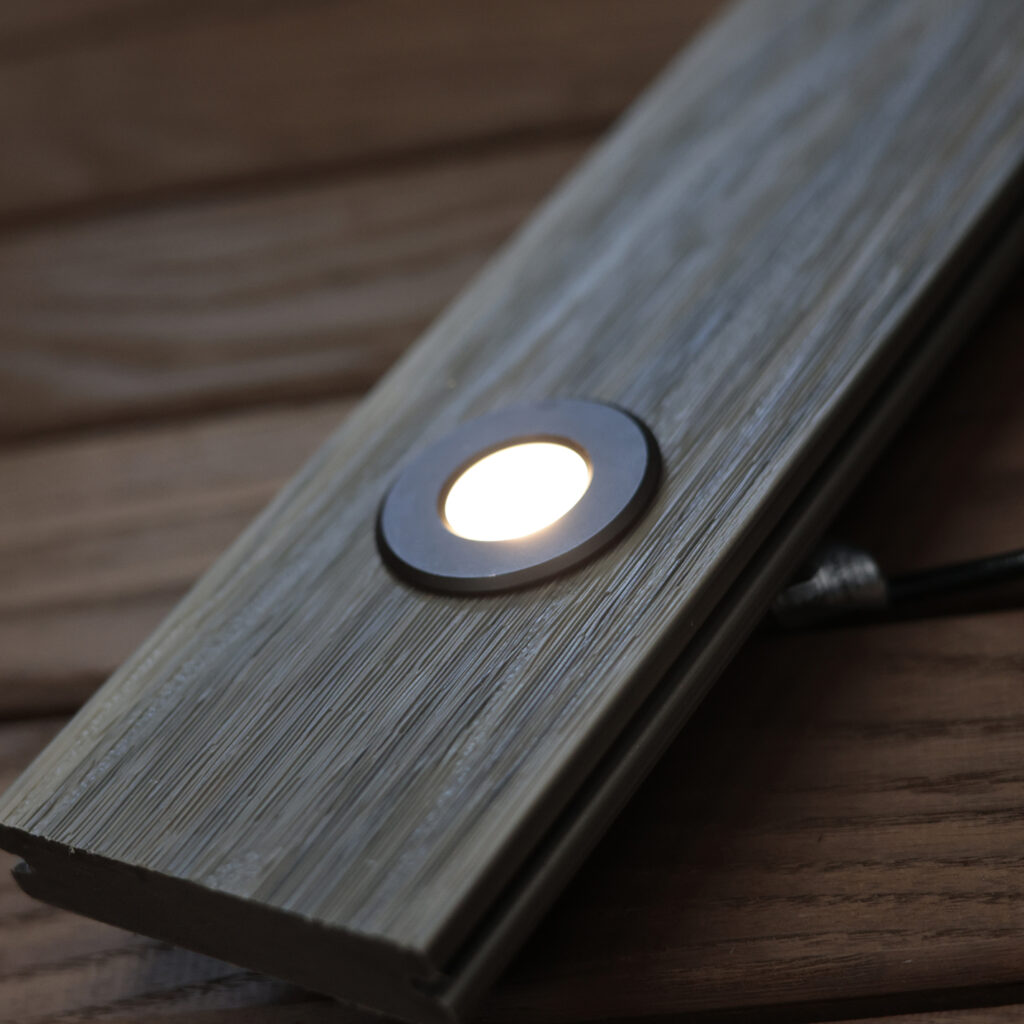
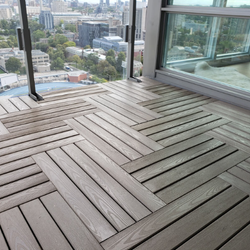
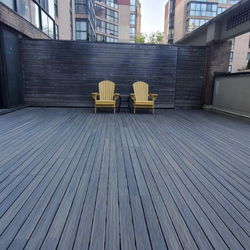
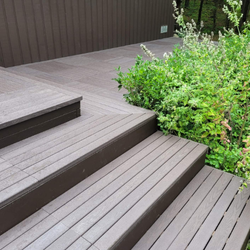
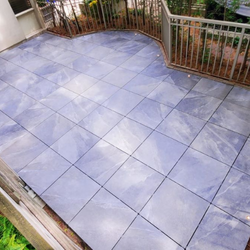
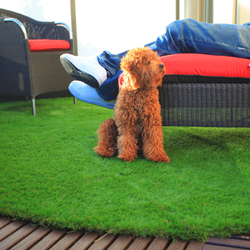
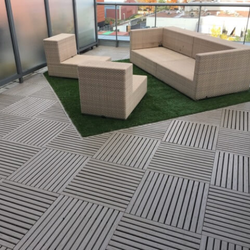


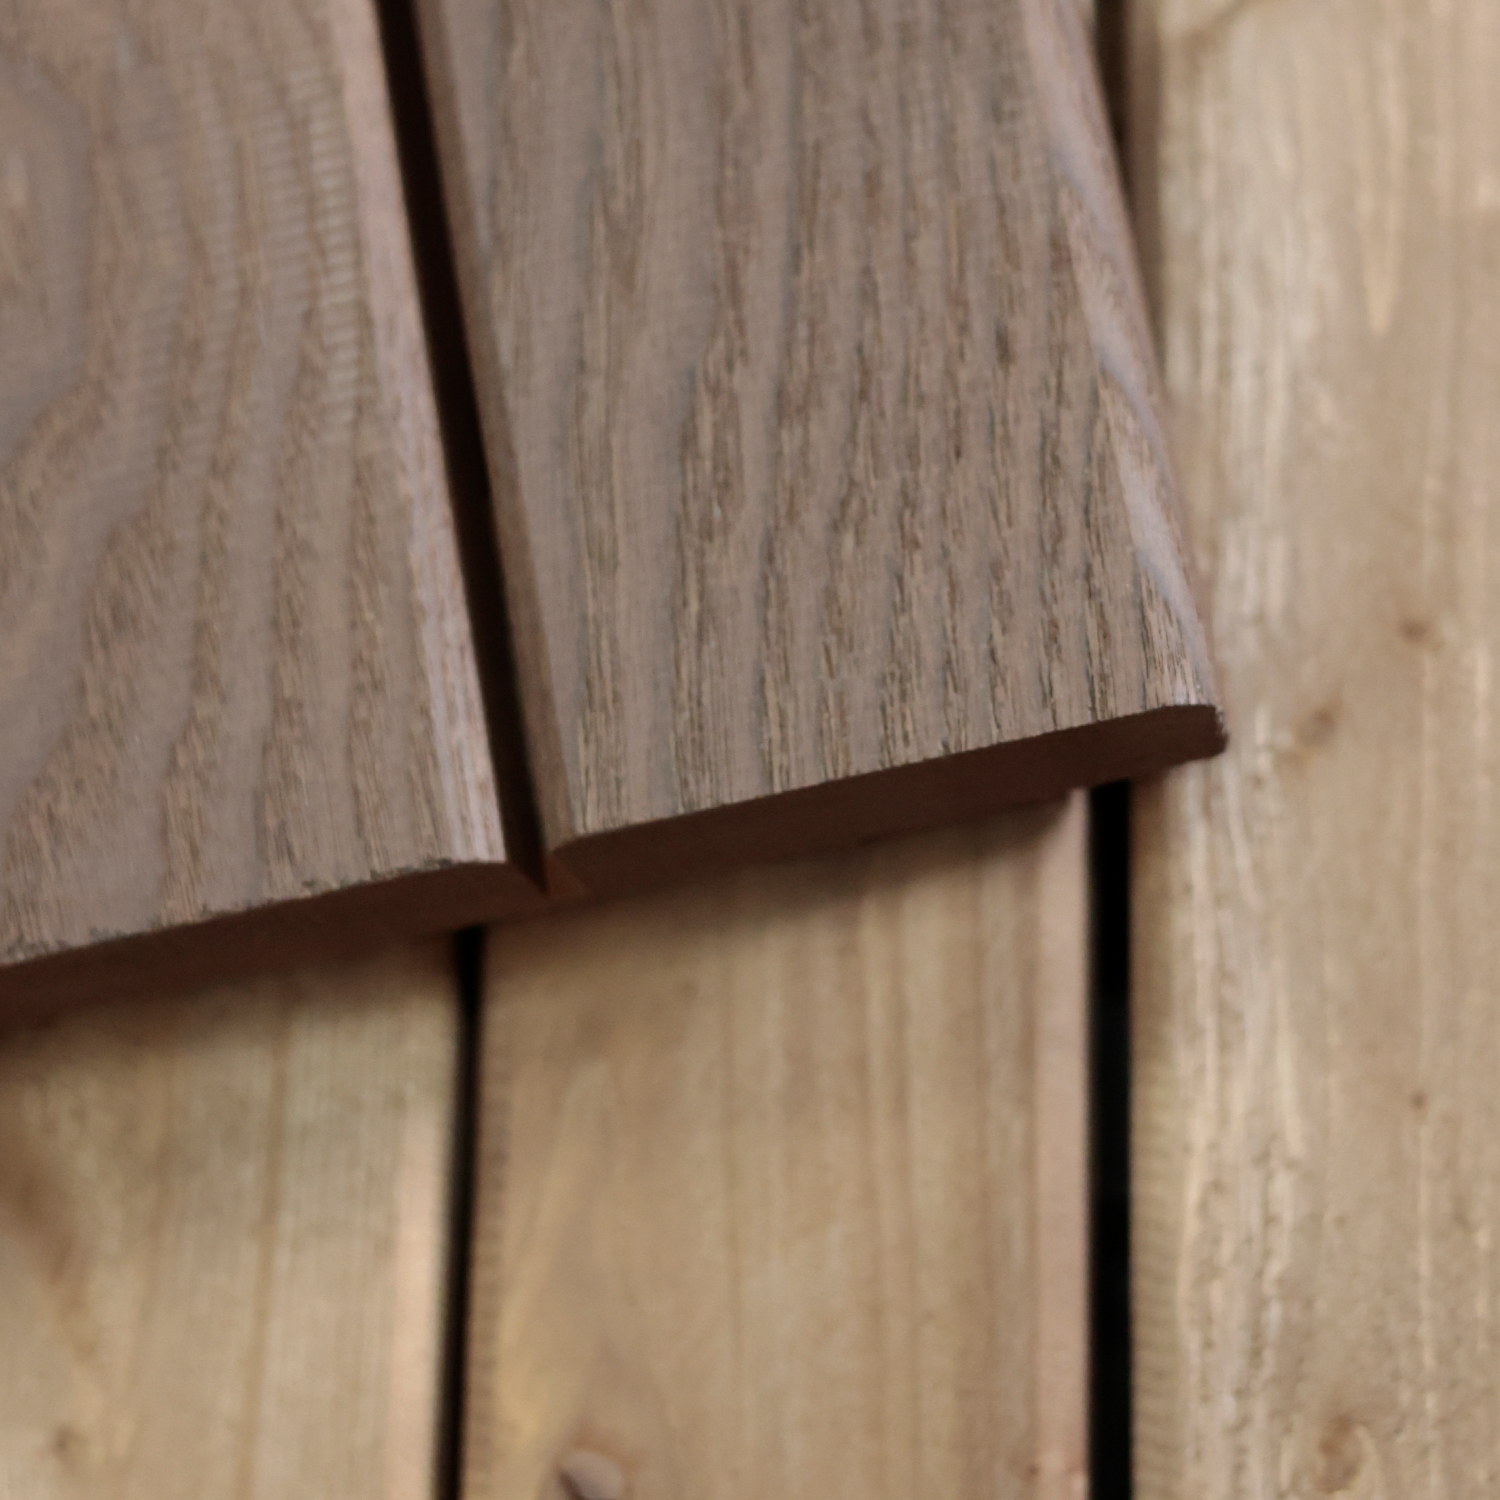
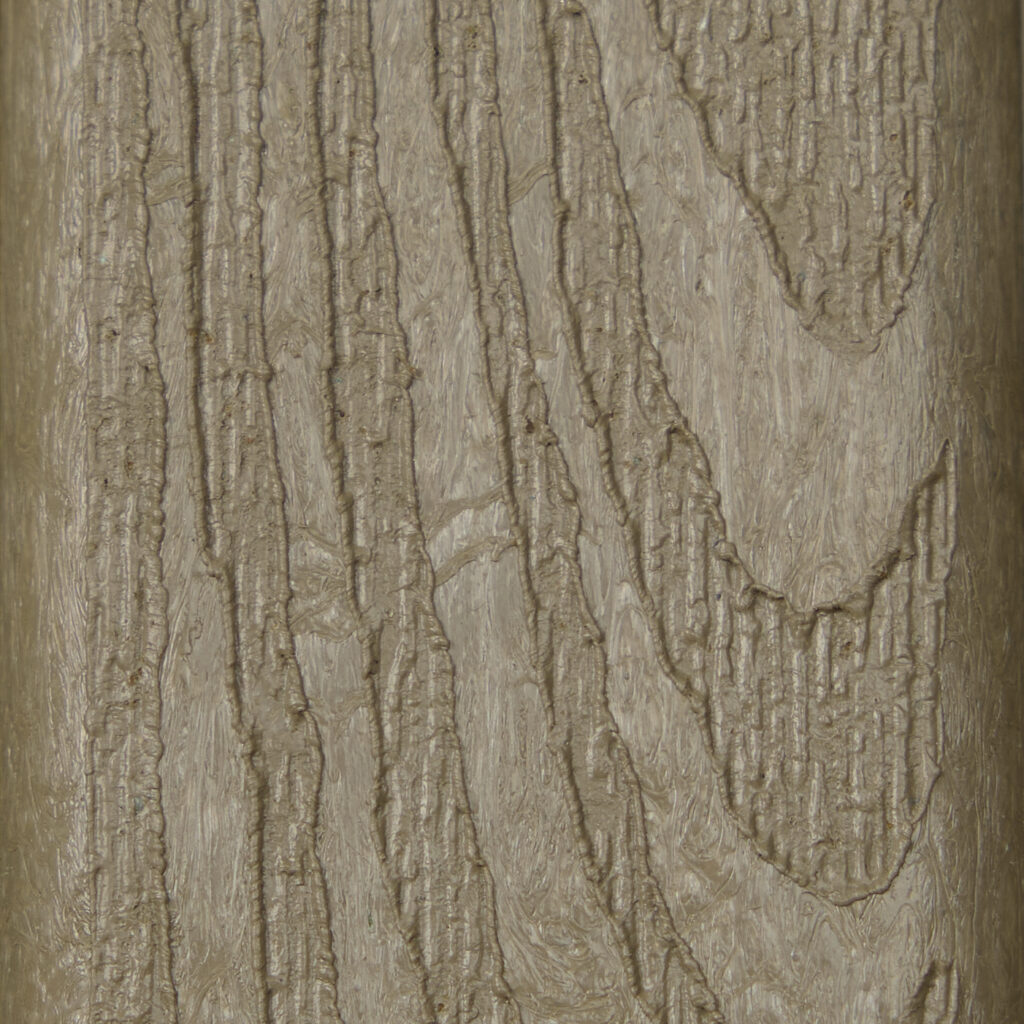
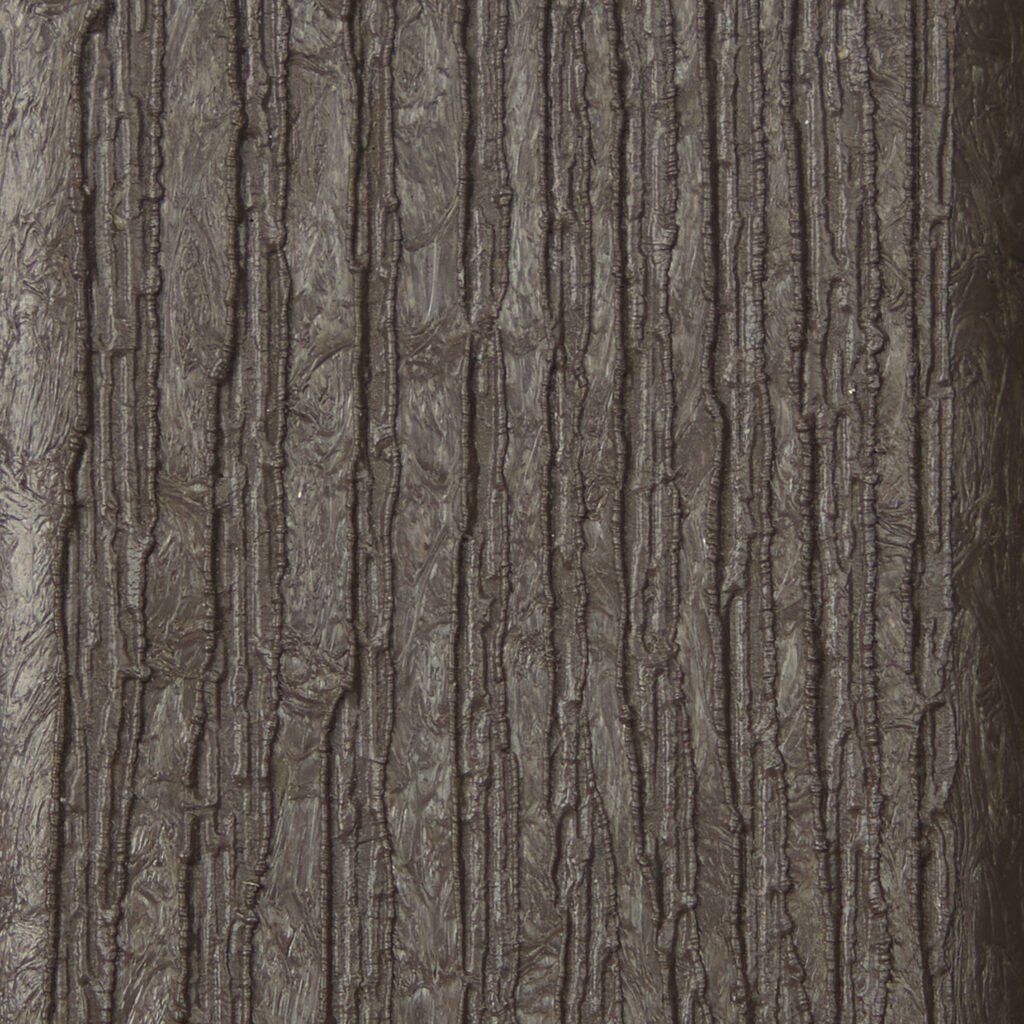
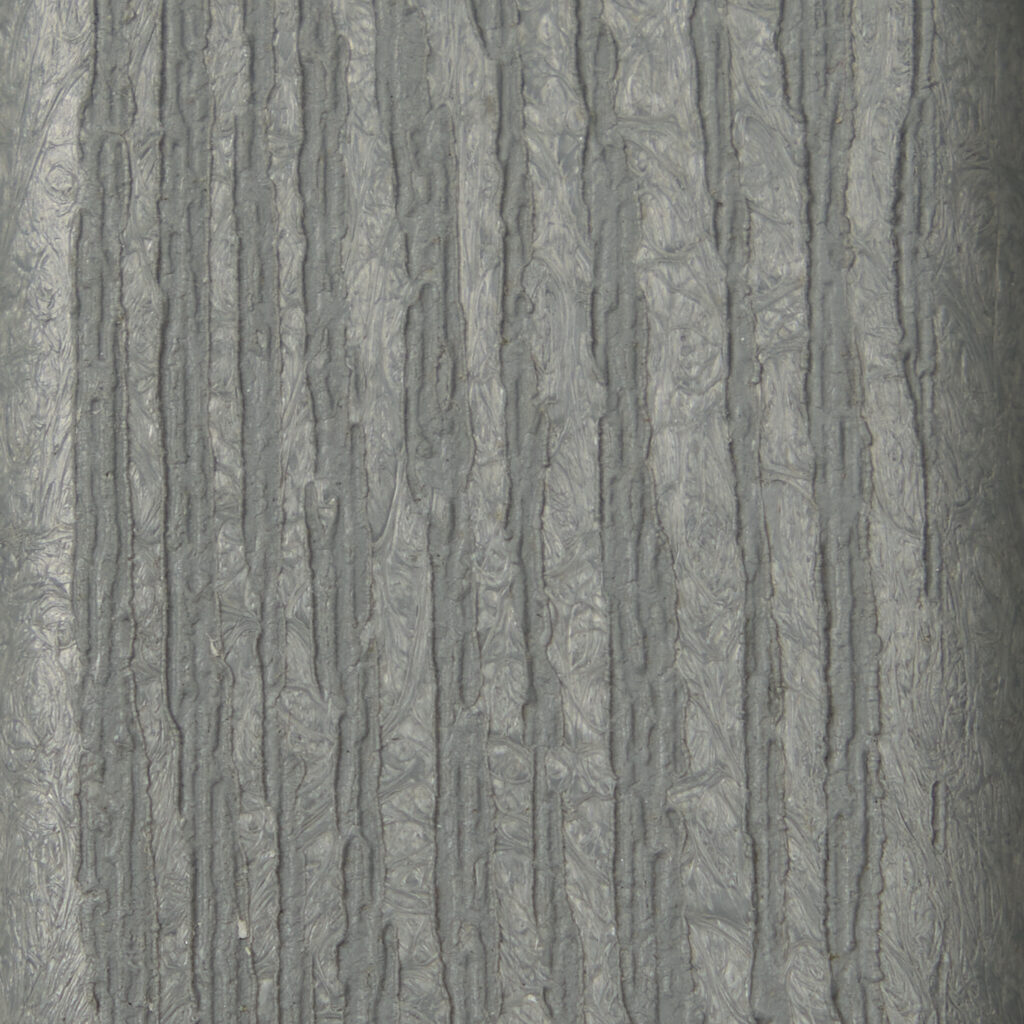
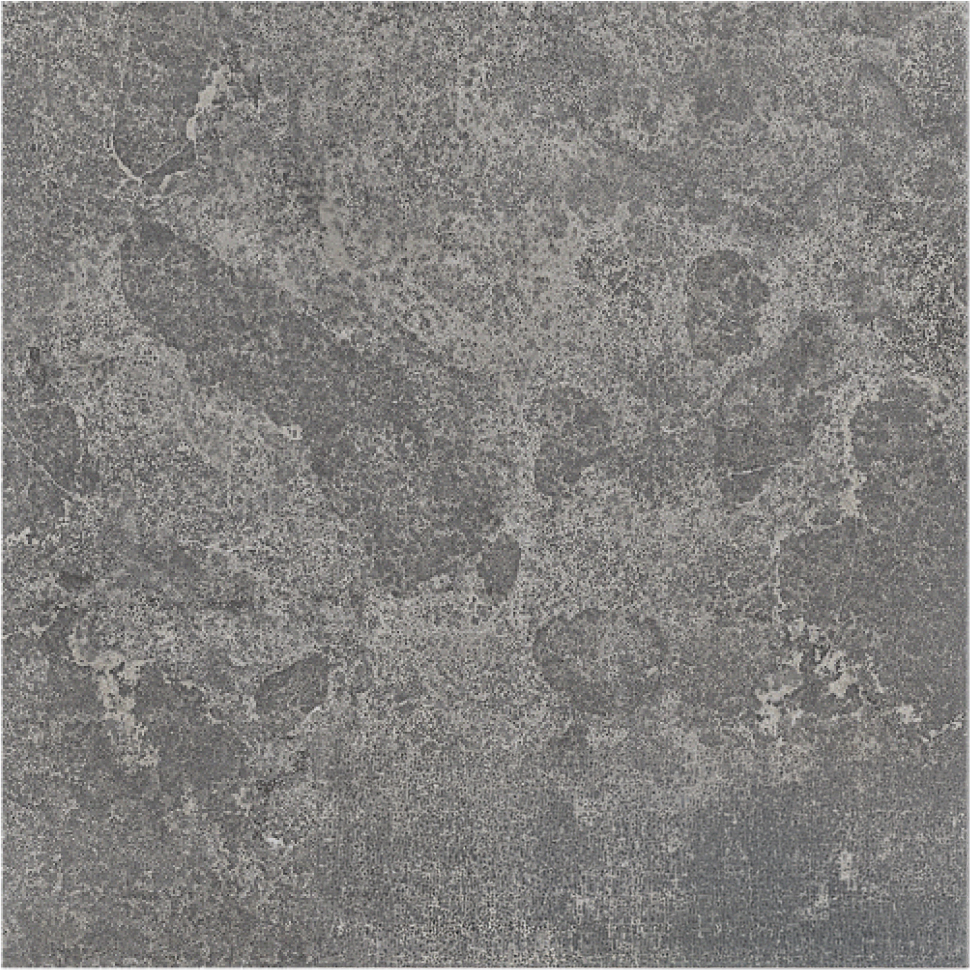
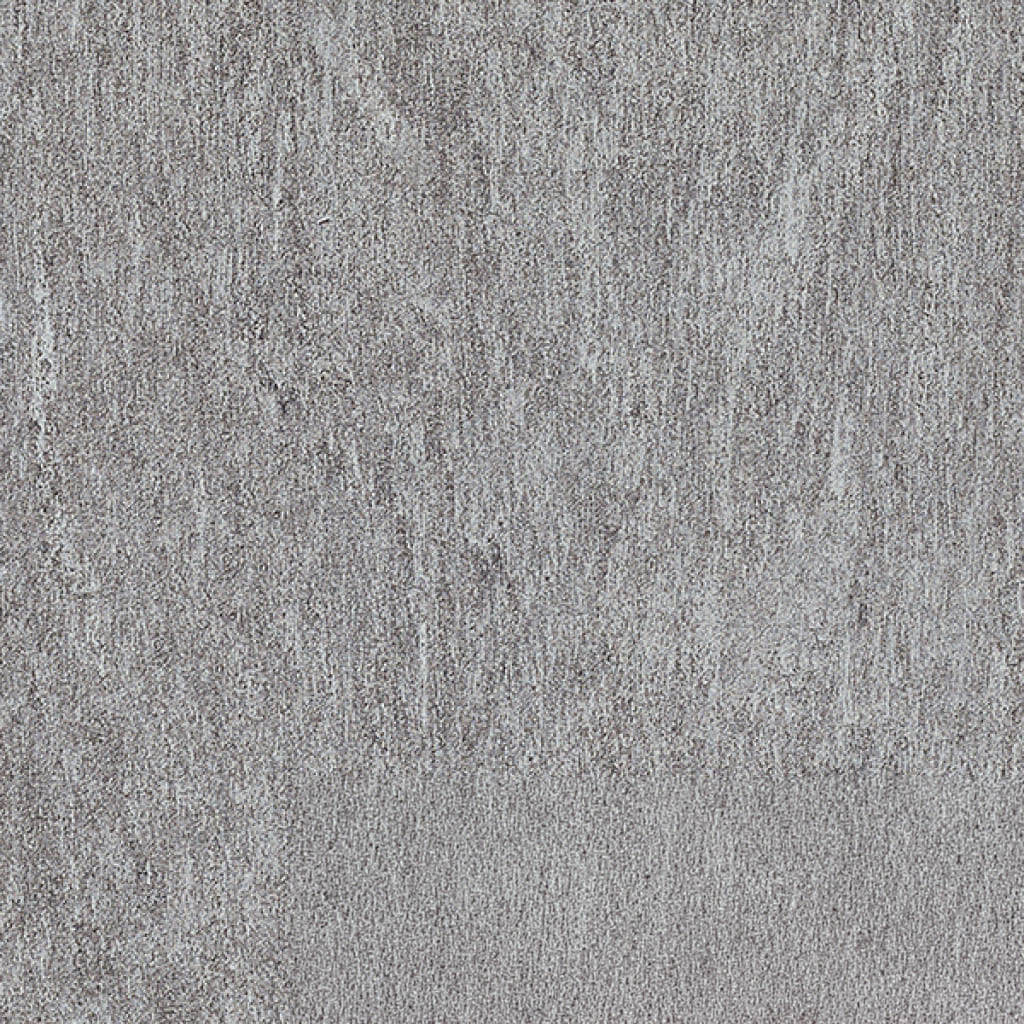
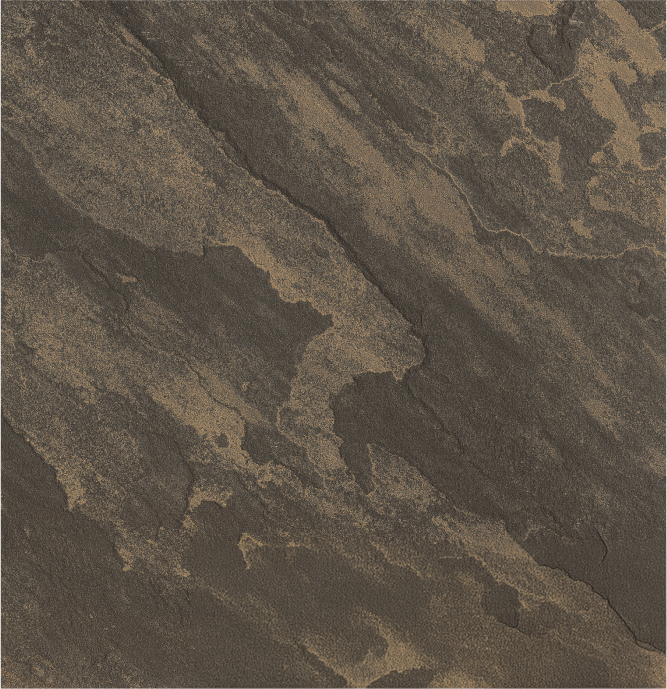
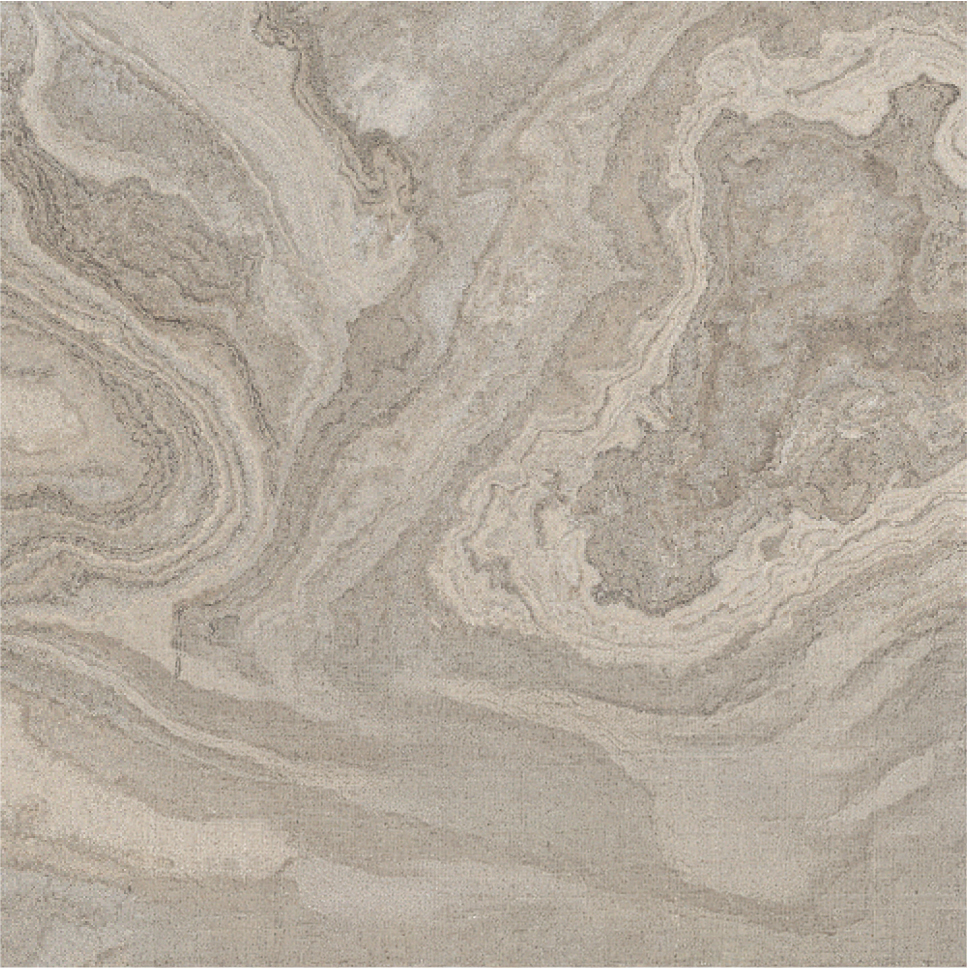
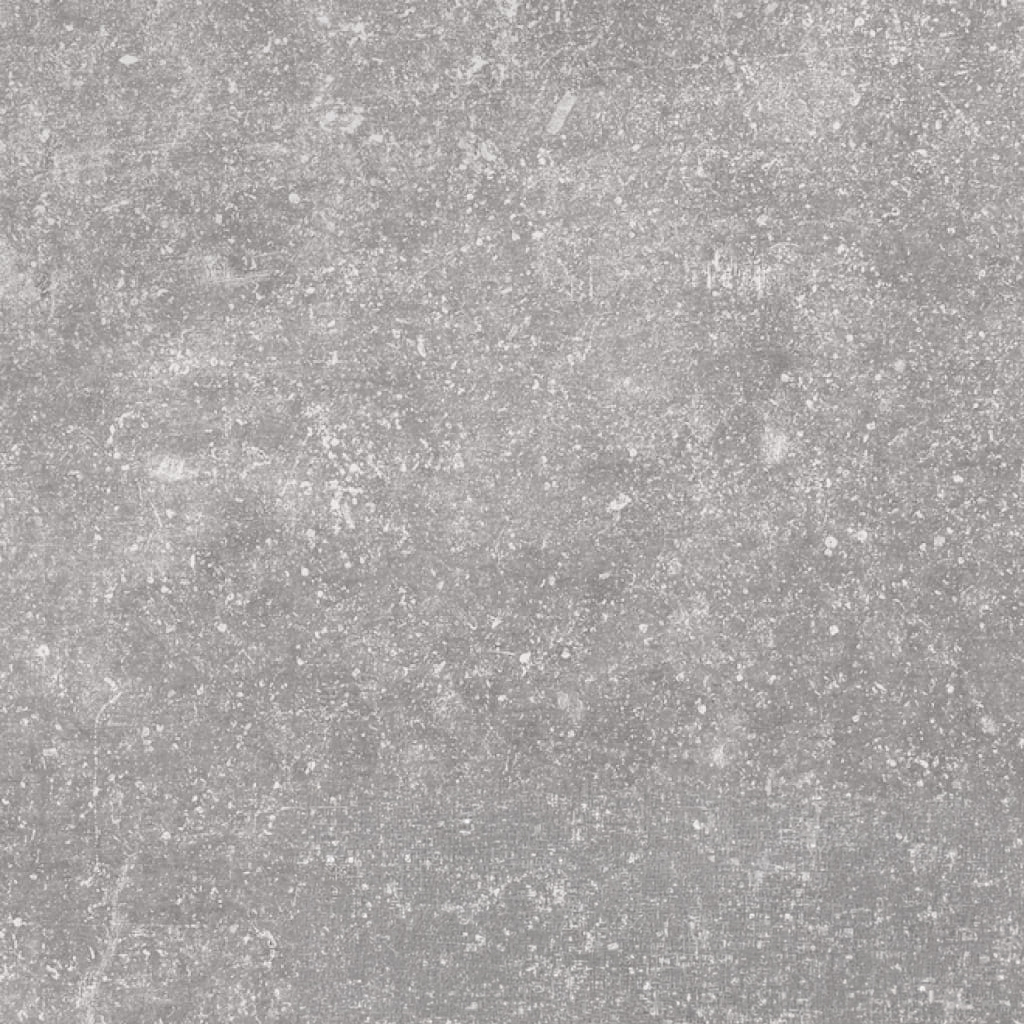
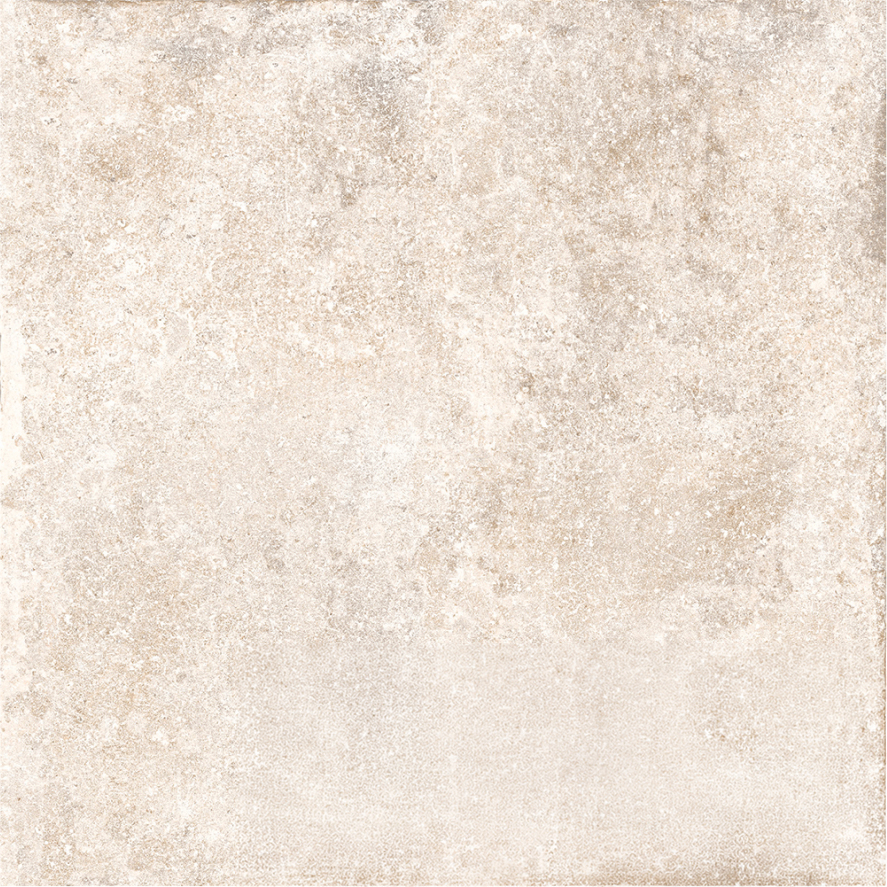
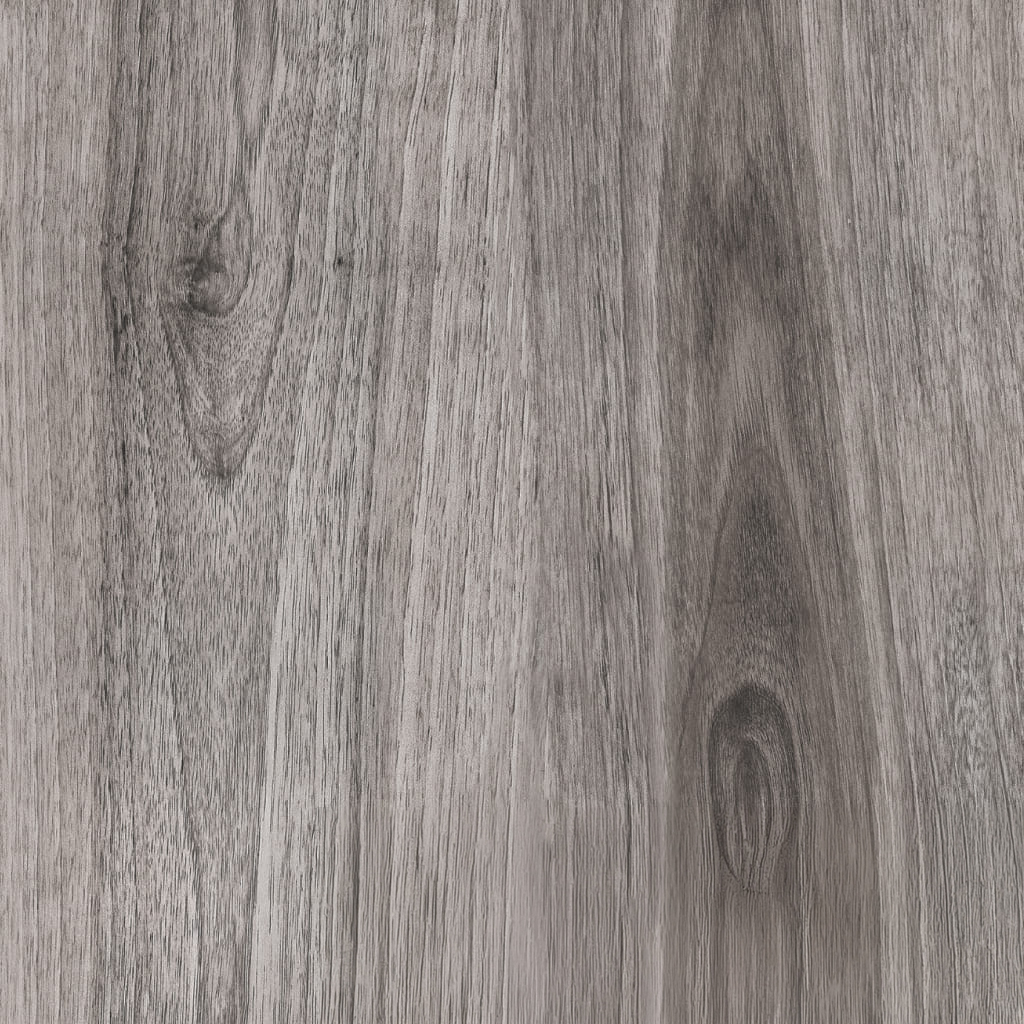
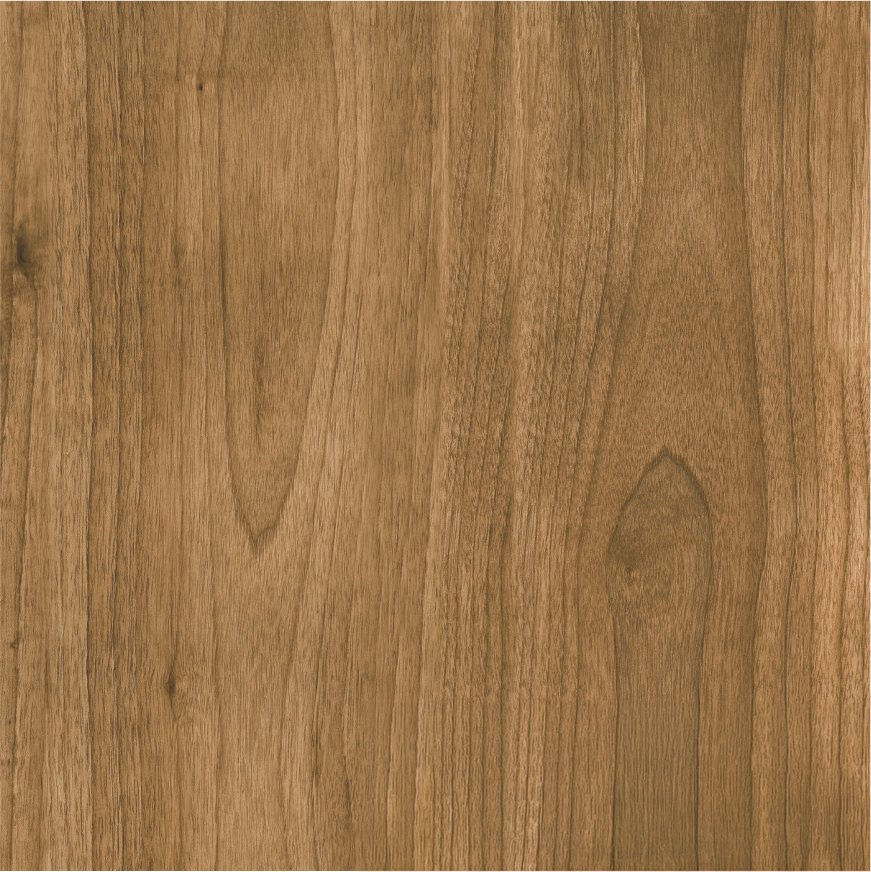
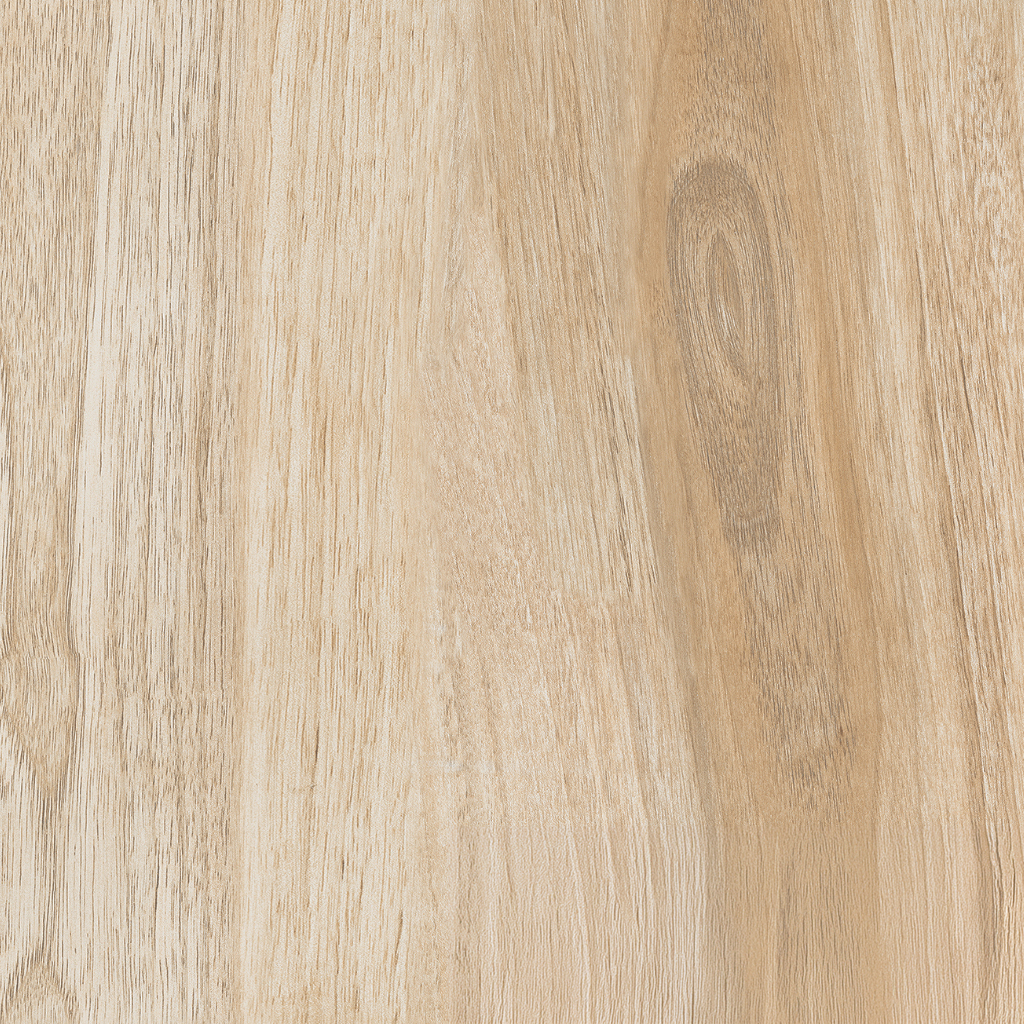
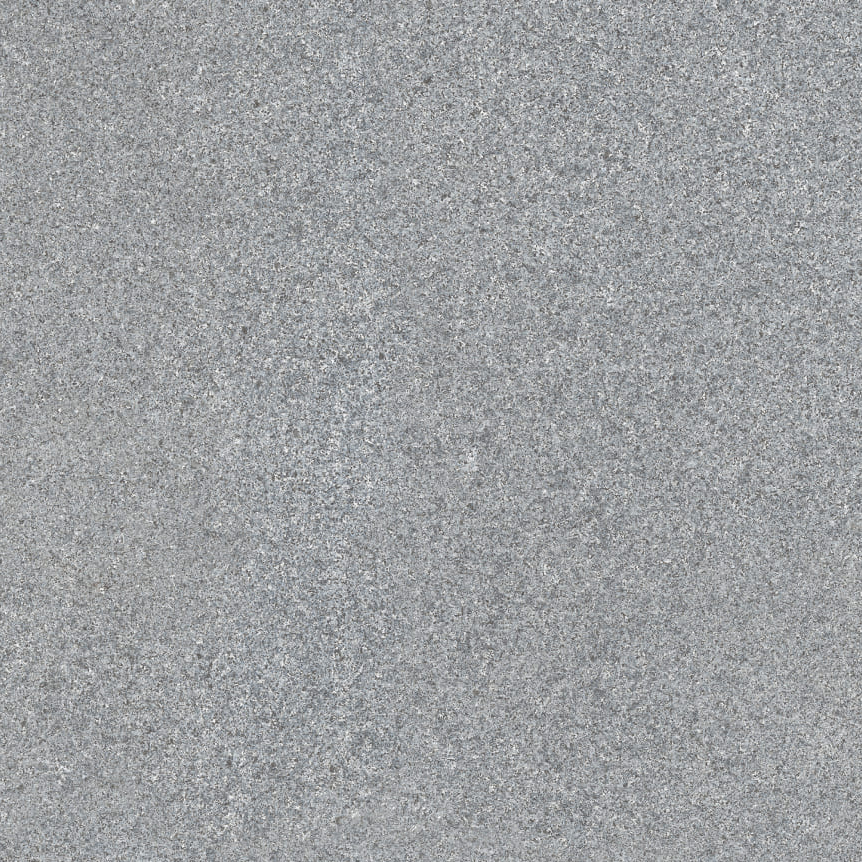
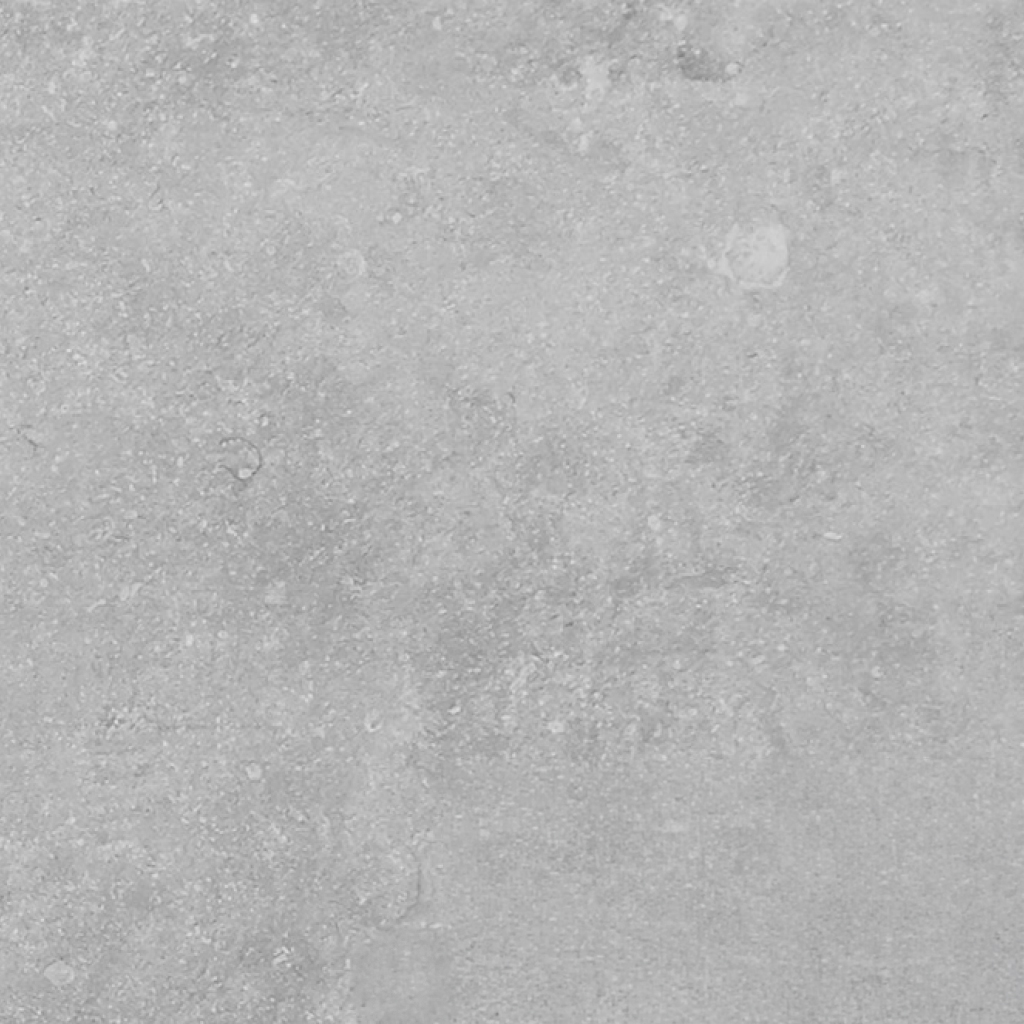
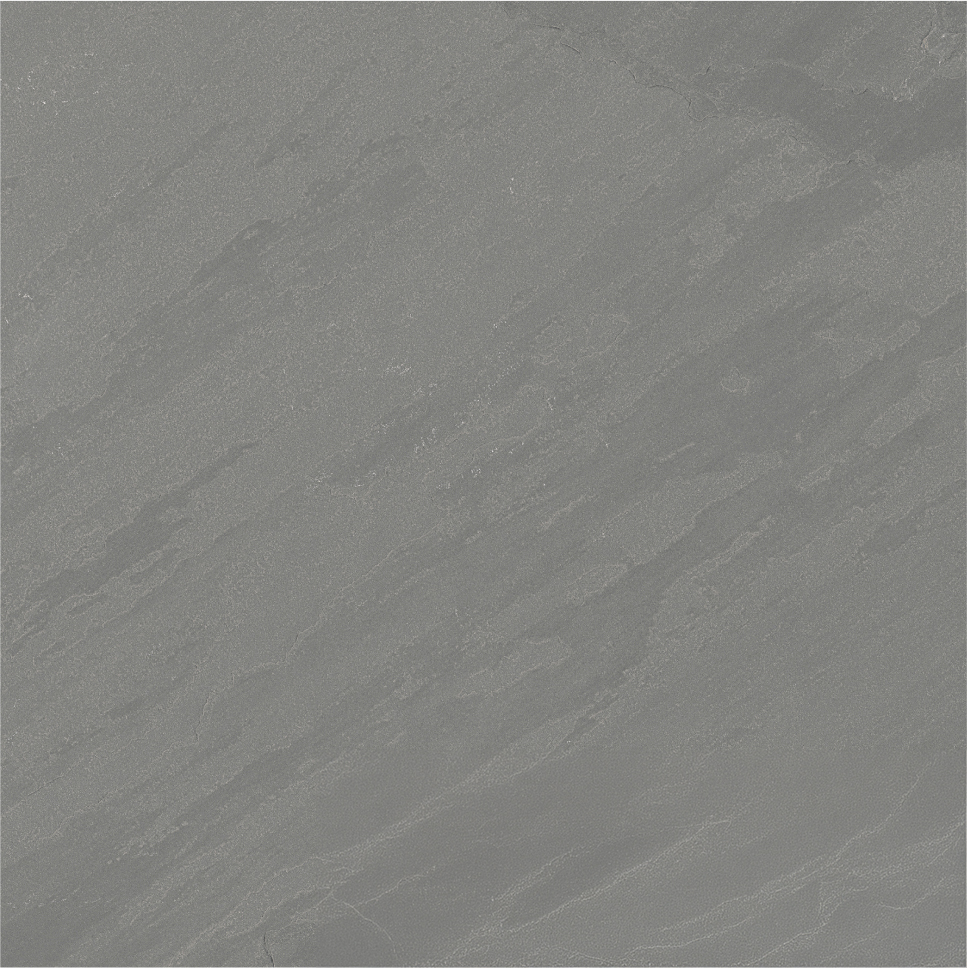
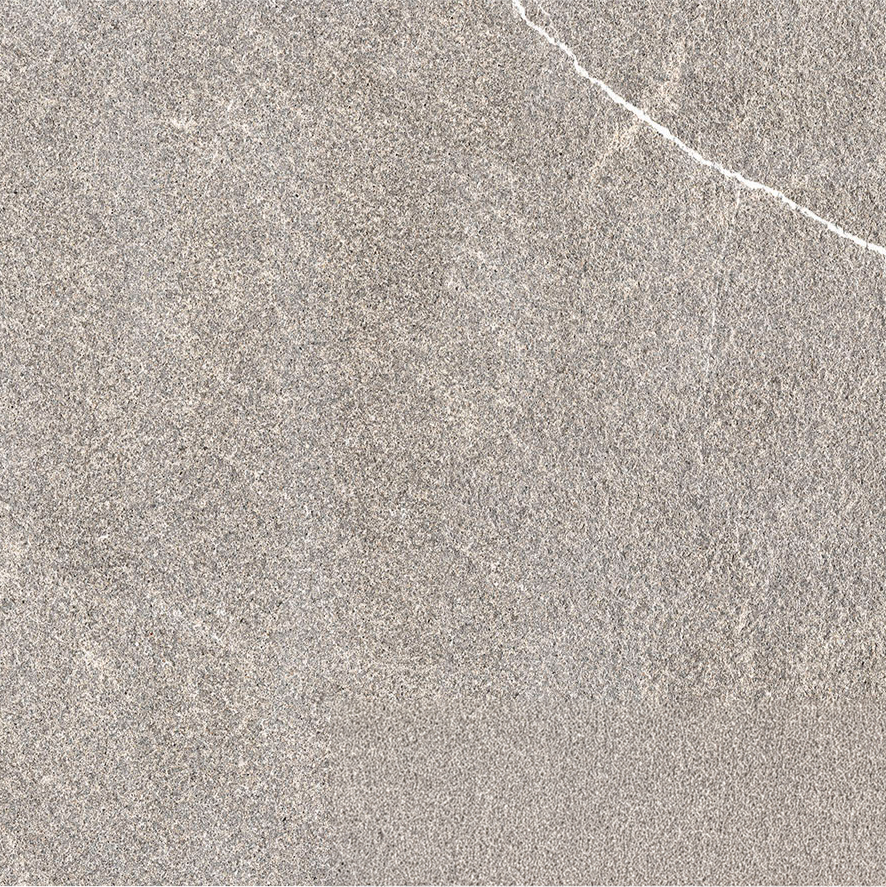
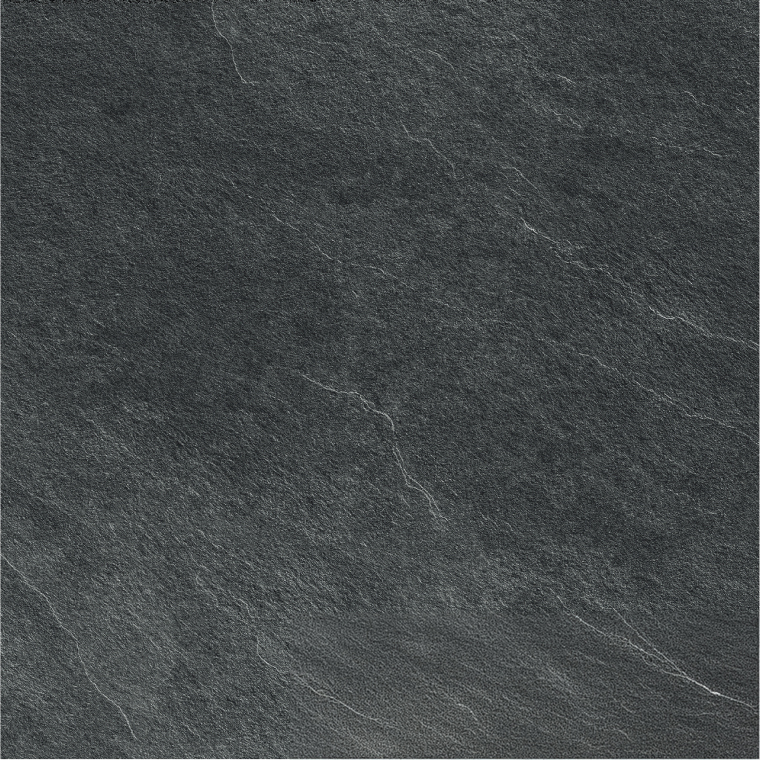
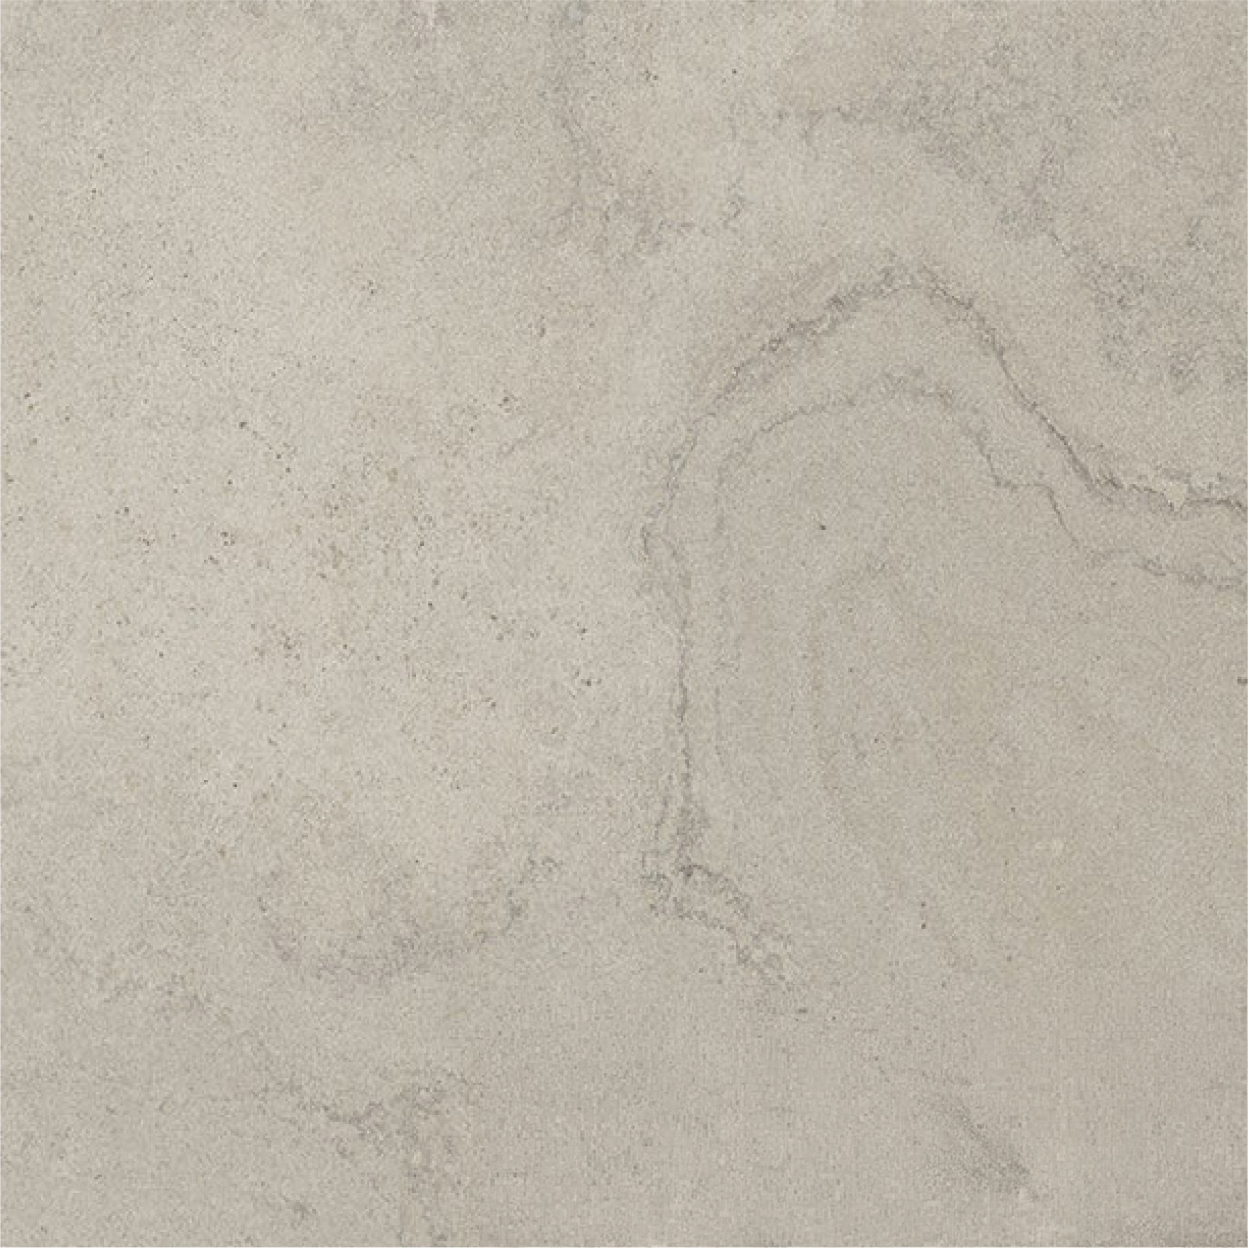