- The Property Manager’s Guide to Approving Balcony Modifications
Every property manager in Ontario deals with the same request on a regular basis: a resident wants to modify their balcony. Sometimes it’s a planter box, sometimes it’s a barbecue, sometimes it’s outdoor flooring. Some requests are simple to approve. Others create real building-envelope risk.
This guide walks through what property managers should approve, what should be declined, and how to structure an approval process that protects the building without unnecessarily blocking reasonable requests.
The Three Questions to Ask About Any Balcony Modification
Before approving any balcony modification, ask three questions. First: does it penetrate the slab or membrane? If yes, decline. Second: is it fully removable without residue or damage? If no, decline. Third: does it add unreasonable weight or drainage obstruction? If yes, request an engineer’s assessment.
Applying these three filters consistently eliminates 90% of the risk associated with balcony modifications. Anything that passes all three tests is generally safe to approve.
What’s Typically Safe to Approve
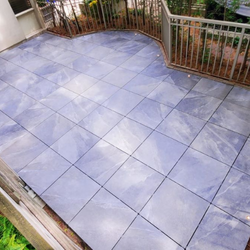
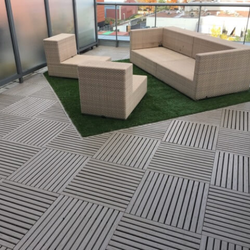
Interlocking deck tiles that sit on the slab without fasteners (like Designer Deck’s Vivid, Contour, and Opulent lines) — safe to approve. Standard planter boxes with drainage saucers — safe to approve. Freestanding furniture, umbrellas, and lighting — safe to approve. Barbecues (subject to any building-specific fire safety rules) — usually safe to approve.
For consistency, some condo corporations maintain a pre-approved product list. Designer Deck is an ACMO Associate Member, which makes it easy to add their product line to this kind of standardized approval list with proper documentation.
What Should Generally Be Declined
Anything requiring fasteners into the slab or membrane — decline. Anything requiring adhesives — decline. Structural additions (pergolas, screens, walls) without engineered plans — decline pending engineering review. Modifications that block existing drainage — decline. Anything that could damage the building envelope or exterior finish — decline.
Being consistent about declines protects both the corporation and the individual owners. Precedent matters: approving something risky for one unit makes it harder to decline the same request from another unit later.
Frequently Asked Questions
Ques: Do owners need condo board approval for outdoor flooring?
Ans: In most Ontario condo corporations, owners need approval for any balcony modification. Products that are non-penetrating and fully removable (like Designer Deck) are typically approved quickly, sometimes under a standing pre-approval list.
Ques: What documentation should we require from suppliers?
Ans: Require product specifications, installation method documentation, warranty information, and evidence that the product does not require fasteners or adhesives. As an ACMO Associate Member, Designer Deck provides standardized documentation packages.
Ques: How can property managers reduce the volume of alteration requests?
Ans: Publishing a standing pre-approval list for common items (like Designer Deck interlocking tiles) eliminates most one-off requests and reduces admin workload.
- Volume Ordering Deck Tiles — Pricing, Delivery, and Timeline Guide for Builders
Volume ordering is where Designer Deck’s builder program really pays off. Volume-based pricing, scheduled deliveries, and predictable supply chain mean the flooring never becomes the bottleneck in your construction schedule.
Here’s what to know about the volume ordering process — pricing structures, delivery scheduling, and how to coordinate large orders across multi-phase builds.
Volume Pricing Tiers
Designer Deck offers three volume pricing tiers based on order size: small (5,000–10,000 sq ft), mid (10,000–20,000 sq ft), and large (20,000+ sq ft). Each tier unlocks progressively better per-square-foot pricing.
Rather than a fixed annual commitment threshold, pricing is applied on a project-by-project basis with volume determining the tier. For repeat builder customers, historical volume is factored into pricing conversations. Contact our team for a project-specific quote.
Delivery Scheduling
Delivery timing is one of the biggest advantages of Canadian-made product. Because Designer Deck manufactures locally in Concord, Ontario, deliveries can be scheduled in phases that align with your construction sequence — no need to receive all product at once and manage on-site storage for months.
Standard delivery lead time from confirmed order is 3 to 5 weeks. Custom colours or non-standard sizes typically run 1 to 3 weeks. There is no additional peak-season delay — production capacity handles GTA construction volume year-round.
Coordinating With Your Construction Sequence
The best time to install deck tiles is after concrete slab work is complete and cured, and before final walkthroughs. Most builders schedule deck tile installation in the final 4 to 6 weeks before occupancy — installation crews typically complete 1 to 4 balconies per day, with a 300 sq ft rooftop finished in a single day.
Designer Deck’s project coordinators work directly with builder site supervisors to time deliveries and coordinate installation crews. For volume builds, this operational support is included.
Frequently Asked Questions
Ques: What’s the minimum order for builder pricing?
Ans: Volume-based pricing starts at 5,000 sq ft per order. Below that threshold, projects are quoted at standard pricing. Contact our team for a specific project quote.
Ques: How far in advance should we order?
Ans:Order at least 4 to 6 weeks before your target installation date, or 6 to 8 weeks for custom colours and sizes. Because there’s no peak-season lead time increase, this timing holds year-round.
Ques: Do you offer just-in-time delivery for multi-phase builds?
Ans: Yes. Designer Deck coordinates phased deliveries to match your construction sequence, which reduces on-site storage requirements and simplifies project logistics.
- Tarion Compliance and Outdoor Flooring — What Ontario Builders Need to Know
Tarion compliance and outdoor flooring warranty program is one of the defining features of the Ontario new-home construction industry. It’s also one of the most misunderstood areas when it comes to outdoor flooring. Balconies, decks, and rooftop terraces sit at an intersection of Tarion coverage, manufacturer warranty, and homeowner maintenance responsibility.
This guide clarifies how Tarion applies to deck tile installations in new home builds — what’s covered, for how long, and what falls outside coverage.
First-year Comprehensive Coverage
Tarion’s first-year warranty covers defects in materials and workmanship. For deck tile installations, this typically means the tiles themselves and the installation quality are both covered — as long as the manufacturer’s installation specifications were followed.
Documentation is critical here. Keep records of the product used, installation method, and any manufacturer certifications for your installation crew. If a warranty claim arises in year one, this documentation is what determines whether Tarion coverage applies or whether the homeowner needs to pursue the manufacturer directly.
Two-year Electrical, Plumbing, and Building Envelope Coverage
The two-year Tarion warranty is where outdoor flooring gets interesting. If a deck tile installation was improperly installed and causes damage to the building envelope (like membrane damage on a rooftop terrace), that’s a two-year Tarion issue.
This is why deck tile installations on membrane rooftops need to use elevated systems (like Designer Deck’s Porsets porcelain on built-in micro-adjustable pedestals) that don’t penetrate or damage the membrane. Any product installed with fasteners into a rooftop membrane creates a two-year Tarion exposure that builders should avoid.
Seven-year Major Structural Warranty
The seven-year structural warranty rarely applies to deck tile installations directly, but it can apply if outdoor flooring installation caused structural damage. This is another argument for non-penetrating, floating installations like Designer Deck’s system — they eliminate the risk of long-term structural exposure entirely.
For builders, the safest approach is to specify deck tile products that are explicitly designed for non-invasive installation on residential slabs and membrane rooftops. Designer Deck has been the choice for Ontario builders for over 40 years partly because of exactly this compatibility with Tarion coverage frameworks.
Frequently Asked Questions
Ques: Are deck tiles covered under Tarion warranty?
Ans: Yes, for the first year deck tiles are covered as part of the general workmanship warranty. Longer coverage depends on whether the installation affects the building envelope or structure.
Ques: What happens if a homeowner damages the deck tiles?
Ans: Homeowner-caused damage is not covered under Tarion or manufacturer warranty. Providing clear care and use instructions at closing helps prevent this — including avoiding rock salt (which leaves residue) and using pet-safe cleaners.
Ques: Do we need Tarion approval to install deck tiles in new builds?
Ans: No specific Tarion approval is required for deck tiles, but you must follow the manufacturer’s specifications to maintain warranty compliance.
- How Ontario Builders Are Cutting Balcony Finishing Costs by 40%
Traditional balcony finishing methods — framed wood decks, pedestal paver systems, poured concrete overlays — carry material costs, labour costs, and timeline costs that compound across hundreds of units. For volume builders, even small per-unit savings translate into significant project economics.
Interlocking deck tiles have quietly become the choice for cost-conscious Ontario builders. Here’s how Designer Deck is delivering the same visual result for up to 40% less than the alternatives.
Labour Cost Reduction
Traditional wood decking requires framing carpenters, deck builders, and finish crews working over several days per unit. Pedestal paver systems require specialized installers and precise levelling. Designer Deck interlocking tiles install in a single afternoon per balcony by a small crew — no specialized certification required.
For a builder finishing 200 balcony units on a project, the labour savings alone can reach six figures. And because installation is faster — typically 1 to 4 small balconies per day per crew — the overall project timeline compresses meaningfully.
Material Cost Reduction
Designer Deck tiles ship on skids, install without adhesives or fasteners, and require no substrate preparation beyond a clean concrete slab. Compare that to wood decking (framing lumber, joists, decking boards, fasteners, sealer) or pedestal pavers (pedestals, pavers, spacers, adjustable feet) and the material simplification is dramatic.
All Designer Deck product is Canadian-made, which eliminates the shipping delays and cost volatility of imported flooring products — critical for builders working on fixed budgets and tight timelines. Standard delivery runs 3 to 5 weeks from confirmed order, with custom colours or sizes in 1 to 3 weeks.
Warranty and Callback Cost Reduction
Wood decking generates callbacks: warping, splitting, cracking, sealer failure. Pedestal paver systems can develop rocking issues, drainage problems, and grout failure. Interlocking deck tiles have far fewer failure modes, and Designer Deck’s 25-year warranty (5 years for Porsets 1cm porcelain) means most callback risk transfers to the supplier rather than the builder.
Builder callback cost is one of the most under-tracked expenses in residential construction. Reducing it by even 20% often saves more than the initial material cost of the flooring itself.
Frequently Asked Questions
Ques: What are Designer Deck volume pricing tiers?
Ans: Volume-based pricing kicks in at 5,000+ square feet, with better rates for 10,000–20,000 sq ft orders and best rates for 20,000+ sq ft. Contact us for a project quote — pricing depends on product mix and delivery schedule.
Ques: Do interlocking deck tiles work on all balcony types?
Ans: They work on any flat surface with reasonable drainage — concrete slabs, membrane rooftops, existing wood decks, and paved surfaces. Curved or heavily sloped surfaces may need custom solutions.
Ques: Can we install deck tiles ourselves or do we need Designer Deck installers?
Ans: Interlocking deck tiles are designed for installation by any trained crew. Designer Deck provides installation guides and on-site training, plus additional online resources. For large volume projects we can also refer certified installers.
- Deck Tile Specification Guide for Model Homes
Model homes are the sales tool that closes buyers on your development. When prospective homeowners walk out onto a balcony, terrace, or townhome deck for the first time, the outdoor flooring is one of the last impressions they take with them. It’s also one of the details that separates a builder who cares about finish from one who doesn’t.
This guide walks through how to specify Designer Deck products for model homes at three different unit price points — entry, mid-range, and premium — so your model reflects the level of finish that matches your buyer.
Entry-level: Vivid & Contour Collection
For entry-level product, Designer Deck’s Vivid and Contour lines hit the sweet spot: clean modern look, fast installation, and 100% recycled plastic content that appeals to environmentally-minded buyers. Both are Canadian-made and UV-stable. Vivid uses wider boards, Contour uses narrower — same material, same 25-year warranty, same price point.
Best for: townhome balconies, small condo balconies, and rear patios where visual impact matters but budget is tight. Available colours: Sandstone, Deep Barrel, Stormy Day, and Dusty Pebble.
Mid-range: Opulent Collection (Wood Plastic Composite)
For mid-market builds, the Opulent WPC series delivers real wood aesthetic without the maintenance load of natural wood. Made in Concord, Ontario, it’s become the go-to specification for GTA condo and townhome projects because it looks premium without pushing unit costs beyond target.
Available sizes include 12″×24″, 24″×24″, and 48″×12″, in both board and plank formats. Colours: Beechwood, Rocky Shoreline, Misty Wharf, and Rustic Cabin. Best for mid-market condo balconies, townhome rooftops, and any project where buyers expect wood aesthetic but the builder needs long-term durability.
Premium: Porsets Collection and European Collection
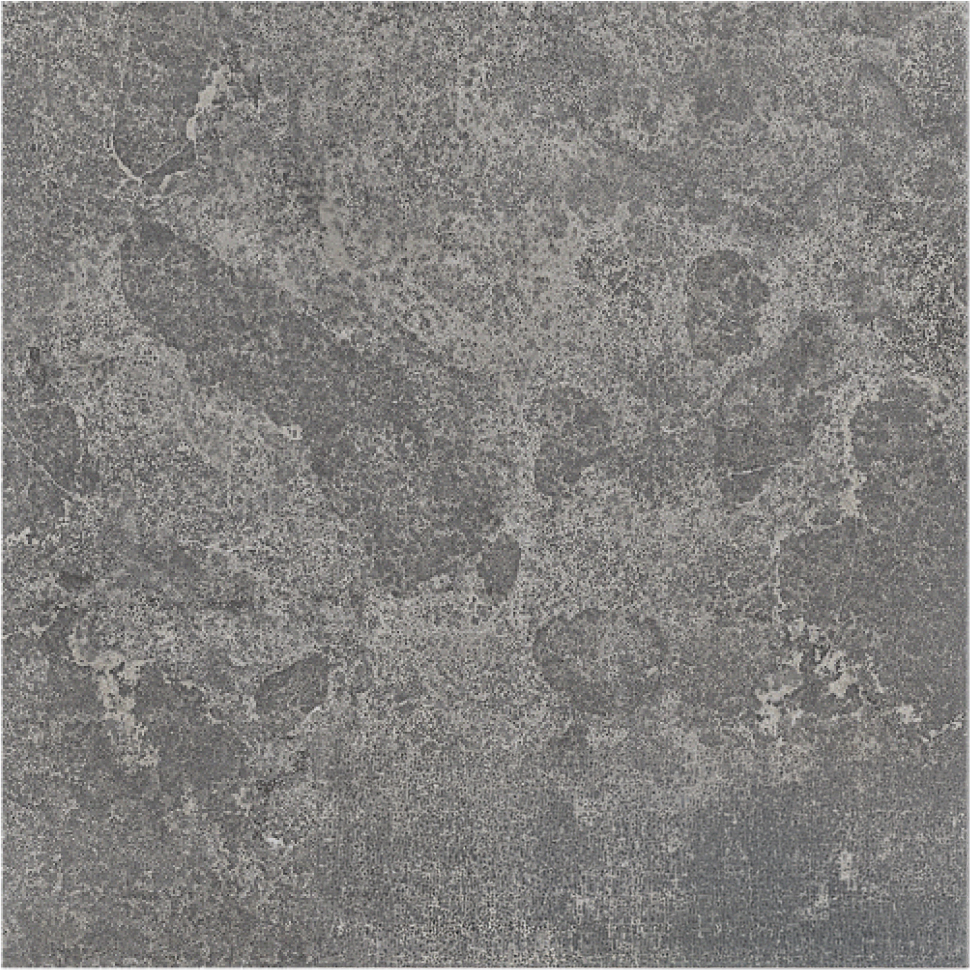
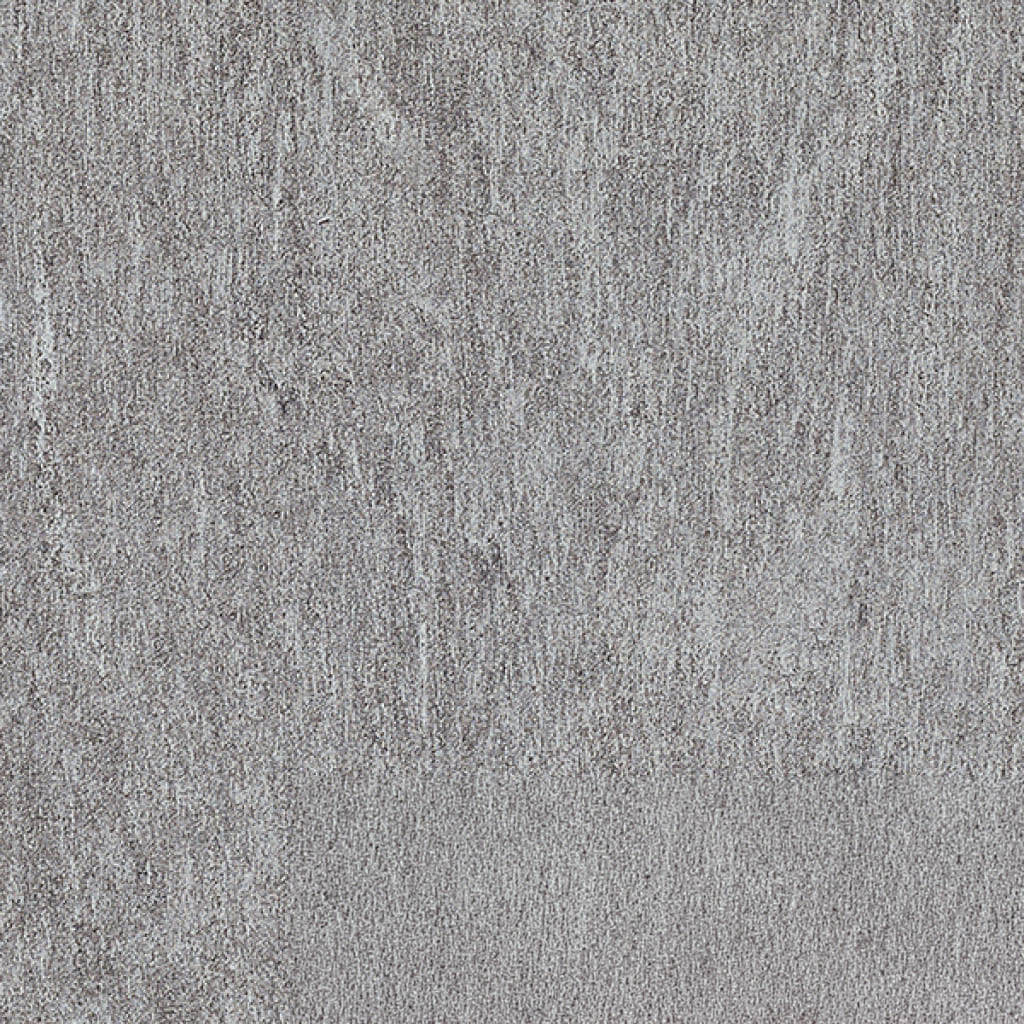
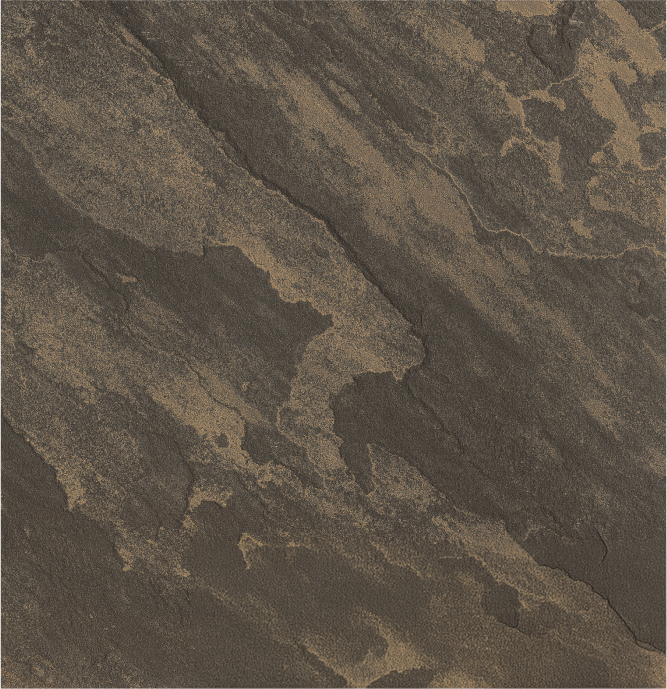
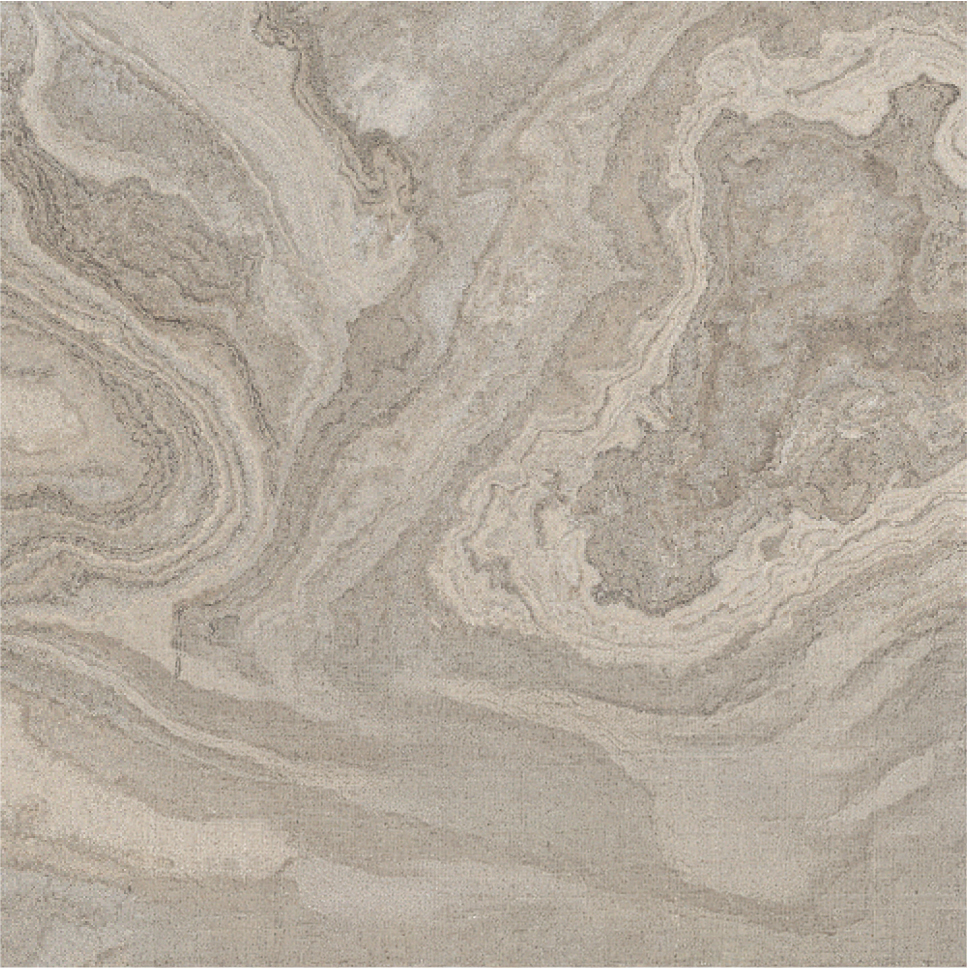
For luxury and penthouse-tier product, Porsets porcelain and Tantimber thermally modified wood become the standard. Porsets comes in 1cm, 2cm, and 3cm thicknesses on built-in micro-adjustable pedestals, in five refined colours: Lithium, Alabaster, Iron, Slate, and Tektonic.
Tantimber uses North American White Ash — locally sourced, thermally modified for outdoor durability, and rated for 25+ years of service life. Best for penthouse terraces, luxury townhome rooftops, custom-build showpiece spaces, and any project where the outdoor space is a major sales feature.
Frequently Asked Questions
Ques: Should model homes use the same product as the base spec?
Ans: Yes — using the base-spec product in model homes shows buyers exactly what they’re getting. Upgrading model homes to premium product without offering that as a purchasable upgrade creates disappointment at handover.
Ques: Can I mix product tiers across different unit types in one development?
Ans: Yes, and it’s often the right call. Entry-level units can use Vivid or Contour, mid-range can use Opulent, and premium units can feature Porsets porcelain or Tantimber — Designer Deck supplies all four tiers with consistent quality across production runs.
Ques: How do I include Designer Deck products in my spec sheet?
Ans: Include product line name, size, colour, coverage area, warranty period, and installation method. Designer Deck provides pre-formatted spec sheet content builders can drop directly into their standard documentation.
- What Every Ontario Builder Should Know About Deck Tile Warranties
For Ontario builders finishing balconies, rooftops, and townhome decks across hundreds of units, outdoor flooring warranties are one of the most under-discussed parts of the specification process. A poorly warrantied product can generate warranty claims for years after closing — and those claims almost always land on the builder’s desk before they reach the supplier’s.
This guide breaks down what every builder should know before choosing a deck tile supplier: what warranties actually cover, what they exclude, and how to structure procurement so that homeowner claims after handover don’t become your problem.
What Designer Deck Warranties Cover?
Designer Deck backs every product line with a written warranty. Porsets porcelain carries a 5-year warranty on the 1cm thickness and a 25-year warranty on the 2cm and 3cm thicknesses. Opulent WPC, Vivid and Contour recycled plastic, and Tantimber thermally modified wood all carry 25-year warranties. Every warranty covers manufacturing defects, structural integrity, colour fastness, and freeze-thaw resistance.
For builders, this means one predictable warranty structure across multiple product tiers. Documentation for each warranty is standardized so claims processing follows the same path regardless of which product line the homeowner selected.
What Warranties Commonly Exclude?
Warranties exclude damage from improper installation, use of incorrect substrates, chemical staining from de-icing salts or oils used incorrectly, and modifications made by the homeowner after installation. This is where builder liability quietly accumulates — if your installer doesn’t follow the manufacturer’s specifications, the warranty may not apply even for a legitimate manufacturing defect.
The fix is procedural: document your installation team’s training and certification, keep signed installation records for each unit, and ensure homeowner care instructions are included in the closing package.
How to Pass Warranty Coverage to Homeowners?
Homeowners appreciate warranty documentation delivered at closing — it becomes part of the perceived value of the unit. Designer Deck provides warranty cards, care instructions, and product spec sheets that can be included in every homeowner welcome package. All product documentation is also available publicly at designerdeck.ca so homeowners can access it directly.
For volume builders, we can supply pre-organized documentation packages designed for pass-through, which reduces admin overhead for your project management team.
Frequently Asked Questions
Ques: How long do Designer Deck warranties last?
Ans: Porsets porcelain: 5 years on 1cm thickness, 25 years on 2cm and 3cm. Opulent WPC, Vivid, Contour, and Tantimber all carry 25-year written warranties covering manufacturing defects, colour fastness, and structural integrity.
Ques: Are builder-installed deck tiles covered under Tarion?
Ans: Deck tiles installed as part of a new home purchase generally fall under Tarion coverage for the first year for defects in materials and workmanship. After that, the manufacturer’s warranty is the primary coverage. Coordinate with your Tarion representative and Designer Deck to confirm scope.
Ques: What voids a deck tile warranty?
Ans: Common voiders include improper installation, use of unauthorized substrates, chemical damage from de-icing products (particularly rock salt), and modifications after installation. Following manufacturer specifications and documenting installation is essential.
- Hire a Designer Deck Pro: Complete Guide to Services, Process & Project Planning
Are you planning to upgrade your outdoor space but unsure where to start? With so many products to choose from, finding the right solution can feel overwhelming. From deck tiles to rooftop terraces, every outdoor project needs careful planning. Many homeowners know the look they want. However, they often struggle with materials, measurements, drainage, installation, and permit requirements. Making the right decisions early helps you create a functional and long-lasting outdoor space. Hire a Designer Deck Pro gives you expert guidance at every stage. Our team helps you choose the right products, plan your project, and stay within your budget.
Why Do Outdoor Projects Need More Planning Than You Might Think?
At Designer Deck, many customers want to upgrade their outdoor spaces but soon realize the project involves more than choosing deck tiles or flooring. Before installation begins, you should assess the existing surface, check drainage, take accurate measurements, review building guidelines, and select the right products.
For example, rooftop terraces often need adjustable deck pedestals to create a level surface and improve water drainage. Some porcelain tile projects require Safety Support Grid Systems, while others work better with composite wood deck tiles or recycled plastic deck tiles. We also help customers choose the right Porsets 1 cm, 2 cm, or 3 cm porcelain tiles for their project.
Planning your project from the start helps you avoid costly mistakes and unexpected delays. It also makes it easier to choose products that match your space, lifestyle, and design goals.
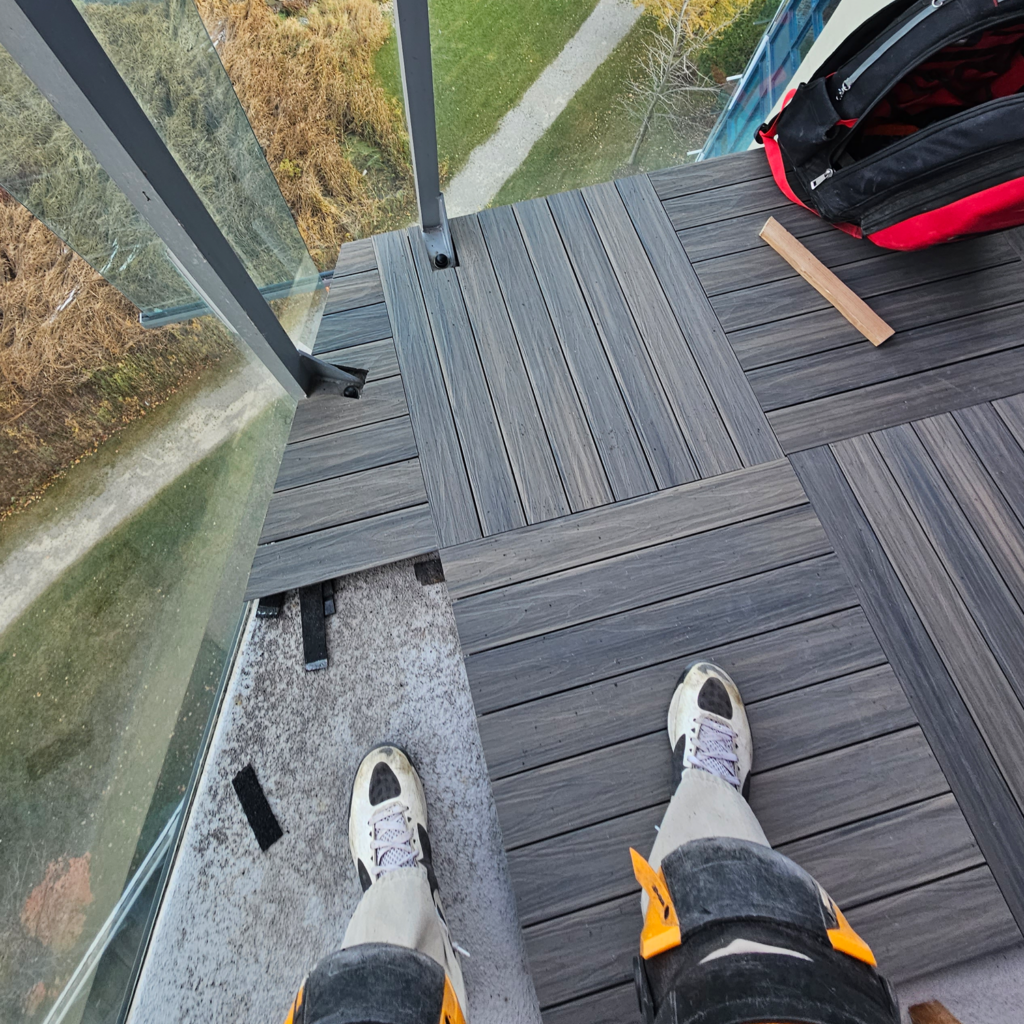
Which Outdoor Space Are You Planning to Upgrade?
One of the first things we ask customers is what type of outdoor space they are working with. The answer helps us recommend products, installation systems, and accessories that make sense for the project. Over the years, we have helped homeowners, contractors, property managers, and developers improve a wide variety of outdoor environments, each with its own unique requirements.
1. Condo Balconies
Condo balcony projects usually focus on turning a basic concrete surface into a more comfortable and finished outdoor area. This season, lighter tones and simple grid-style layouts are being used to make compact spaces feel more open. The aim is to improve everyday usability while keeping the design clean and low maintenance.
2. Rooftop Terraces
Rooftop terrace projects require attention to surface balance, drainage flow, and long-term stability. Modern designs are moving toward clean lines and structured finishes that work well with outdoor seating and open-air use. The focus is on creating a surface that feels stable, safe, and visually refined.
3. Floating Decks
For floating deck related projects, the trend is shifting toward simple defined zones that organize outdoor space without heavy construction. Clear boundaries, neat alignment, and easy-to-maintain surfaces are preferred. The goal is to create a usable outdoor area that feels structured yet flexible.
4. Courtyards, Garden Areas and Outdoor Gathering Spaces
These spaces are shaped by their surroundings, so the design usually follows existing landscaping, walkways, and architectural elements. Instead of focusing only on the surface, attention is given to how everything connects visually. Mixed patterns and balanced layouts are commonly used to keep the space natural and easy on the eye.
5. Commercial Outdoor Spaces
Commercial outdoor projects are designed with heavy use in mind, so durability and long-term performance become the main priorities. Clean, professional finishes are preferred in spaces like hotels, restaurants and office complexes. The overall approach stays practical while still maintaining a modern appearance.
And of course, not every project involves creating a completely new outdoor area. Many customers already have an existing surface that simply needs a fresh new look, which is where deck resurfacing solutions can provide an excellent alternative to replacement.
Designer Deck Resurfacing Solutions for Existing Outdoor Spaces
Deck resurfacing renews your existing outdoor deck without replacing the entire structure. It upgrades the top surface, improves durability, restores the deck’s appearance and enhances everyday functionality. At Designer Deck, we offer professional deck resurfacing and patio resurfacing solutions for a wide range of outdoor spaces.
1. Deck Resurfacing
During deck resurfacing, the Designer Deck Pro team first inspects the existing structure to ensure it is stable. Next, we recommend the best surface system based on your project’s requirements. Choose porcelain tiles for a clean, modern finish, composite wood tiles for a warm, natural look, grass tile inserts to add greenery or natural stone tiles for a premium outdoor appearance. For high-traffic areas, we also recommend recycled rubber tiles to improve comfort and absorb impact. Our team installs every system to promote airflow beneath the surface and support proper drainage for long-lasting performance.
2. Patio Resurfacing
Patio resurfacing begins with a thorough inspection of the existing concrete base. Our team checks the slope, surface condition and drainage before recommending the best resurfacing solution. Natural stone pavers create a timeless outdoor look, while porcelain slabs deliver a clean, modern finish. Recycled composite tiles offer a durable, low-maintenance solution, grass grid tiles add natural greenery, and rubber outdoor tiles improve comfort and slip resistance in high-traffic areas. This approach transforms plain concrete into a functional, attractive and long-lasting outdoor space without removing the existing base.
Once you choose the right resurfacing solution, we create a detailed project plan. We review every measurement, material and installation requirement before work begins, ensuring a smooth installation and lasting results.
How Does Designer Deck’s Project Planning Process Works?
Planning a deck, balcony, rooftop or terrace starts with the right strategy. At Designer Deck, we support homeowners, builders, developers, and contractors through one streamlined planning process. Our team assesses your project requirements, recommends suitable products and develops a clear installation plan. This organized approach improves accuracy, reduces on-site challenges, and keeps every project on track from start to finish.
1. Understanding Project Requirements in Detail
Every project begins with a clear understanding of what needs to be achieved. This step focuses on the basic vision and purpose of the space. We gather details such as:
- Type of project: Whether it is a residential home, a commercial building, or a contractor-led execution project, as each category has different planning needs, material usage, and installation approach.
- Purpose of the space: Clear understanding of how the area will be used, such as a leisure sitting space, a high-traffic walking zone, or a functional flooring area designed for daily practical use.
- Design expectations: The preferred look and feel of the space, including modern style layouts, natural wood-like finishes, minimal clean designs, or a premium high-end appearance based on overall project vision.
- Specific requirements: Any special instructions shared by the client, builder, or site engineer regarding structure, layout adjustments, product selection, installation method, or site conditions.
This step ensures that the planning direction is correct from the beginning and matches the final expectation.
2. Detailed Site Information Collection
Accurate site data is one of the most important parts of the planning process. Without this, execution can face delays or errors. We collect:
- Exact surface measurements: Accurate length and width of the area along with total square footage or square meter calculation, which helps in planning material quantity and layout properly.
- Current site condition: Present surface status such as bare concrete base, existing old tiles, or any other installed finish, along with overall condition of the surface for installation readiness.
- Drainage flow and slope direction: Understanding how water naturally flows on the surface and identifying the slope direction to ensure proper drainage in outdoor spaces.
- Accessibility of the site: Ease of reaching the installation area for carrying materials, tools, and equipment, including stair access, lift availability, or direct entry points.
Along with this, clear site photographs are reviewed to understand real-time conditions before planning begins.
3. Product Selection and System Guidance
Once site details are clear, the next step is selecting the right decking system or surface solution. This includes:
- Recommended product type based on usage: Selection of decking system depending on load requirements such as light use areas like balconies, medium use spaces like residential terraces, or heavy load zones such as commercial outdoor areas.
- Material suitability for weather conditions and durability needs: Choosing materials that perform well under local weather exposure, including resistance to heat, rain, moisture, and long-term outdoor usage for better durability and stability.
- Surface finish options like texture, colour, and design pattern: Available finishing choices such as smooth or textured surfaces, wood-like or stone-inspired colours, and different layout patterns that match the overall design style of the space.
- Compatibility of system with the existing site base: Checking whether the selected decking system can be properly installed on the current surface such as concrete, tiles, or prepared sub-base without requiring major structural changes.
This step ensures that the selected solution is not only visually suitable but also long-lasting and practical for real use.
4. Technical Evaluation and Feasibility Check
Before moving into final planning, a technical review is carried out to ensure the project is safe and practical. This includes:
- Checking load-bearing capacity of the base surface: Assessing whether the existing surface can safely support the weight of deck tiles, furniture, and regular foot traffic without any risk to stability or structure.
- Identifying structural limitations, if any: Reviewing the site to understand any restrictions such as weak sections, cracks, or construction constraints that may affect installation or long-term performance.
- Evaluating installation method suitability: Deciding the most appropriate installation approach based on site conditions, whether it requires pedestal systems, interlocking tiles, or direct laying methods.
- Reviewing leveling requirements and base preparation needs: Checking if the surface is even or if adjustments like leveling, smoothing, or minor preparation work are needed before installation begins.
- Ensuring material performance in expected environmental conditions: Making sure the selected decking materials can withstand local weather conditions such as heat, rain, and moisture for long-term durability and stable performance.
This step helps prevent future issues and ensures the installation process runs smoothly.
5. Layout Planning and Design Alignment
After technical clearance, the layout and visual planning stage begins. In this step:
- Basic layout or arrangement of tiles/decking is planned: The overall pattern and placement of deck tiles or decking boards is planned according to the shape and size of the space, ensuring a balanced and practical layout.
- Direction, alignment, and spacing are decided: The installation direction is fixed along with proper alignment and spacing so the surface looks clean, uniform, and well-structured after completion.
- Design flow is matched with architectural or user requirements: The layout is coordinated with the building style and user expectations so the outdoor space feels naturally connected to the surrounding structure.
- Sketches or drawings are created for better understanding: Simple visual sketches or basic drawings are prepared to clearly show how the final installation will look before execution begins.
- Final visual structure is aligned with the overall project goal: The complete layout is refined to ensure it matches the intended use, design vision, and practical requirements of the project.
This step turns raw site data into a clear visual plan for execution.
6. Timeline Planning and Execution Scheduling
Every project requires proper time planning to ensure smooth progress without delays. We define:
- Expected start date based on readiness: The project start date is decided once the site is ready for installation, meaning measurements are confirmed, design is approved, and materials are finalized for dispatch.
- Material preparation and delivery timeline: After final approval, materials are prepared, packed, and scheduled for delivery based on project size and location, ensuring everything reaches the site on time.
- Installation duration based on project size: The installation time is planned according to the area and complexity of work, with smaller projects taking less time and larger spaces requiring a structured execution schedule.
- Coordination schedule between teams (client, contractor, installer): A clear communication plan is set between all parties involved so that updates, approvals, and on-site activities stay aligned throughout the project.
- Any buffer time required for site adjustments: Extra time is kept in the schedule to manage minor changes, site preparation needs, or unexpected adjustments without affecting the overall project flow.
This helps ensure all stakeholders stay aligned throughout the project.
7. Delivery, Coordination, and Execution Support
The final step focuses on making sure everything is ready for on-site execution. This includes:
- Material delivery planning and logistics coordination: Materials are scheduled and delivered in a planned manner based on project timeline, site location, and installation sequence to ensure everything arrives at the right time.
- Site readiness confirmation before installation: Before starting work, the site is checked to ensure it is fully prepared, with correct measurements, cleared surface, and required conditions for installation.
- Support for installation guidelines and method execution: Clear instructions and practical guidance are provided so that the installation process follows the correct method and maintains quality standards.
- On-site coordination if required for large or complex projects: For bigger projects, coordination is provided during execution to ensure smooth teamwork between installers, contractors, and site teams.
- Final alignment between planning and actual execution: The planned design, layout, and technical details are matched with on-site work to ensure the final outcome reflects the approved plan accurately.
This ensures the transition from planning to installation is smooth and controlled.
Ready to Start Your Project?
A successful outdoor space always begins with proper planning and complete information. Once the right details are collected, execution becomes faster, smoother, and more efficient. Designer Deck supports all types of projects with a clear, practical, and well-organized planning process designed to deliver long-term results.
Frequently Asked Questions on Designer Deck Process Planning
Ques: What should I share first when I contact Designer Deck?
You can start by sharing your space type like balcony, rooftop, terrace or garden. Even a short description helps us understand your requirements clearly.
Ques: Do I need to know the exact deck tile type before starting?
No, you don’t need to decide in advance. We help you choose between options like porcelain deck tiles, composite wood tiles or recycled plastic tiles based on your space.
Ques: I only have rough measurements. Can planning still start?
Yes, rough measurements are enough to begin the discussion. Final accurate sizing is confirmed later during the planning stage.
Ques: What if I don’t have any design ideas for my outdoor space?
That is completely fine, many clients start without a fixed idea. We suggest layouts and deck tile patterns based on your space and usage.
Ques: Will you check if my surface is suitable for deck tiles?
Yes, we always review your existing surface condition before suggesting any system. This ensures the deck tiles or system selected will work properly and last longer.
Ques: Do I need to worry about drainage before installing deck tiles?
No, drainage is part of our planning check. We ensure water flow is not blocked and the deck tile system works safely on your surface.
Ques: Can I use different types of deck tiles in one project?
Yes, in many projects we combine different deck tile styles for better design and function. This depends on your space layout and requirements.
Ques: What if my project is still under construction?
That is also fine, we can plan in advance. We coordinate based on your construction stage so deck tile installation happens at the right time.
Ques: How do I know which deck tile option is best for heavy use areas?
We guide you based on usage level like residential, commercial, or high-traffic areas. Heavy-use spaces usually need stronger and more durable deck tile systems.
In Conclusion,
Every outdoor space has unique requirements. At Designer Deck , our experienced team helps you plan every detail with confidence. We start with accurate measurements, recommend the right materials, assess drainage, and understand how you will use the space. This approach makes product selection, layout planning, and installation much easier. It also helps you avoid costly mistakes and ensures a smooth project from start to finish.
Ready to transform your balcony, patio, rooftop or terrace? Hire a Designer Deck Pro today. Share your project details and let our experts help you create a durable, functional and beautifully designed outdoor space.
- Recycled Plastic Narrow Board vs Wide Board: What’s the Difference?
Can a simple deck tile pattern completely transform your outdoor space? The answer may surprise you. More homeowners across Canada now invest in stylish balconies, patios, rooftops, and terraces. Outdoor living has become an essential part of modern home design. As a result, recycled plastic outdoor tiles have become a popular flooring choice. They offer sustainable construction, realistic wood aesthetics, and easy maintenance. These qualities make them perfect for modern outdoor spaces.
At Designer Deck, Recycled Plastic Narrow Board and Recycled Plastic Wide Board tiles remain customer favorites. Both collections use durable recycled plastic for long-lasting outdoor performance. However, their board layout, texture and appearance create completely different looks. Choosing the right option depends on your design goals and outdoor space. First, let’s take a closer look at recycled plastic outdoor tiles and lumber.
What Are Recycled Plastic Outdoor Tiles and Lumber?
Recycled plastic deck tiles offer a versatile modular flooring solution for outdoor living spaces. Homeowners commonly install them on balconies, patios, rooftops, terraces, and garden areas. They improve both the appearance and functionality of outdoor spaces. Their realistic wood finish and simple installation system make them an excellent alternative to traditional outdoor flooring. These tiles use recycled plastic lumber as their core material.
The manufacturers produce this lumber from recycled plastic to withstand harsh outdoor conditions. It resists moisture, rot, insects, splintering, and weather damage. Unlike natural wood, it requires very little maintenance while delivering long-lasting performance. If you want outdoor flooring that combines durability, low maintenance, and a realistic wood appearance, recycled plastic deck tiles are an excellent choice.
Recycled Plastic Narrow Board Tiles for Classic Outdoor Decking
Recycled Plastic Narrow Board Tiles create a detailed, classic decking look with multiple closely spaced boards in every tile. This layout delivers a rich, textured finish that closely resembles traditional wood decking. Homeowners who prefer a structured and timeless outdoor design often choose this collection. Made from recycled HDPE plastic, these tiles resist moisture, sunlight, temperature changes, insects, and rot while requiring minimal maintenance. They work well on balconies, patios, rooftops, and terraces where durability and visual appeal matter equally. The latest Narrow Board designs feature realistic wood-grain textures and modern earthy colours, making them suitable for both traditional and contemporary outdoor spaces.
Here are the Latest Design Trends of Recycled Plastic Narrow Board Deck Tiles:
1. Sandstone
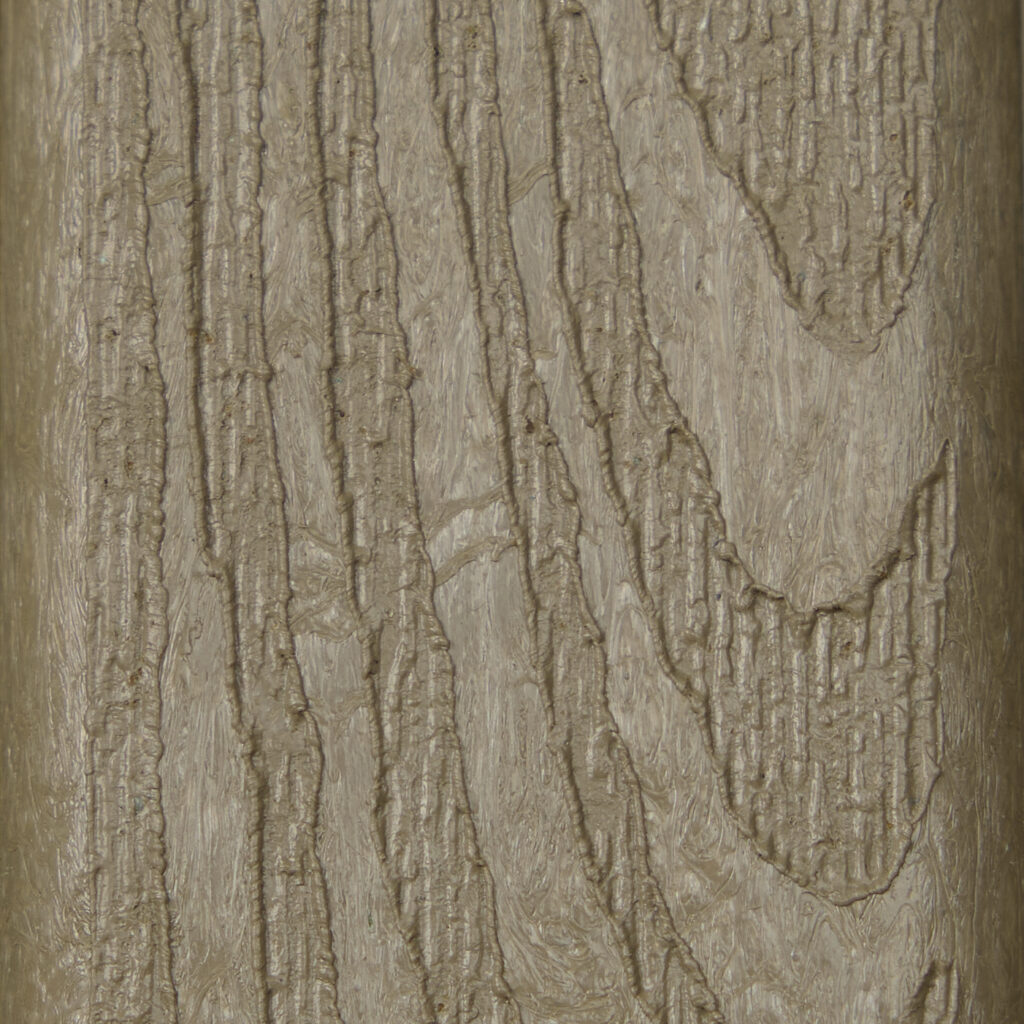
Sandstone is a soft, light earthy colour inspired by natural stone and light wood. It creates a bright and fresh look, making small outdoor spaces feel more open.
2. Deep Barrel
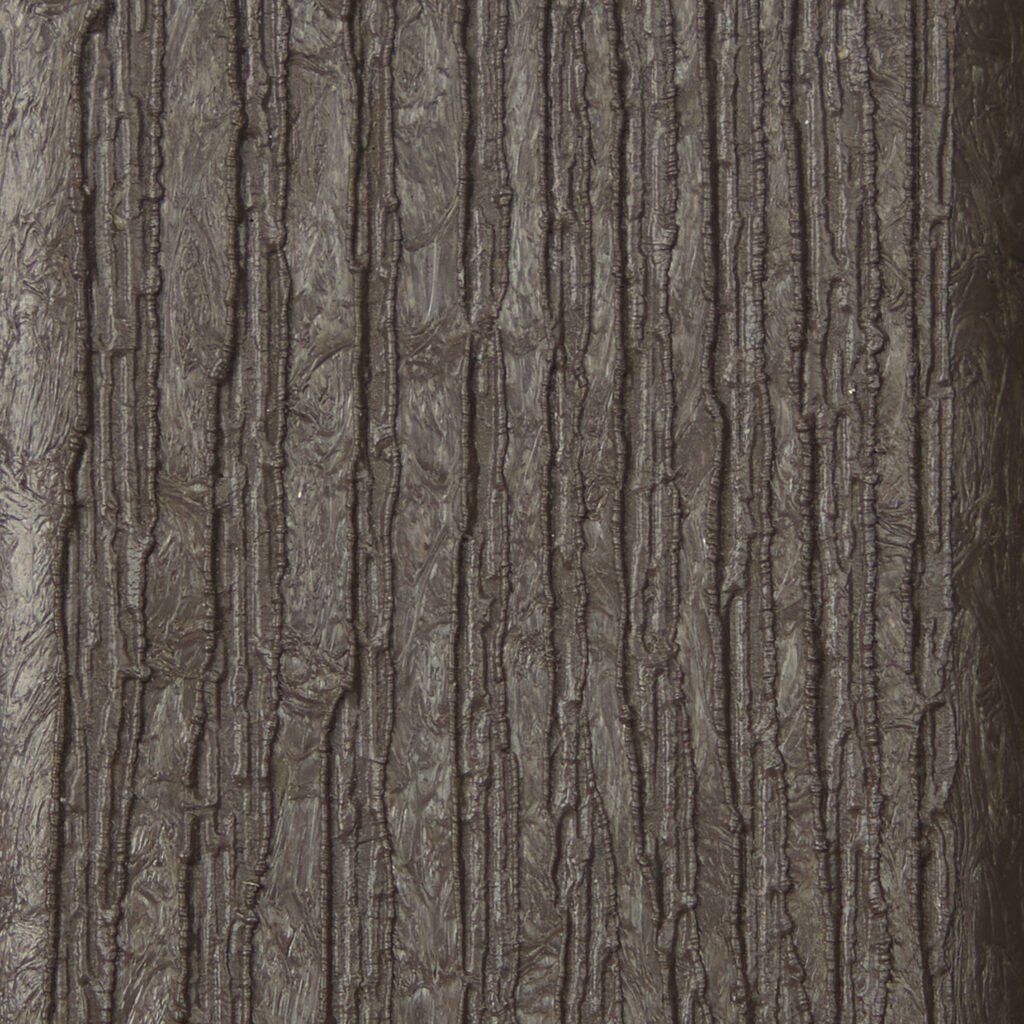
Deep Barrel is a deep brown shade that gives a strong and rich wood-like appearance. It is perfect for creating a bold and classic outdoor deck style.
3. Stormy Day
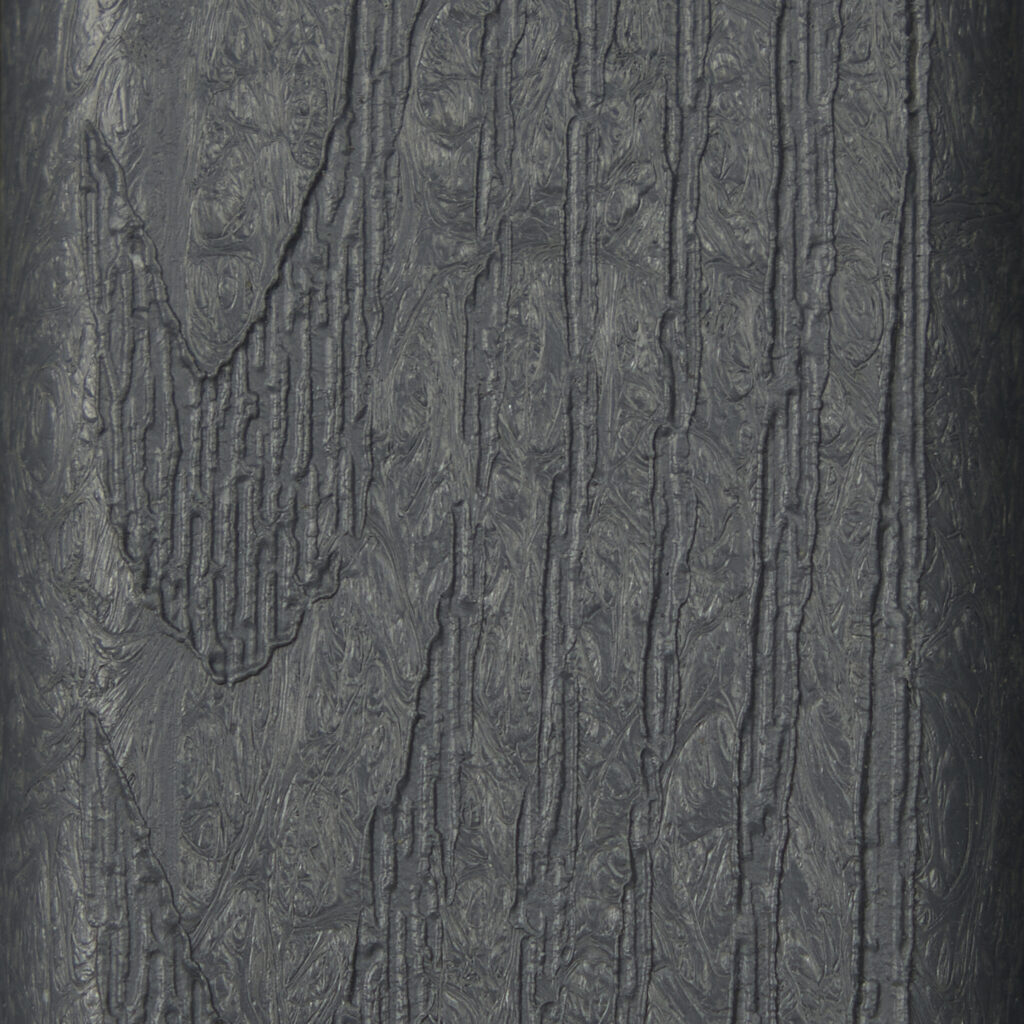
Stormy Day is a grey shade that fits well with modern outdoor designs. It gives a clean and simple look that matches most building styles.
4. Dusty
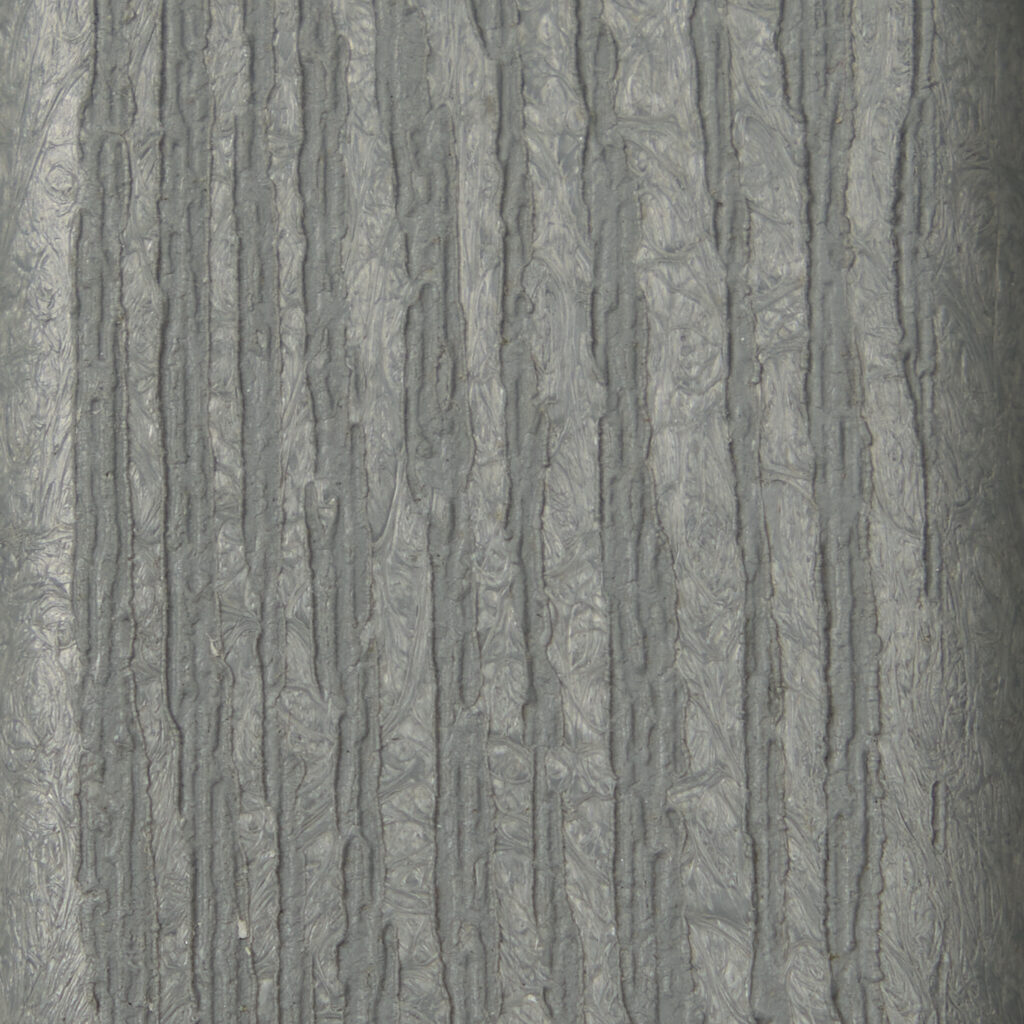
Dusty is a soft grey-brown colour that creates a calm and natural feel. It works well in relaxed outdoor spaces where a simple look is preferred.
The Narrow Board tiles come in a 2×2 square interlocking pattern, which allows easy installation and a uniform outdoor finish. This modular design helps the tiles connect seamlessly, creating a stable and even surface across balconies, patios, rooftops, and terraces.
Now, let’s move on to Recycled Plastic Wide Board Deck Tiles. The tile structure is similar to Narrow Board tiles, with the main difference lying in the wider board layout and surface texture, which gives a more modern and open appearance.
Recycled Plastic Wide Board Tiles for a Modern Deck Look
Recycled Plastic Wide Board Tiles feature wider board sections that create a clean, modern appearance. Their broad plank layout delivers a simple, open finish with less surface detailing than Narrow Board tiles. This makes them an excellent choice for contemporary outdoor spaces. Homeowners often install these tiles on patios, rooftops, terraces, poolside areas, and large garden spaces. Made from a blend of pre-consumer and post-consumer recycled HDPE plastic, they provide exceptional strength and long-lasting outdoor performance. The risers use PAD (Partly Air Dried) Grade 2 spruce and pine wood, ensuring a stable foundation and reliable installation. Their low-maintenance design, durable construction, and minimalist look make them ideal for modern outdoor living.
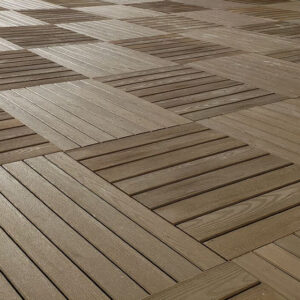
In terms of design, Wide Board tiles feature fewer but broader plank sections within each tile, creating a smooth and spacious visual effect. Thus, both Narrow Board and Wide Board tiles are available in the same colour range, including Sandstone, Deep Barrel, Stormy Day and Dusty Pebble. The main difference between the two lies in their board width, specifications, features and surface texture.
Recycled Plastic Narrow Board Vs. Wide Board: Highlighting Key Differences
Coming to the main point, both Narrow Board and Wide Board tiles use the same recycled HDPE material and feature a similar interlocking installation system for outdoor flooring. They also offer excellent weather resistance, durability, drainage and low-maintenance performance. However, their structural design, board layout, pattern options and overall appearance differ significantly, making each collection suitable for different outdoor spaces.
1. Board Structure and Surface Design
Narrow Board tiles feature 13 slim boards that create a detailed, textured, and traditional decking look. Wide Board tiles use 8 broader boards to deliver a cleaner, smoother, and more modern appearance. The board layout creates the biggest visual difference between the two collections.
2. Tile Pattern and Installation Layout
Narrow Board tiles are available in a 2×2 square interlocking format that ensures consistent alignment and easy installation across surfaces. Wide Board tiles offer greater flexibility as they come in both 2×2 square and 2×1 herringbone layouts. The additional herringbone option allows more creative design patterns for modern outdoor flooring arrangements.
3. Visual Appearance and Design Effect
Narrow Board tiles create a more detailed and structured appearance due to the 13 smaller boards within each tile, which adds depth and texture to the surface. Wide Board tiles, with only 8 broader boards, produce a cleaner and more open visual effect that suits modern minimalist design styles.
4. Size and Format Options
Narrow Board tiles are available in a standard square dimension of 23.75” × 23.75”. Wide Board tiles offer two format options, including a 24” × 24” square tile and a 12” × 24” rectangular (subway-style) tile, providing more layout flexibility for different design requirements.
5. Weight and Handling
Narrow Board tiles weigh 3.67–3.92 lbs per sq ft, giving them a sturdier and more solid feel. Wide Board tiles weigh about 2.81 lbs per sq ft, making them lighter and easier to handle during large installations.
6. Ideal Application Areas
Narrow Board tiles are best suited for smaller or defined outdoor areas such as balconies, compact patios and limited rooftop spaces where detailed texture enhances the design. Wide Board tiles are more suitable for larger open areas such as terraces, poolside decks and expansive outdoor zones where a clean and minimal appearance is preferred.
Quick Comparison at a Glance:
To make the differences easier to understand, here is a quick side-by-side comparison of Narrow Board and Wide Board tiles based on their key features and specifications:
Feature
Narrow Board Tiles
Wide Board Tiles
Surface Design 13 closely spaced boards for detailed texture 8 broader boards for a clean finish Visual Style Classic, textured wood-like appearance Modern, minimal, open look Installation Pattern 2×2 square interlocking system 2×2 square + 2×1 herringbone option Drainage System Horizontal and lateral drainage design Horizontal and lateral drainage design Surface Grip Embossed anti-slip wood grain finish Embossed anti-slip wood grain finish Maintenance Low maintenance, easy cleaning Low maintenance, easy cleaning Durability Resistant to rot, insects, and moisture Resistant to rot, insects, and moisture Color Options 4 earthy tones (shared range) 4 earthy tones (shared range) Ideal Usage Compact outdoor areas, balconies, rooftops Large open spaces, terraces, poolside decks Which Recycled Plastic Deck Tile You Should Choose?
If you want a more traditional and detailed deck appearance, Narrow Board tiles are a better choice. Their closely arranged board structure creates a textured surface that adds depth and works well in smaller or defined outdoor areas such as balconies, compact patios and limited rooftop spaces.
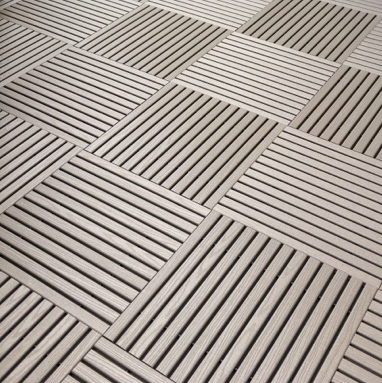
On the other hand, if you prefer a clean, modern, and more open look, Wide Board tiles are more suitable. Their broader board layout creates a minimal finish that works best in larger outdoor areas such as terraces, poolside decks, and open garden spaces where a spacious visual effect is preferred.
Both options offer strong durability, recycled material benefits, and long-lasting outdoor performance, so the final decision comes down to the type of design aesthetic you want to achieve. Furthermore, adding decorative elements enhances the final look of your outdoor space.
Enhancing Outdoor Spaces with Decorative Elements
Once the right deck tile style is selected, the overall outdoor look can be further improved by adding simple design elements that enhance depth, comfort and visual balance.
1. Decorative Rock Pebbles
Decorative rock pebbles placed along edges, planter zones or pathway borders create a natural contrast against the deck tile surface. They help define different sections of the outdoor space while adding a clean, balanced, and visually refined finish to the layout.
2. Ambient Outdoor Lighting
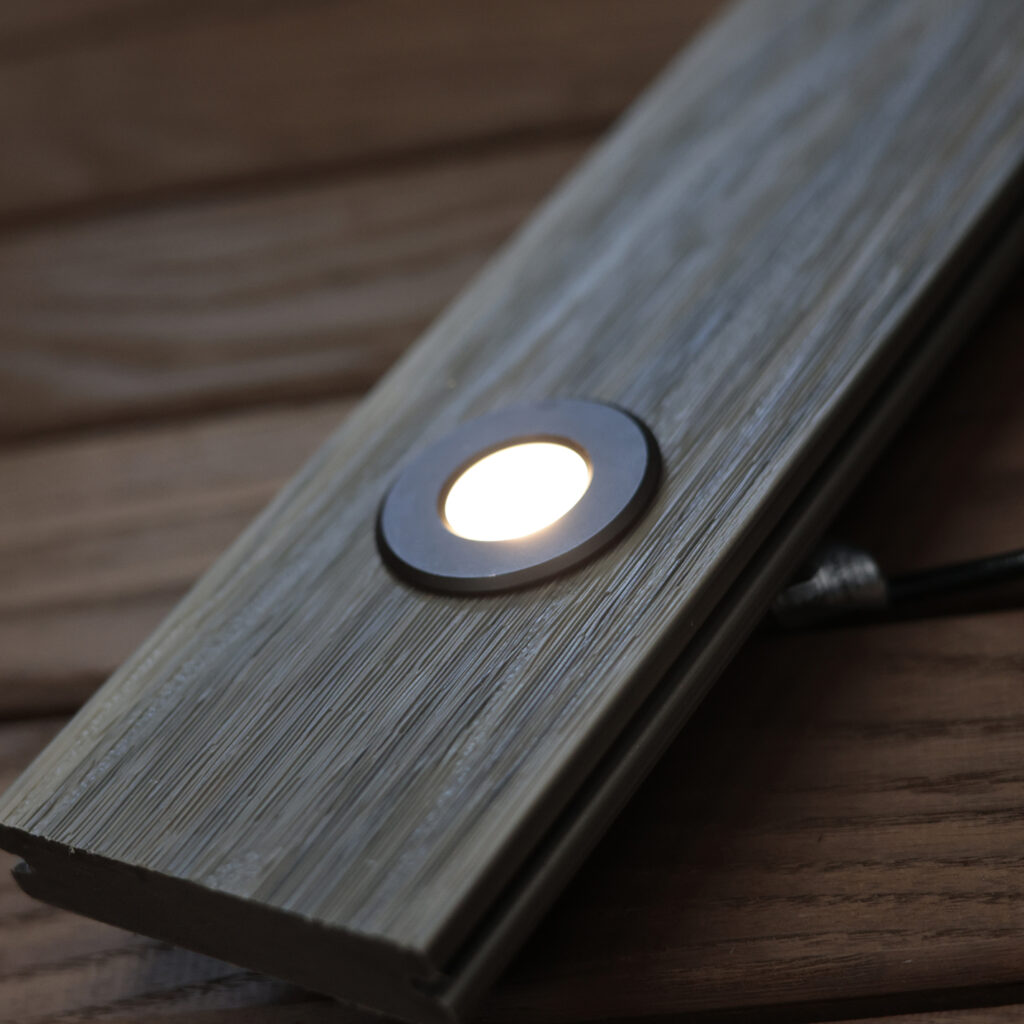
Ambient outdoor lighting adds warmth and visibility during evening hours. Soft lighting placed near seating areas, corners, or walkways highlights the texture of the deck surface and creates a welcoming, elegant, and visually rich outdoor atmosphere.
The right deck tiles can completely transform your outdoor space. Designer Deck’s Narrow Board and Wide Board collections combine durability with distinctive design. Whether you prefer a classic or modern look, both collections help you create a stylish, functional, and low-maintenance outdoor living area that matches your vision.
Frequently Asked Questions on Recycled Plastic Decking
Ques: What are recycled plastic deck tiles used for?
Ans: Recycled plastic deck tiles are used for outdoor flooring in spaces such as balconies, patios, rooftops, and terraces. They provide a durable and low-maintenance surface with a wood-like appearance.
Ques: Where can recycled plastic decking be installed?
Ans: It can be installed in residential and commercial outdoor areas including garden spaces, poolside decks, rooftop terraces and balcony flooring systems.
Ques: What makes Narrow Board tiles different from Wide Board tiles?
Ans: Narrow Board tiles feature a more detailed surface with closely arranged boards, while Wide Board tiles offer a cleaner and more modern look with broader board sections.
Ques: Are recycled plastic deck tiles weather resistant?
Ans: Yes, they are designed to withstand rain, sunlight, and temperature changes while resisting moisture, rot and insect damage over time.
Ques: Do these tiles require regular maintenance?
Ans: No heavy maintenance is required. Occasional cleaning with water is enough to maintain their appearance and performance.
Ques: Where can I buy recycled plastic decking in Canada?
Ans: You can explore high-quality options at Designer Deck, which offers both Narrow Board and Wide Board recycled plastic deck tile collections in Canada.
Ques: What is recycled plastic lumber made of?
Ans: It is made from a blend of recycled pre-consumer and post-consumer high-density polyethylene (HDPE), designed for strength and outdoor durability.
Ques: Are recycled plastic boards better than wood?
Ans: Recycled plastic boards last longer outdoors as they do not rot, splinter or absorb moisture like natural wood, making them more stable over time.
Ques: What outdoor spaces are best for deck tiles?
Ans: Deck tiles work best in compact balconies, open terraces, patios, rooftops and poolside areas depending on the design style chosen.
In Conclusion,
Designer Deck offers a variety of deck tiles for different outdoor spaces and design preferences. Narrow Board tiles create a detailed, classic wood look, while Wide Board tiles deliver a clean, modern finish. Both collections offer durable, sustainable and low-maintenance flooring for balconies, patios, rooftops and terraces. Choose Narrow Board tiles for smaller, defined spaces or select Wide Board tiles to create an open, contemporary look. Both options withstand harsh outdoor conditions and maintain their appearance for years.
Need help choosing the right deck tiles? Contact Designer Deck for expert advice, product recommendations and premium outdoor flooring solutions tailored to your project.
- Top Porsets 2 Elevated Porcelain Tile Flooring Designs for Every Home
When architects and developers plan modern residential and commercial spaces, flooring becomes an important part of the design process. Tile Flooring choice affects how interior and exterior spaces look and match with the overall infrastructure of the home. From living rooms and kitchens to patios and rooftop spaces, every surface contributes to the final look of the property. Among various tile flooring options available today, porcelain tile flooring has become a preferred choice for creating a luxurious and modern lifestyle. Its elegant appearance, durability, and ability to complement contemporary spaces make it suitable for both indoor and outdoor spaces.
At Designer Deck, we have a collection of porcelain tiles available in different thickness options such as 1 cm, 2 cm, and 3 cm, allowing homeowners and designers to choose a solution based on project requirements and load capacity. In this blog, we will discuss Porsets 2 cm elevated porcelain tile flooring and explore the various stylish tile designs available that can enhance the appearance of every home.
Why Porsets 2 Are a Trending Luxury Choice for Indoor and Outdoor Spaces?
In recent times, tile flooring trends have been evolving quickly as people want designs that look beautiful and also stay strong for years. This is where advanced systems like Porsets 2 come in and are becoming one of the preferred choices in modern construction. Porsets 2 is a 2 cm thick elevated porcelain flooring system built to combine modern style with reliable strength. It is installed on pedestal supports that lift the tiles slightly above the base surface, creating a level and well-aligned finish. This structure also supports long-term stability and smooth surface performance.
It is commonly used in homes and commercial projects because it adapts easily to different spaces. Areas like living rooms, kitchens, balconies, terraces, and rooftops gain a refined and premium appearance with this system. In outdoor applications, it performs effectively when paired with adjustable deck pedestals. These supports create space beneath the tiles, allowing water to flow through easily and air to circulate. This helps keep the surface dry, reduces water accumulation, and maintains structural balance over time. Next, let’s explore the top porsets 2 designs for interior as well as exterior spaces.
Top Porsets 2 Elevated Porcelain Flooring Designs for Residential and Commercial Spaces
As you know, Porsets 2 offers excellent design flexibility and can be used across a wide range of indoor and outdoor areas. Its modern appearance and elevated flooring structure allow homeowners and designers to create visually appealing spaces while maintaining functionality. With different textures, patterns, and finishes available, it becomes easier to match the flooring with various architectural styles and design preferences. Below are the top Porsets 2 designs for modern indoor and outdoor spaces.
Interior Spaces: Best Porsets 2 Tile Designs for Every Room
Every room inside a home creates a different experience and mood. Some spaces are designed for relaxation, some for gatherings, and others for daily activities. Choosing the right Porsets 2 elevated porcelain flooring design can help create a balanced interior while improving the overall appearance of the home. Different shades, textures, and finishes can complement furniture, wall colours, lighting, and decorative elements while creating a smooth visual connection between rooms.
1. Living Room
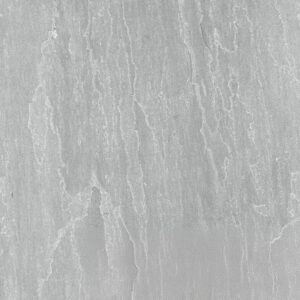
The living room becomes one of the most noticeable spaces in a home because it is where families spend time together and guests are welcomed. Flooring in this area should create a bright, comfortable, and inviting atmosphere. Shades such as Almond, Amalfi, Seashell, Silver Valley, and Greige can help create a spacious appearance while blending naturally with modern furniture and decorative styles. Lighter tones can also reflect more natural light, making the room feel larger and more open.
2. Drawing Room
Drawing rooms usually create the first impression of a home and are commonly designed with a more elegant appearance. Flooring designs with a refined and premium character can improve the overall atmosphere of this space. Imperial, Eramosa, Silver, and Greige can complement luxury furniture, statement lighting fixtures, and contemporary design themes while creating a polished look.
3. Kitchen
Modern kitchens require flooring that supports style while complementing cabinets, countertops, and appliances. Clean and stone-inspired finishes can create a timeless appearance while helping the space feel organized and visually balanced. Kitchen porcelain tile designs Canada such as Ice Grey, Gris, Crema Antico, and Indus White can fit beautifully into both modern and contemporary kitchen layouts.
4. Dining Room
Dining spaces bring family members together, making the environment warm and welcoming. Flooring with soft and balanced tones can improve the dining experience while matching tables, chairs, and decorative accents. Crema Antico, Almond, Silver Valley, and Amalfi can create an elegant dining atmosphere.
5. Bedroom
Bedrooms are designed for comfort and relaxation, which makes warm and natural flooring designs a suitable choice. Wood-inspired porcelain designs such as Ash Timber, Birch Timber, and Light Timber can bring the appearance of natural wood while maintaining the strength of porcelain flooring. Shades like Moongrey can also create a peaceful atmosphere suitable for modern bedroom interiors.
6. Children’s Room
Children’s rooms usually look attractive with flooring that creates a bright and cheerful environment. Seashell, Silver Valley, and Almond can create a soft appearance that blends well with playful interior themes and colourful decorative elements.
7. Home Office and Study Room
Study rooms and home office spaces require an environment that supports focus and productivity. Flooring with balanced and neutral tones can help create a clean and organized appearance. Greige, Light Timber, and Ash Timber can complement modern workspaces and minimalist interiors.
8. Bathroom
Bathrooms generally look attractive with lighter shades that create a fresh and clean appearance. Silver, Tundra, Ice Grey, and Indus White can complement modern fixtures, glass shower panels, and contemporary layouts while helping the space feel bright.
9. Hallways and Entrance Areas
Hallways connect different spaces throughout the home, so flooring should create a smooth transition between rooms. Imperial, Eramosa, Gris, and Greige can create a connected and sophisticated appearance throughout the interior.
10. Indoor Lounge and Reading Areas
Relaxation corners and indoor seating areas can become more comfortable with flooring designs that create a calm atmosphere. Moongrey, Light Timber, Coast, and Silver Valley can complement indoor plants, cozy seating arrangements, and modern decor styles.
In case of exterior spaces, Porsets 2 are installed by using adjustable deck pedestals. With such a support system, you can place porcelain tiles on uneven surfaces and adjust the height of the pedestals as per your requirement.
Exterior Spaces: Porsets 2 Tile Designs for Outdoor Living
The right tile flooring can define outdoor spaces by adding structure, surface continuity, and a more refined architectural finish. Factors such as tile texture, dimensions, shade selection, and layout pattern play an important role in shaping the overall renovation of the exterior residential areas.
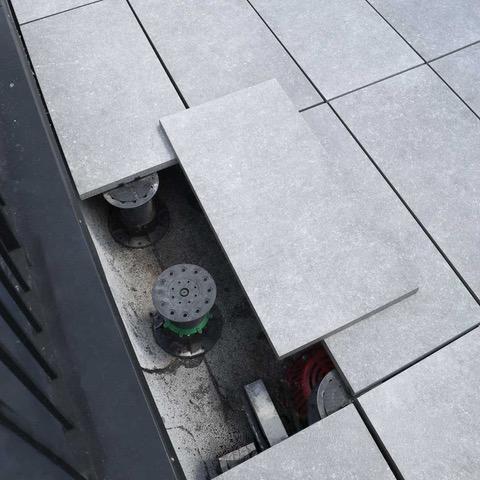
Adjustable Deck Pedestals for Outdoor Tiles
1. Patio Spaces
Patios usually require flooring that creates a strong visual foundation while supporting seating and dining arrangements. Slate Grey, Thundercloud, Rio Black, and Black Opal can introduce deeper tones and modern surface patterns that work well with pergolas, outdoor furniture, and open-air gathering spaces.
2. Terrace Areas
Terraces usually benefit from tile designs that add texture and create a balanced architectural appearance. Algonquin, Eramosa, and Indus can provide natural stone-inspired finishes that help create depth and dimension across larger surfaces.
3. Balcony Spaces
Balconies generally work best with tile designs that help smaller areas feel more open and organized. Coast, Moongrey, Seashell, and Silver Valley can create a lighter surface appearance while complementing railing systems, planters, and compact seating arrangements.
4. Rooftop Spaces
Rooftop areas usually require flooring that creates a defined and contemporary setting. Black Opal, Thundercloud, Rio Black, and Indus can contribute stronger visual contrast and a modern surface profile suitable for outdoor lounges and elevated deck areas.
5. Porch Areas
Porches create the transition between exterior and interior sections of the property. Almond, Tundra, Coast, and Crema Antico can introduce balanced tones and surface textures that support different architectural styles.
6. Garden Walkways and Surrounding Areas
Walkways and surrounding landscape sections benefit from tile designs that integrate smoothly with natural elements. Algonquin, Slate Grey, Eramosa, and Tundra can create a structured pathway appearance while complementing greenery and outdoor materials.
7. Poolside Areas
Poolside spaces generally require tile designs that create a clean and modern surface finish. Silver, Coast, Indus White, and Greige can contribute lighter tones that pair well with water features, outdoor seating layouts, and surrounding landscape elements.
As Porsets 2 creates well-defined flooring layouts across residential spaces, its durability and surface performance also make it a practical solution for commercial environments where flooring experiences continuous daily movement.
Commercial Spaces: Porsets 2 for High Traffic Areas
Commercial spaces require flooring systems that support regular movement while maintaining a clean and professional appearance. Areas such as offices, retail stores, restaurants, hotels, rooftop lounges, and commercial outdoor seating zones experience continuous foot traffic throughout the day. Flooring selection in these environments influences the overall experience of the space and contributes to its long-term performance.
1. Office Spaces
Office environments usually require flooring that creates a structured and professional atmosphere. Greige, Silver Valley, Imperial, and Gris can complement modern office interiors, meeting rooms, reception areas, and collaborative workspaces.
2. Restaurants and Cafes
Dining environments benefit from flooring designs that contribute to the overall theme of the space. Crema Antico, Almond, Slate Grey, and Eramosa can work well with contemporary dining layouts and seating arrangements.
3. Retail Stores and Shopping Areas
Retail spaces generally require flooring that supports movement while maintaining a polished appearance. Silver, Ice Grey, Thundercloud, and Black Opal can create a modern surface profile suitable for commercial display areas.
4. Hotels and Hospitality Spaces
Hotels and hospitality environments usually focus on creating a refined atmosphere throughout lobbies, waiting areas, and outdoor seating sections. Imperial, Silver Valley, Rio Black, and Indus can contribute to a premium architectural appearance.
Apart from this, Porsets 2 can be installed in Rooftop Commercial Lounges and Outdoor Seating Areas. Tile designs such as Thundercloud, Black Opal, Rio Black, and Slate Grey can complement modern outdoor furniture and contemporary exterior layouts.
Frequently Asked Questions on Porsets 2 Tile Flooring
Ques: Why are porcelain tile designs becoming more popular in modern homes?
Ans: Porcelain tile flooring combines surface durability with a wide range of textures, shades, and dimensions. It can complement both contemporary and traditional layouts across indoor and outdoor spaces.
Ques: Which tile colors are currently trending for residential spaces?
Ans: Modern porcelain tile designs Canada collections commonly include Greige, Ice Grey, Silver Valley, Thundercloud, and natural stone-inspired shades that work well with changing design trends.
Ques: Can 2cm porcelain outdoor flooring be installed on uneven surfaces?
Ans: Yes, 2cm porcelain outdoor flooring can be installed with adjustable deck pedestals that help create a level flooring surface while supporting height adjustments as required.
Ques: Does tile thickness make a difference in flooring performance?
Ans: Tile thickness can influence strength and application areas. Porsets 2 elevated porcelain flooring uses a 2 cm profile that can support indoor areas as well as elevated outdoor installations.
Ques: Where can porcelain deck tiles be used around a property?
Ans: Porcelain deck tiles Canada solutions can be installed in patios, terraces, balconies, rooftop areas, garden spaces, and outdoor seating sections.
Ques: Are elevated porcelain tile systems suitable for outdoor projects?
Ans: Elevated porcelain tile systems for outdoors can help create structured flooring layouts while allowing space beneath the tiles for water movement and airflow.
Ques: Is porcelain tile a suitable choice for bathroom flooring?
Ans: Porcelain tile designs Canada bathroom collections usually include lighter and stone-inspired shades that can complement modern fixtures and create a clean appearance.
Ques: How do larger tile dimensions affect the overall flooring layout?
Ans: Larger tile dimensions can create a more continuous surface appearance with fewer visible joints, helping spaces feel more open and organized.
Ques: Should neutral tile shades be selected for long-term design flexibility?
Ans: Neutral shades such as beige, grey, white, and Greige continue to remain relevant because they pair easily with changing furniture styles and interior themes.
Winding Up,
Designer Deck is a trusted supplier of premium outdoor and elevated flooring solutions across Canada. We offer Porsets systems, adjustable deck pedestals, and modern porcelain tile flooring designed for residential and commercial spaces. The right flooring can improve the overall look and feel of a space while helping create a clean and well-planned design. If you are planning to upgrade your indoor or outdoor area with Porsets 2 elevated porcelain tile flooring, connect with our team and begin your next project today.
- Deck Tile Warranty Explained — What is Covered and What is Not
Every deck tile product comes with a warranty. Most buyers never read it. That is usually fine — until something goes wrong and the claim falls into the fine print.
Here is a straight look at what deck tile warranties typically cover, what they typically do not, and how to evaluate whether a warranty is actually worth the paper it is printed on.
What a Deck Tile Warranty Should Cover?
1. Manufacturing defects: Cracks, warping, or failures in the material itself that are not caused by misuse or improper installation. This is the core of every legitimate warranty.
2. Colour fastness (UV fading): Quality tiles should resist fading in sun exposure for many years. Warranty terms vary by material — porcelain typically has the longest colour warranty, followed by recycled plastic (UV inhibitor-protected), WPC, and natural wood (shortest, because wood naturally weathers).
3. Structural failure from normal use: If the tile breaks under normal foot traffic, normal furniture, or normal weather, that is a warranty claim.
4. Material quality issues: Surface delamination, interlock failure, riser breakage — problems that trace back to the manufacture of the product.
What a Deck Tile Warranty Typically Does NOT Cover?
1. Improper installation: If the installation was botched, the warranty on the product itself usually does not apply. This is why professional installation carries its own warranty alongside the product warranty.
2. Damage from misuse:
- Dropping heavy objects on the tiles
- Dragging furniture that damages the surface
- Using metal tools that scratch or chip
- Using harsh chemicals that degrade the finish
3. Damage from extraordinary weather: Tornadoes, direct lightning strikes, and other extreme weather events are typically excluded. Normal Canadian winter is fully covered by products designed for Canadian conditions.
4. Damage from the slab underneath: If the concrete slab fails, shifts, or develops structural issues, damage to the tiles on top is usually not a tile warranty claim. This is why we recommend inspecting the slab before installation.
5. Cosmetic changes from normal use: Foot-traffic patina, natural wood greying, minor scuffs — these are normal wear, not warranty events.
How Designer Deck Warranties Work?
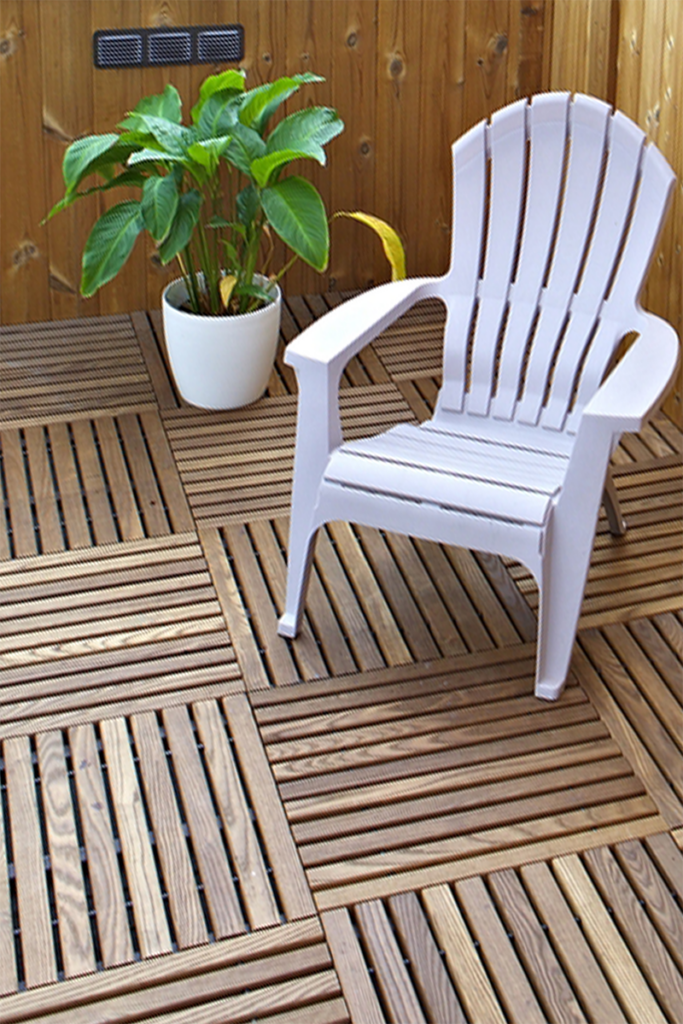
Designer Deck backs every product line with a written warranty. Terms vary by product — porcelain carries the longest warranty, followed by WPC and recycled plastic, with natural wood having shorter coverage because wood naturally weathers over time.
Professional installation carries a separate installation warranty, which covers labour-related issues.
Red Flags in Warranty Terms (When Shopping Other Brands)
1. Very short warranty periods: A one-year warranty on outdoor flooring is a signal that the manufacturer does not expect the product to last much longer than that. Quality deck tiles warrant for years, not months.
2. “Pro-rated” warranty after year one: Some warranties only cover the full replacement cost in year one, then diminish each year. Read the terms — a 10-year pro-rated warranty might only cover 10% in year 10.
3. Warranty only transferable with major documentation: If you are selling the property, a non-transferable warranty loses value. Designer Deck warranties are transferable with purchase documentation.
4. Installation-only warranties with no product coverage: Some contractors warrant installation but not the tiles themselves. You want both — product from the manufacturer, labour from the installer.
5. Vague or undefined terms: “Defective materials” should be specifically defined. Otherwise it becomes whatever the manufacturer says it means when you file a claim.
How to File a Warranty Claim (the Typical Process)?
- Document the issue with photos and a description
- Locate your original purchase or installation documentation
- Contact the manufacturer or installer
- Allow for an inspection if required
- Receive resolution — replacement tiles, repair, or refund as specified in the warranty terms
Keep your purchase documentation. This is the most common reason warranty claims fail — the homeowner cannot prove when and where they bought the product.
Why Installation Warranty Matters?
A beautiful product installed badly is still a bad outcome. Product warranty covers the tile; installation warranty covers the labour. Both matter.
Designer Deck professional installation includes an installation warranty alongside the product warranty. DIY installation is supported with guidance, but the installation warranty does not apply to self-installed projects.
Transferring Warranty if You Sell the Property
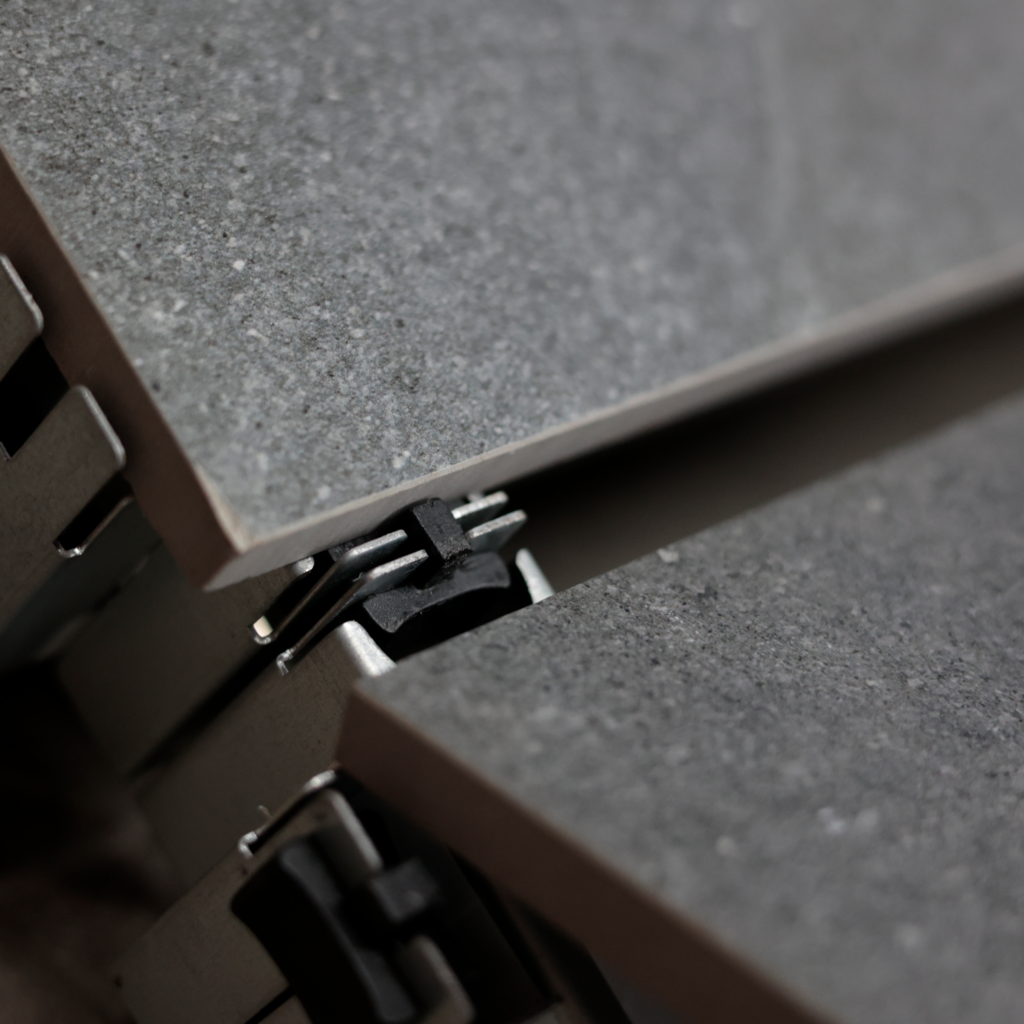
For condo owners who may sell in the future, a transferable warranty adds value to the listing. Designer Deck warranties transfer to the new owner with documentation, which helps on resale.
What to Keep for Your Records
- Original invoice and receipt
- Warranty documentation
- Installation photos (before and after)
- Contact information for the installer and manufacturer
- Any maintenance records
A simple folder or digital backup is enough. The goal is being able to produce documentation if needed years later.
The Honest Truth About Warranties
Most warranty claims never happen. Quality tiles from quality manufacturers simply do not fail at meaningful rates. The warranty exists as a backstop for the small minority of claims, and as a signal from the manufacturer about how confident they are in the product.
A manufacturer who stands behind long warranty terms is telling you they expect the product to last. That is the single best indicator of actual product quality.
Frequently Asked Questions
Ques: How long is the Designer Deck warranty?
Ans: Warranty terms vary by product line. Porcelain carries the longest coverage; natural wood the shortest (due to the natural weathering of wood). See our warranty page for specific terms by product.
Ques: What if my tiles were installed by my builder and I am the second owner?
Ans: Designer Deck warranties are transferable with documentation from the original installation. Ask the builder or previous owner for records.
Ques: Does the warranty cover labour to replace a defective tile?
Ans: This depends on the specific warranty and installation agreement. Professional installations typically include labour coverage for warranty-related work; DIY installations generally do not.
Ques: What if my condo corporation installed the tiles as part of a building-wide project?
Ans: Building-wide warranty coverage is typically negotiated between Designer Deck and the corporation at project start. Individual unit owners should check with their property manager for specifics.
-
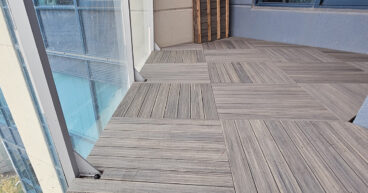 04Sep
04Sep
The Property Manager’s Guide to Approving Balcony Modifications
Every property manager in Ontario deals with the same request on a regular basis: a resident wants to modify their balcony. Sometimes it's a planter… Read More →
-
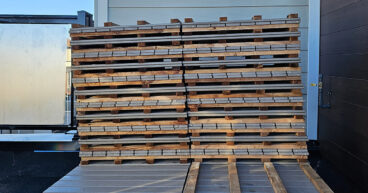 31Aug
31Aug
Volume Ordering Deck Tiles — Pricing, Delivery, and Timeline Guide for Builders
Volume ordering is where Designer Deck's builder program really pays off. Volume-based pricing, scheduled deliveries, and predictable supply chain mean the flooring never becomes the… Read More →
-
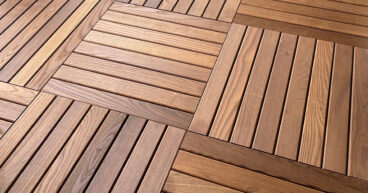 27Aug
27Aug
Tarion Compliance and Outdoor Flooring — What Ontario Builders Need to Know
Tarion compliance and outdoor flooring warranty program is one of the defining features of the Ontario new-home construction industry. It's also one of the most… Read More →
-
 24Aug
24Aug
How Ontario Builders Are Cutting Balcony Finishing Costs by 40%
Traditional balcony finishing methods — framed wood decks, pedestal paver systems, poured concrete overlays — carry material costs, labour costs, and timeline costs that compound… Read More →
-
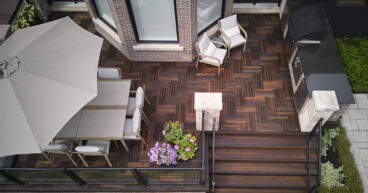 21Aug
21Aug
Deck Tile Specification Guide for Model Homes
Model homes are the sales tool that closes buyers on your development. When prospective homeowners walk out onto a balcony, terrace, or townhome deck for… Read More →
-
 18Aug
18Aug
What Every Ontario Builder Should Know About Deck Tile Warranties
For Ontario builders finishing balconies, rooftops, and townhome decks across hundreds of units, outdoor flooring warranties are one of the most under-discussed parts of the… Read More →
-
 24Jul
24Jul
Hire a Designer Deck Pro: Complete Guide to Services, Process & Project Planning
Are you planning to upgrade your outdoor space but unsure where to start? With so many products to choose from, finding the right solution can… Read More →
-
 21Jul
21Jul
Recycled Plastic Narrow Board vs Wide Board: What’s the Difference?
Can a simple deck tile pattern completely transform your outdoor space? The answer may surprise you. More homeowners across Canada now invest in stylish balconies,… Read More →
-
 17Jul
17Jul
Top Porsets 2 Elevated Porcelain Tile Flooring Designs for Every Home
When architects and developers plan modern residential and commercial spaces, flooring becomes an important part of the design process. Tile Flooring choice affects how interior… Read More →
-
 15Jul
15Jul
Deck Tile Warranty Explained — What is Covered and What is Not
Every deck tile product comes with a warranty. Most buyers never read it. That is usually fine — until something goes wrong and the claim… Read More →
-
 13Jul
13Jul
Rental Property Balcony Upgrades That Do Not Damage the Surface
Renting a condo in Toronto often comes with a concrete balcony that nobody wants to touch because nobody wants to lose their damage deposit. Landlords… Read More →
-
 10Jul
10Jul
Eco-Friendly Deck Tiles — Sustainable Outdoor Flooring Options
Sustainable outdoor flooring is a category where marketing has outrun reality. Every product claims to be "green." Few actually are. If you care about what… Read More →